How to Configure Intrusion & Region Entering & Region Exiting & Loitering Detection Function of My VIGI Camera
Contents
Additional features (Only for Intrusion Detection and Loitering Detection)
Loitering Detection - Loitering Time
Intrusion Detection- Percentage & Intrusion Time
Loitering Detection - Loitering Time
Objective
These four detection functions focus on the interaction between the target and the detection region, and can be configured for human-vehicle enhancement. This article takes VIGI C345 as an example to introduce how to configure the above several detection functions.
Requirements
- VIGI Camera
- Web Browser
- APP
Introduction
VIGI IPC supports area-based algorithms such intrusion detection, region entering, region exiting detection, and loitering detection, which are used to realize the monitoring of areas of concern. These four functions also support configuring the region parameters. In addition, the above four functions support the configuration of alarm scheduling and a variety of alarm linkage. Turning on the function switch and drawing the required detection zones can fulfill the basic functional requirements.
Configuration
Web UI
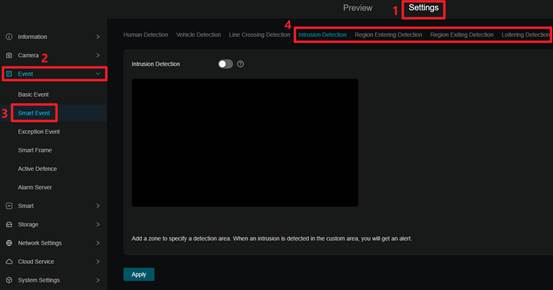
Step 1. Log in to the IPC’s management web interface, and go to Settings > Event > Smart Event > Intrusion Detection / Region Entering Detection / Region Exiting Detection / Loitering Detection. Then enable the button.
If the button will be green ![]() , which represents the function is enabled.
, which represents the function is enabled.
If the button will be grey ![]() , which represents motion detection is disabled.
, which represents motion detection is disabled.
Step 2. Set Activity Zones and the camera will only detect motion in custom zones. Click on the preview screen to draw. Click to generate vertices, at least four vertices per region, and right click to end the drawing.
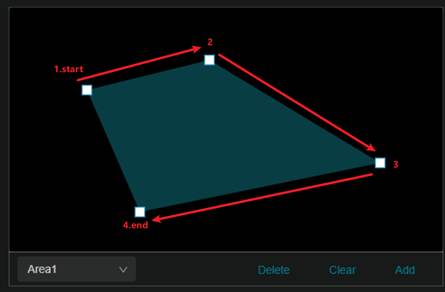
Below the preview window are shortcut buttons for Delete, Clear, Add, and clicking to switch regions.
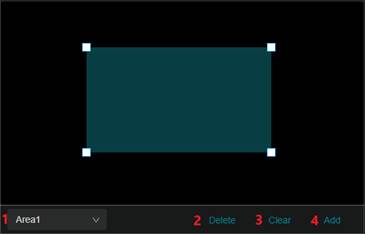
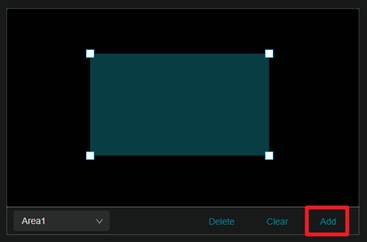
Add: Click to add a new region directly, leaving the position and parameters as default.
Delete: Deletes an area after selecting it.
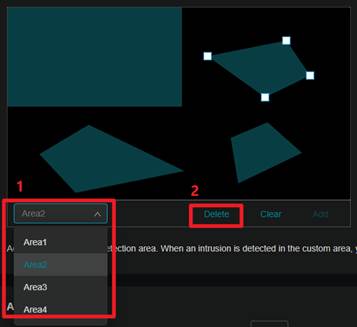
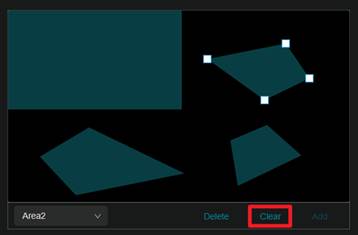
Clear: Delete all areas with one click.
Then click the Apply to complete the setup.
If you want to configure the parameters, first select the area where you need to adjust the parameters, and then you can configure each parameter.
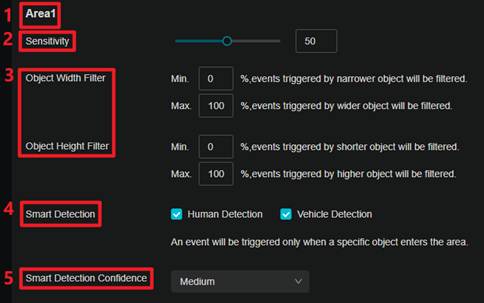
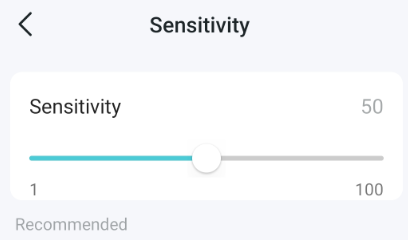
Sensitivity
You can modify the value by entering a number or dragging the scroll wheel.

|
Sensitivity Setting |
Description |
|
Low Sensitivity (e.g., 20) |
A significant change in the preview image is required to trigger an alarm. |
|
Medium Sensitivity (e.g., 50) |
VIGI IPC defaults to a sensitivity of 50, suitable for the vast majority of usage scenarios. |
|
High Sensitivity (e.g., 80) |
Only a slight change in the preview image is needed to trigger an alarm. |
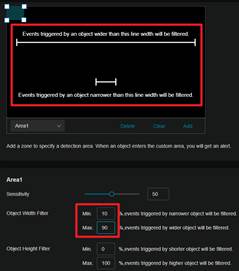
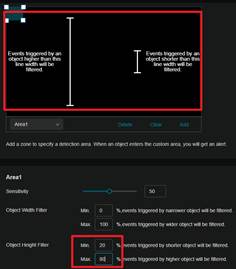
Object Width/Height filter
You can manually input numbers to modify the relevant parameters. When you enter a number, the preview window will show the size ratio of the currently entered number.
Only targets that meet the restrictions can trigger the related area events, which can help to exclude some of the objects that do not need to be monitored.
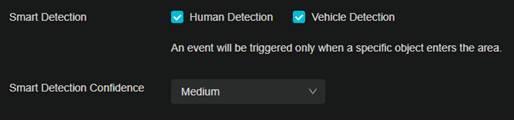
Smart Detection
This function is enabled by default. Check the box to detect only the corresponding human and vehicle targets. If this parameter is checked, Smart Detection Confidence will appear at the same time, and you can choose high, medium or low confidence.
The higher the confidence, the higher the degree of similarity of the detected targets to people or cars; on the contrary, the lower the confidence, the lower the degree of similarity required for human figures and car models.
VIGI App
Step 1. Add the IPC to your VIGI App. You can refer to How to set up VIGI Cameras | TP-Link
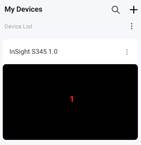
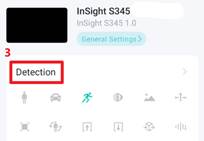
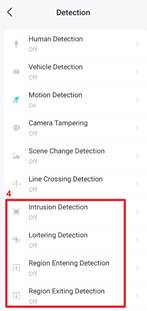
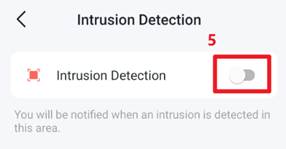
Step 2. Tap on your camera and go to the Live View page. Then, tap on More Settings > Detection > Intrusion Detection / Region Entering Detection / Region Exiting Detection / Loitering Detection. Then enable the button.
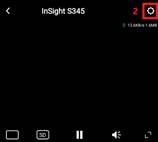
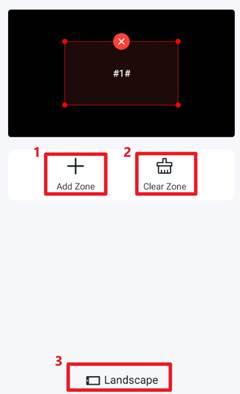
Step 3. Draw the Detection Area. Tag the Set Detection Area to draw the detection zone. Tag Add to add a new region, move four vertices to adjust the position. Then click the Save to complete the setup.

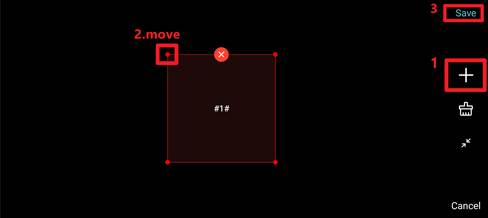
There are Add and Clear below the drawing area, in addition, you can choose Landscape to do full-screen drawing.
Step 4. (Option) Tag to Advanced Settings. You can modify Sensitivity and Object Classification.

Additional features (Only for Intrusion Detection and Loitering Detection)
In addition to the above parameters, the intrusion detection also supports the configuration of intrusion time and intrusion percentage. And the loitering detection additionally supports the configuration of loitering time.
Web UI
Intrusion Detection
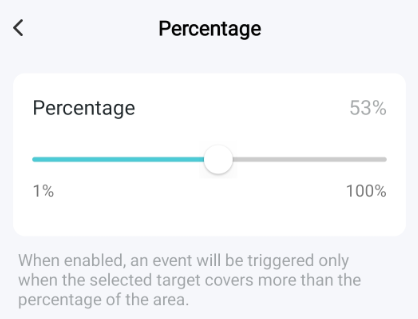
Percentage
The default setting is 15%, which can be adjusted to any value between 1 and 100.
After configuration, event detection will only be triggered when the target’s entry area meets this percentage threshold.
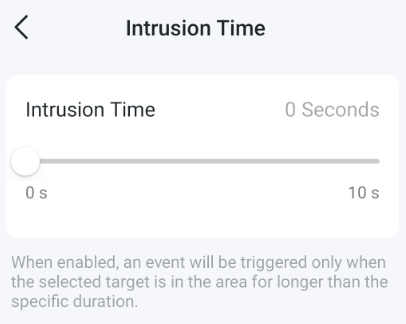
Intrusion Time
The default setting is 0, which can be adjusted to any value between 1 and 10. After configuration, event detection will only be triggered when the target remains in the designated area for the specified duration.

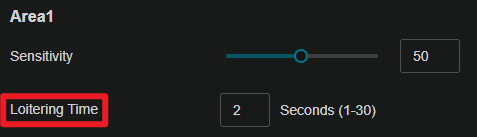
Loitering Detection - Loitering Time
The default setting is 2 seconds, and you can enter a value from 1-30. The target must keep moving within the area for the set duration to trigger detection.
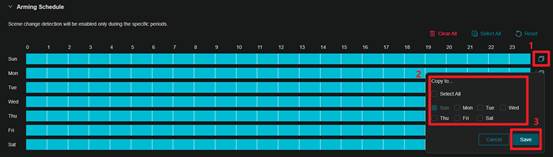
Aiming Schedule
Left click to slide and draw a time period. Click the period again to enter the start and end time. Then Click Save to modify the length of the time period.
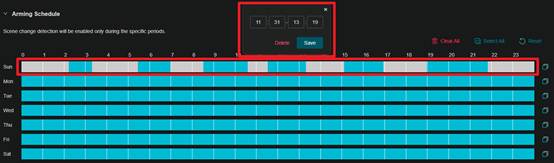
Note: Only six time periods can be plotted in a day.
After setting up a single day, you can use the schedule copy function to copy the arming times to other days.
Click the Copy button at the end of the timeline and select the date you want to copy to. Then click the Save button to complete the setup.
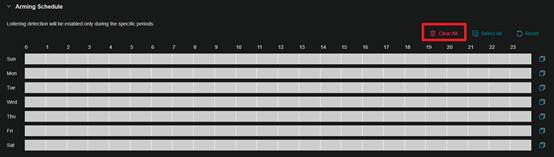
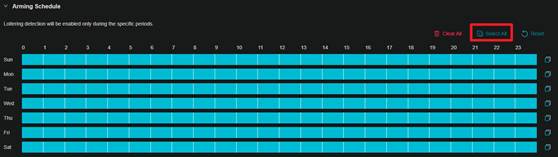
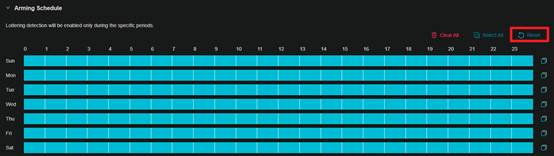
The timeline is fully selected by default. You can clear the timeline by Clear All, select the entire timeline with Select All, or return the timeline to its default state with Reset.
Linkage Method
The VIGI IPC offers a wide range of alarm linkages that can be selected on demand.
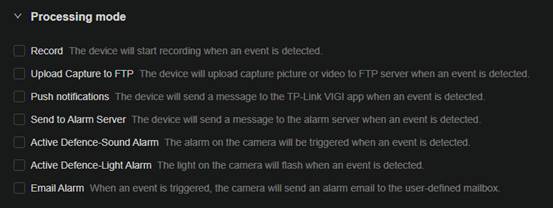
Note: If you need to set the linkage method, the functions of process mode should be enabled.
|
Linkage methods |
Description |
|
Record |
The device will start recording when an event is detected. Details can be found in Storage> Recording Schedule |
|
Upload Capture to FTP |
The device will upload capture picture or video to FTP server when an event is detected. Details can be found in Network Settings> FTP Settings |
|
Push notifications |
The device will send a message to the TP-Link VIGI app when an event is detected. |
|
Send to Alarm Server |
The device will send a message to the alarm server when an event is detected. Details can be found in Event> Alarm Server |
|
Active Defence-Sound Alarm |
The alarm on the camera will be triggered when an event is detected. Details can be found in Event> Active Defence> Sound Alarm |
|
Active Defence-Light Alarm |
The light on the camera will flash when an event is detected. Details can be found in Event> Active Defence> Light Alarm |
|
Email Alarm |
When an event is triggered, the camera will send an alarm email to the user-defined mailbox. Details can be found in Network Settings> Email |
VIGI App
Intrusion Detection- Percentage & Intrusion Time
Tag on Advanced Settings, you’ll see Intrusion Time and Percentage.
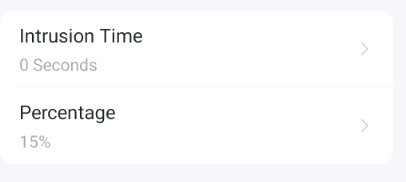
You can modify the value by dragging the scroll wheel.
Loitering Detection - Loitering Time
Tag on Advanced Settings, you’ll see Time Threshold. You can modify the value by dragging the scroll wheel.

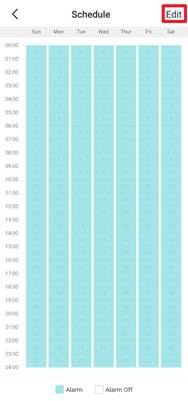
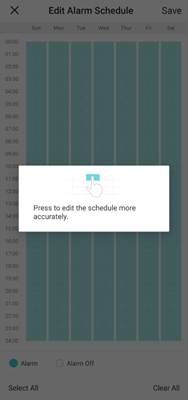
Aiming Schedule
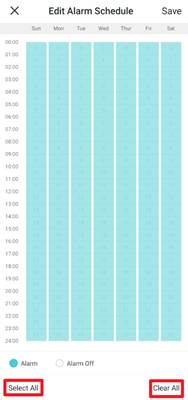
Tag on Aiming Schedule->Edit, then you can slide to draw the time period. In addition, you can clear the timeline by Clear All, select the entire timeline with Select All.
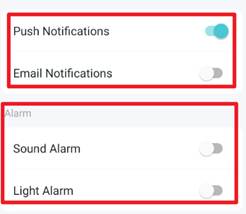
Linkage Method
VIGI App only support Push notifications, Email Notification, Sound Alarm and Light Alarm. You can click to turn on the function.
Conclusion
The above can guide the user to configure the four detection functions of intrusion detection, region entering detection, region exiting detection and loitering detection through Web and APP.
Get to know more details of each function and configuration please go to Download Center to download the manual of your product.
¿Es útil esta pregunta frecuente?
Sus comentarios nos ayudan a mejorar este sitio.


