How to Set Up Port Forwarding on Your Deco
Port forwarding lets you make a device or service on your local network accessible from outside your home over the Internet. Network Address Translation (NAT) handles this traffic routing by default, but port forwarding gives you direct control over which ports are open and where they point. Setup is done entirely through the Deco app in just a few steps.
Different services use different ports: for example, port 80 for HTTP, port 21 for FTP, port 25 for SMTP, and port 110 for POP3. Confirm your service's port number before you begin.
Key Takeaways
- Port forwarding on a Deco system is configured in the Deco app under More > Advanced > NAT Forwarding > Port Forwarding.
- Each rule requires a Service Type, Service Name, Internal IP (selected from connected devices), External Port, and Internal Port. If you leave the Internal Port blank, it will automatically match the External Port.
- Deco does not support entering an Internal IP address manually. The target device must be connected to the Deco network and have received an IP address before it appears in the configuration screen.
- To verify a rule is working, find the WAN IP address under More > Internet Connection > IPv4, then try connecting from an outside network using WAN IP:External Port.
- If the Deco's WAN IP is a private address (such as 192.168.x.x), another NAT device exists upstream, and you will need to open the ports on that device as well.
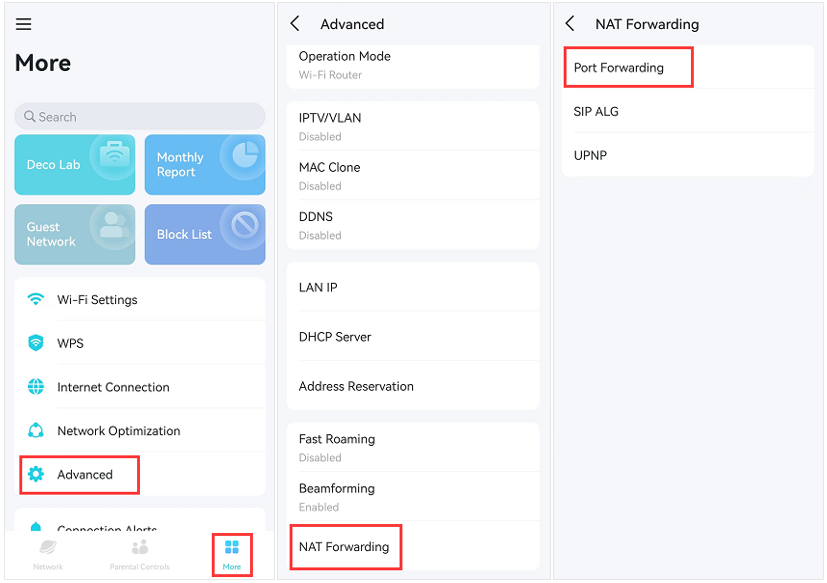
Step 1: Open Port Forwarding in the Deco App
Launch the Deco app and navigate to More > Advanced > NAT Forwarding > Port Forwarding.
Note: Some Deco models support up to 64 port forwarding entries. Entry limits may vary by model.
The steps below use the Deco M5 as an example.
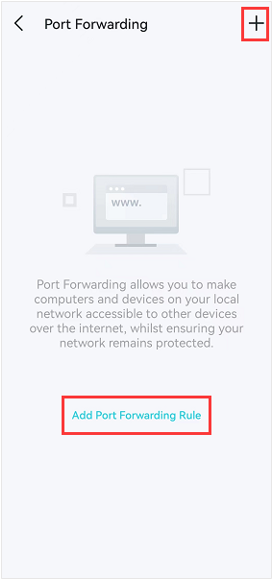
Step 2: Add a New Port Forwarding Rule
Tap the + icon in the upper right corner, or tap Add Port Forwarding Rule to create a new rule.
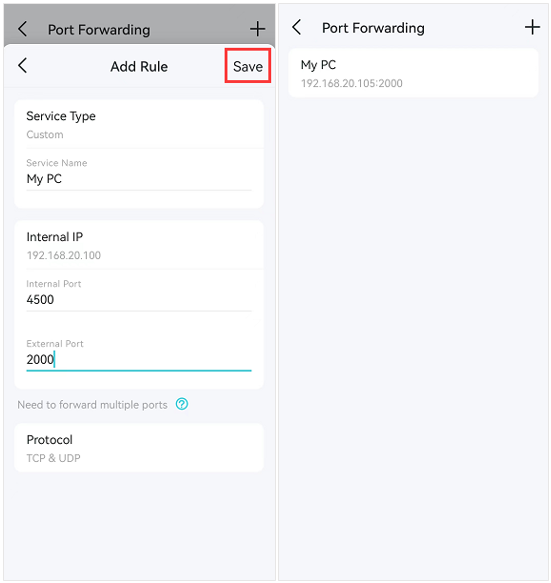
Step 3: Configure the Rule Fields
Click Service Type to expand the list and select your service. If your service is not listed, choose Custom, and enter it manually under the Service Name.
Tap Internal IP to select the device you want to open ports for. The device must already be connected to the Deco network and have received an IP address — Deco does not support entering an Internal IP address manually.
Enter the External Port and Internal Port (Service Port), then tap Save to add the rule.
Note: If you leave the Internal Port blank, it will automatically match the External Port. For example, setting External Port to 4500 and leaving Internal Port blank will open internal port 4500.
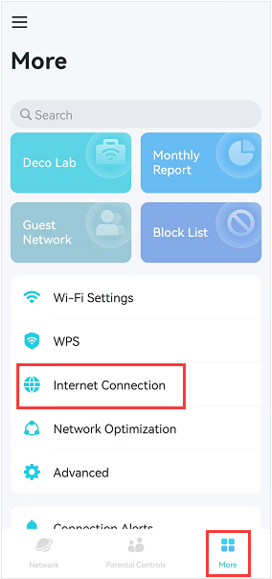
Step 4: Verify the Rule Is Working
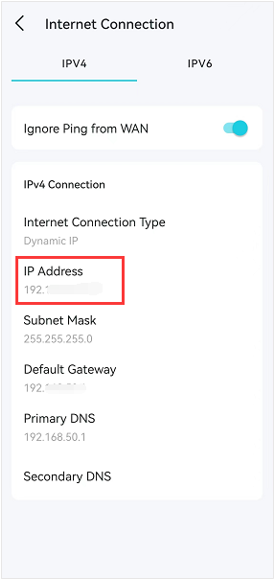
In the Deco app, go to More > Internet Connection > IPv4 to find the WAN IP address of your Deco system. From an outside network, try connecting using WAN IP:Port Number (your External Port) to confirm the service is accessible.
Note: If the WAN IP address shown is a private address (such as one beginning with 192.168), there is another NAT device connected to the WAN port of your main Deco. You will need to open the required service ports on that upstream device as well. For help identifying whether your WAN IP address is public or private, see How to determine if your WAN IP is a public or private address.
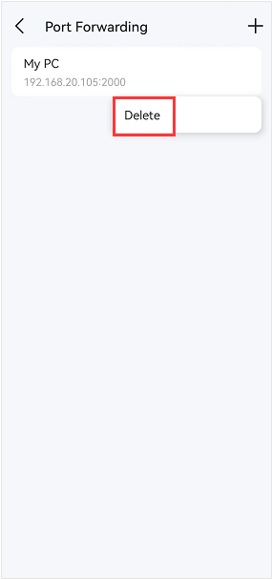
Step 5: Delete a Port Forwarding Rule
To remove a rule, go to More > Advanced > NAT Forwarding > Port Forwarding. Hold the entry you want to remove, then tap Delete.
Полезен ли беше този ЧЗВ?
Вашите отзиви помагат за подобряване на този сайт.
_EU_V1.0_01_normal_20220817025337r.jpg)

_normal_20230201014412u.png)