How to set up Parent Control on TP-Link ISP-customized Modem Router
Introduction
This article provides step-by-step instructions for configuring Parental Controls on a TP-Link ISP-customized modem router.
Configuration
Note: Please ensure your modem/router supports the Aginet app.
Step 1. Launch the Aginet app and log in to manage your modem/router.
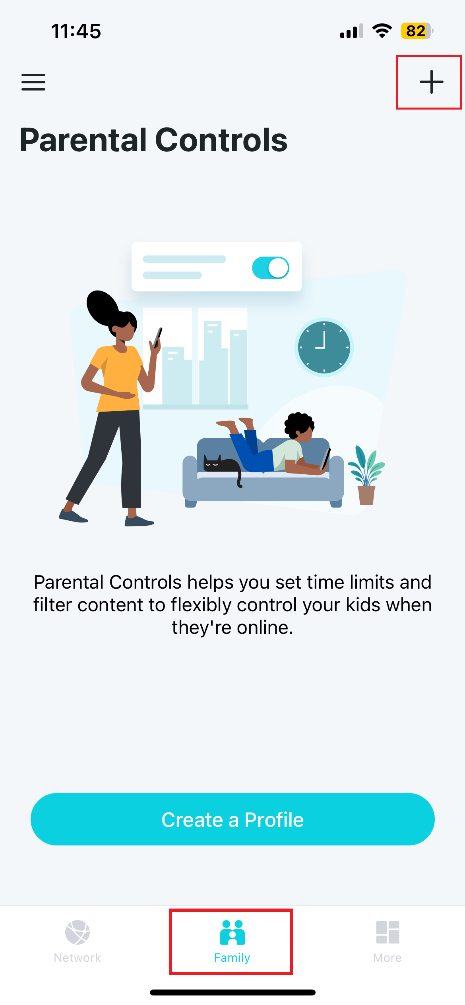
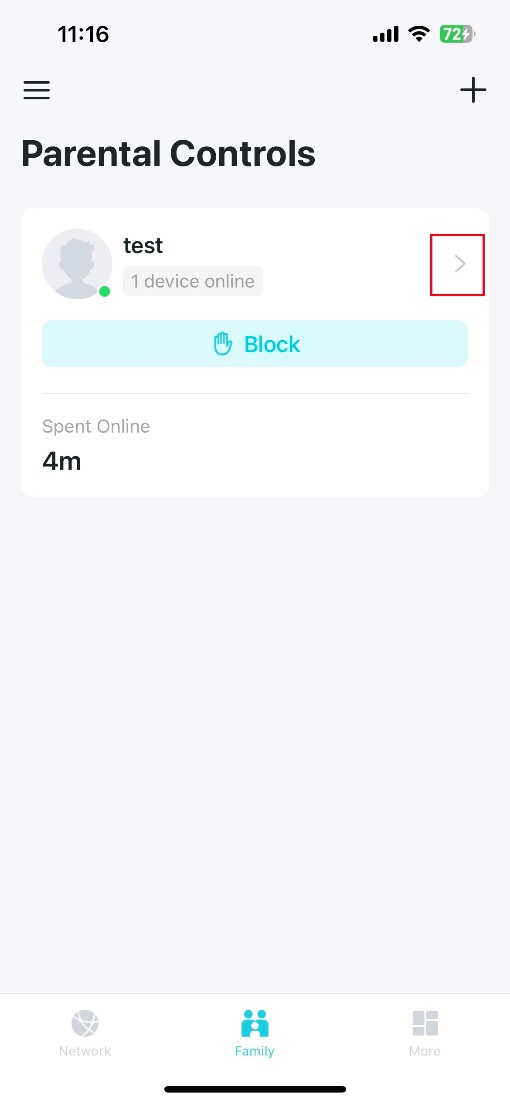
Step 2. Navigate to Family in the bottom bar.
Step 3. Tap the top right corner + icon to create a profile.
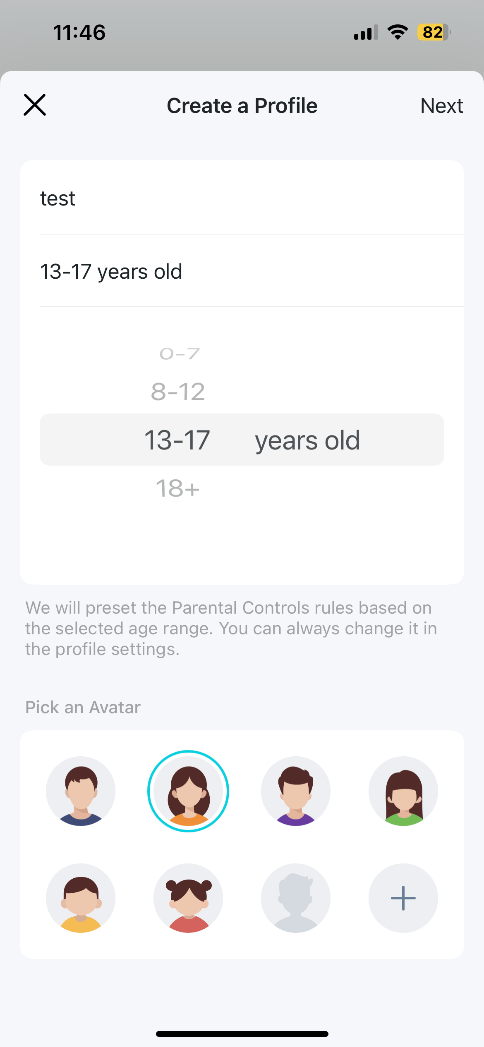
Step 4. Choose the age group of your child, select an avatar, and proceed by clicking Next.
Step 5. The content is filtered according to the chosen age. You can modify the Filter Level and tweak the Categories by using the + or – icon to restrict additional categories or remove some. After that, tap Save to retain your adjustments.
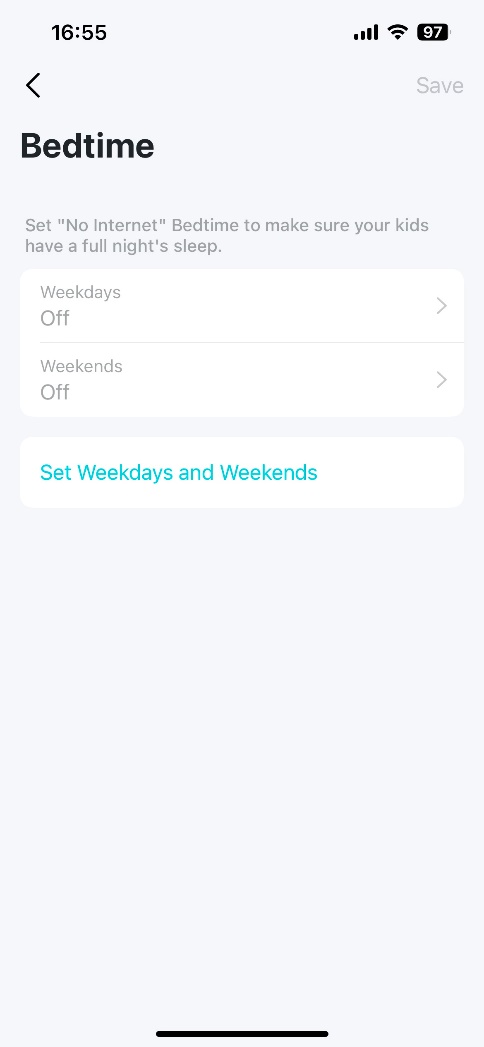
Click on Bedtime to set the time period during which your kids have no internet access to make sure they will have a full night’s sleep. You can adjust the time settings separately based on weekdays and weekends.
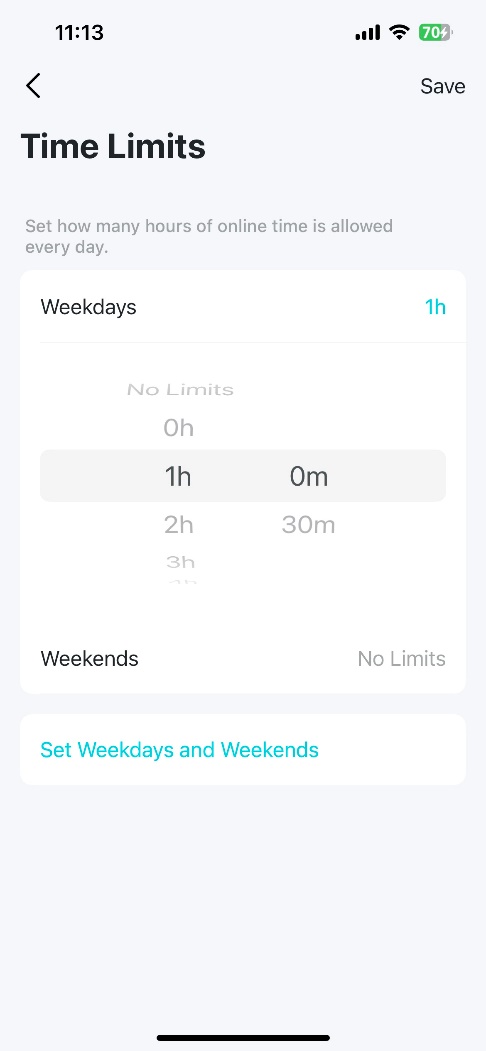
Click on Time Limits to limit how much time your kids spend online every day. Click on Weekdays and Weekends to set the time.
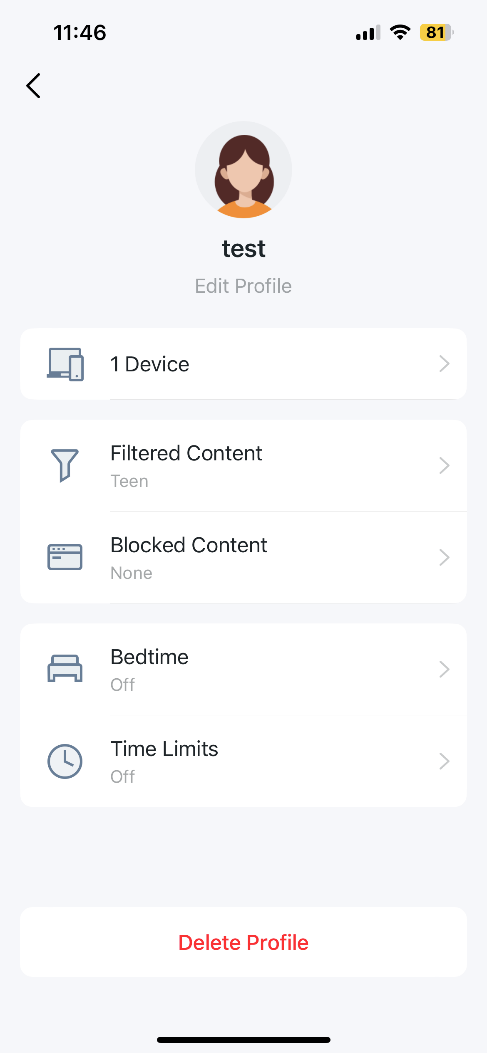


On the Blocked Content page, you can tap Add a Keyword to block certain websites. Click Save to apply the changes.
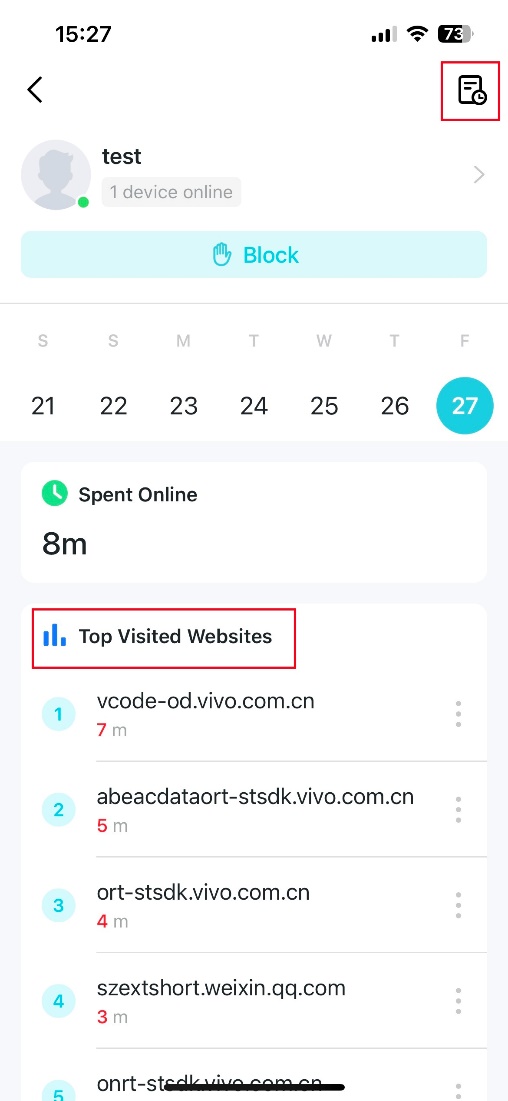
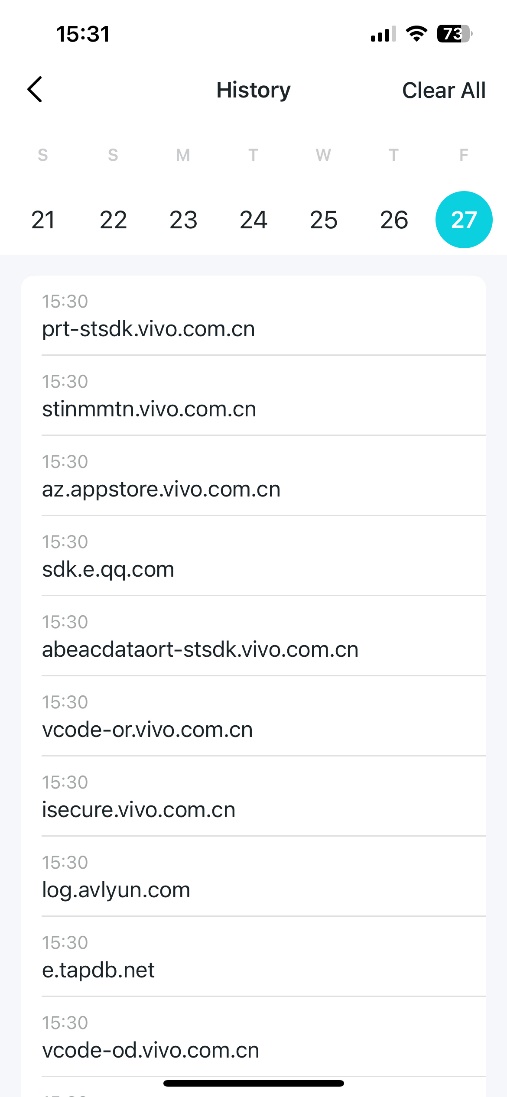
Step 6. After some time of use, revisit the profile to view the insights, such as the most visited websites and the history of blocked content.
Step 1. Ensure your device is connected to the router via Wi-Fi or an Ethernet port. Open a web browser and enter one of these addresses in the browser bar to access the web interface:
- For models starting with E/H: http://tplinkwifi.net
- For models starting with V/N/M: http://tplinkmodem.net
Step 2. Go to Basic > Parental Control or Advanced > Parental Control.
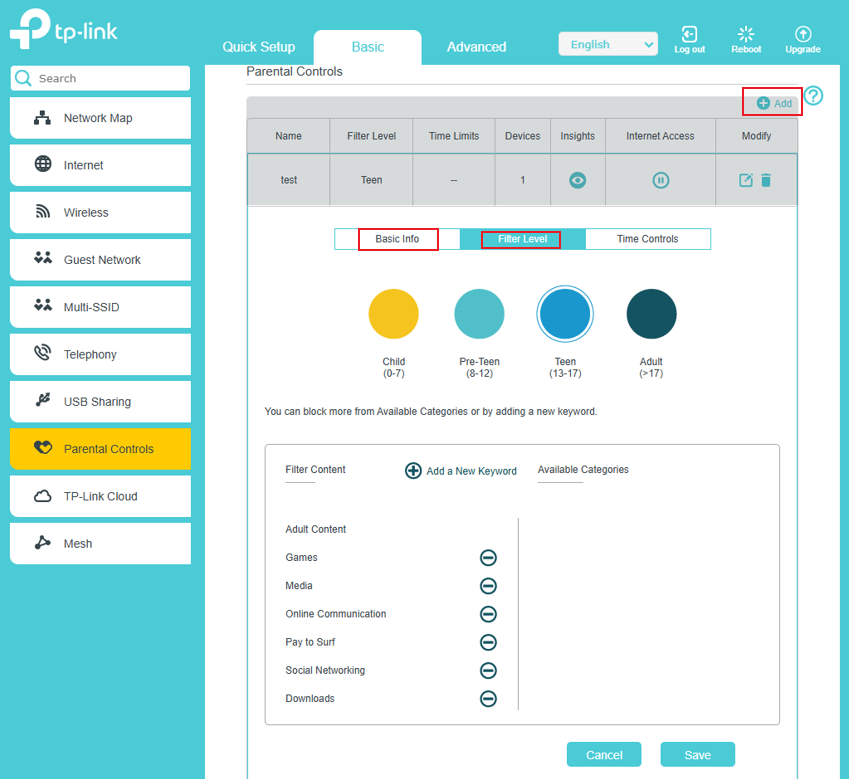
Step 3. Hit the Add button to add a profile.
Step 4. In Basic Info, name the profile and select the device you want to use.
In the Filter Level, select the filter according to the age, and select the content you want to block. Additionally, Add a New Keyword to block more websites.
Step 5. Adjust Time Limits and Bedtime.
- Time Limits: Set daily time limits for the total time spent online.
- Bed Time: Set a limit on when this profile cannot access the internet.
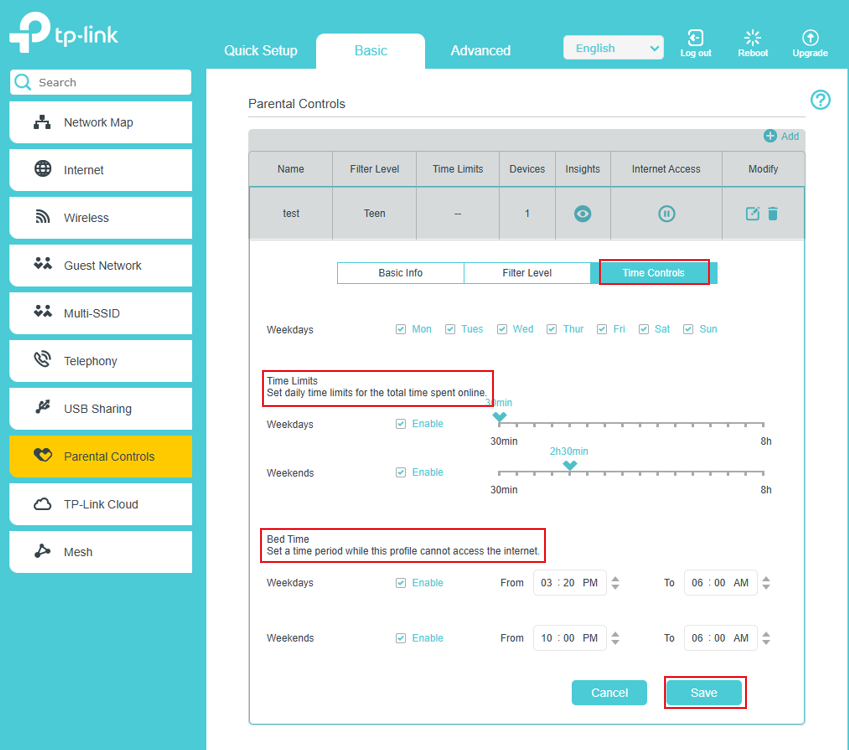
Step 6. Save the profile.
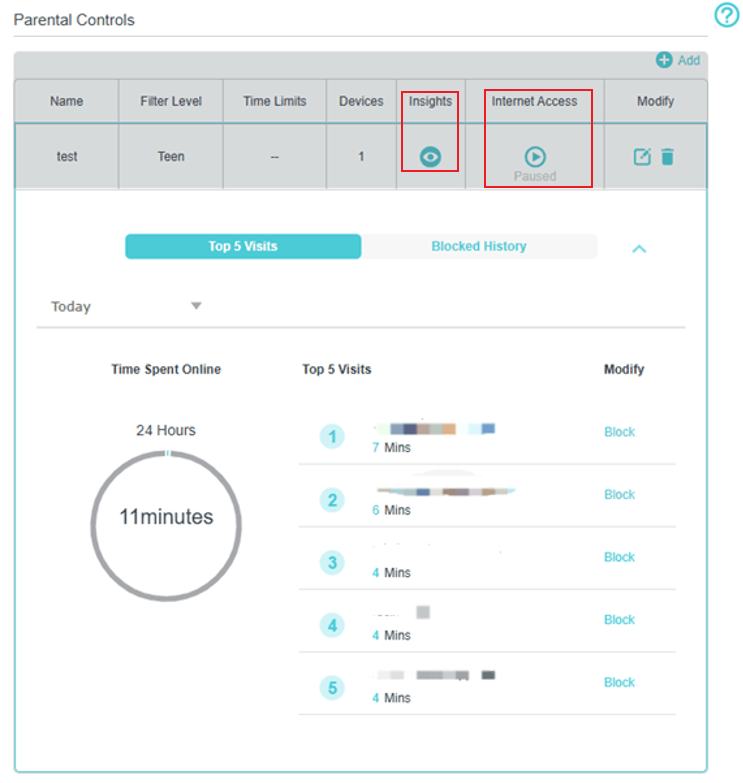
Step 7. Hit the Insights button to view the most visited websites and the blocked history.
Step 8. Hit the Internet Access button to Paused, and all devices in the profile will have no Internet access today. You can also click the button again to release the limit.
Step 1. Ensure your device is connected to the router via Wi-Fi or an Ethernet port. Open a web browser and enter http://tplinkmodem.net in the browser bar to access the web interface.
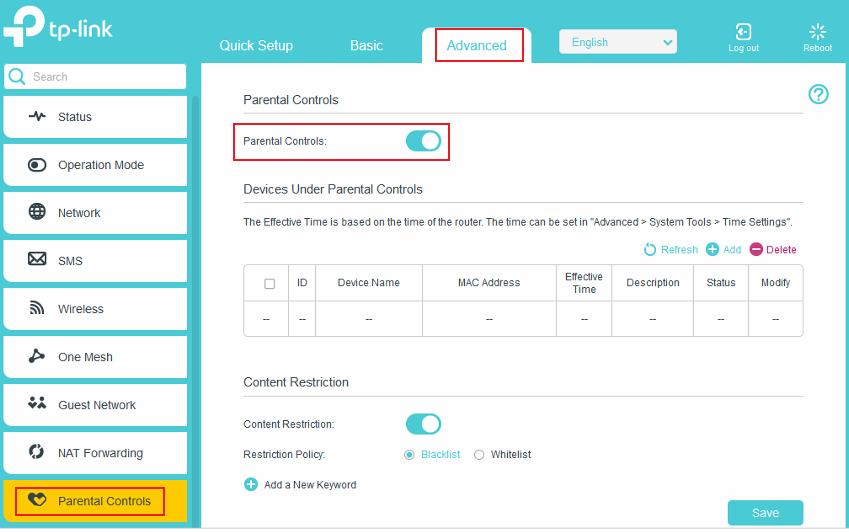
Step 2. Go to Basic or Advanced > Parental Controls and enable Parental Controls.
Step 3. Click Add.
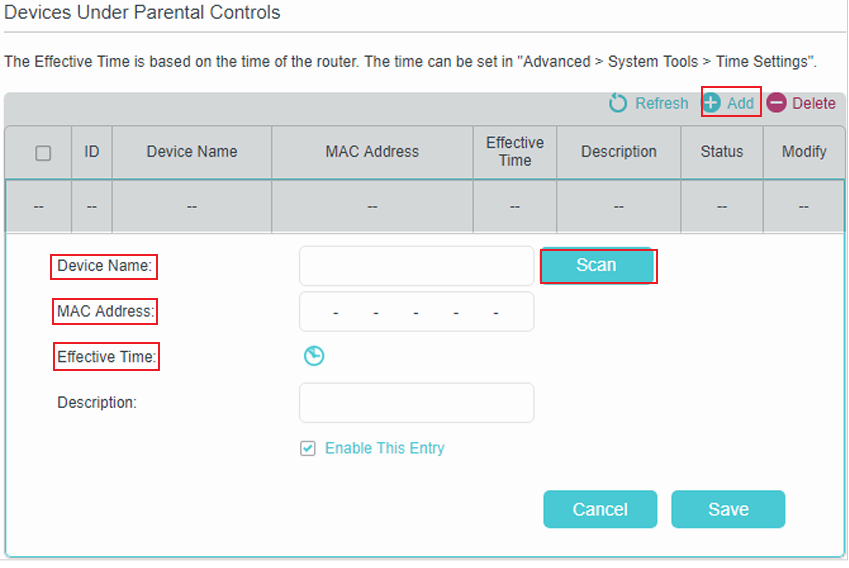
Step 4. Click Scan, and add the device to be controlled. Or enter the Device Name and MAC Address manually.
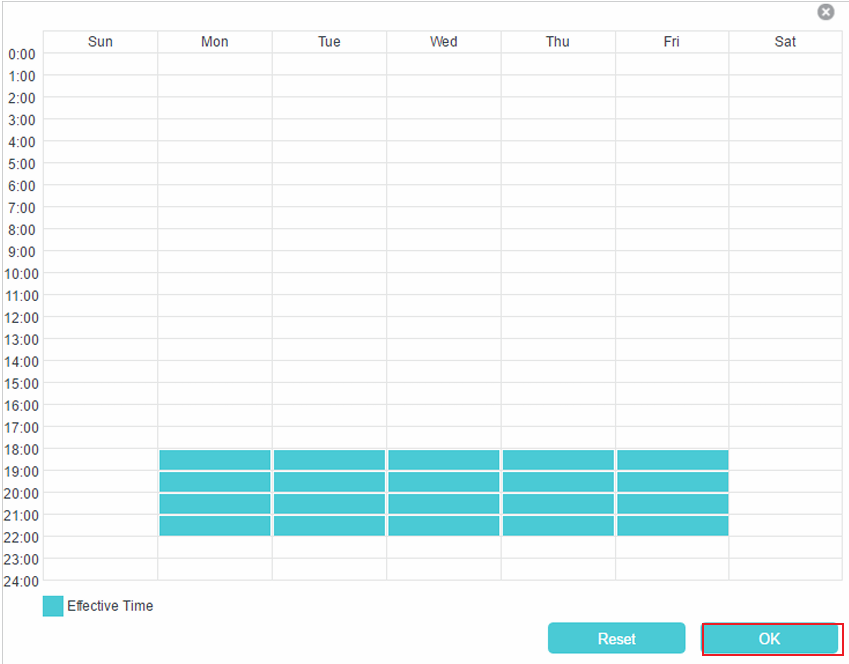
Step 5. Click the icon to set the Effective Time. Drag the cursor over the appropriate cell(s) and click OK.
Effective time is the time during which access to certain websites is allowed or blocked, depending on Whitelist or Blacklist mode.
Step 6. Enter a Description for the entry.
Step 7. Select the check box to enable this entry and click OK.
Step 8. Enable Content Restriction and select the restriction mode. Click Add a New Keyword. You can add many keywords for both Blacklist and Whitelist. Below are some sample entries to allow access.
- In Blacklist mode, the controlled devices cannot access any websites containing the specified keywords during the Effective Time period. Outside the Effective Time period, the controlled devices can access any website.
- In Whitelist mode, the controlled devices can only access websites containing the specified keywords during the Effective Time period. Outside the Effective Time period, the controlled devices cannot access any websites.
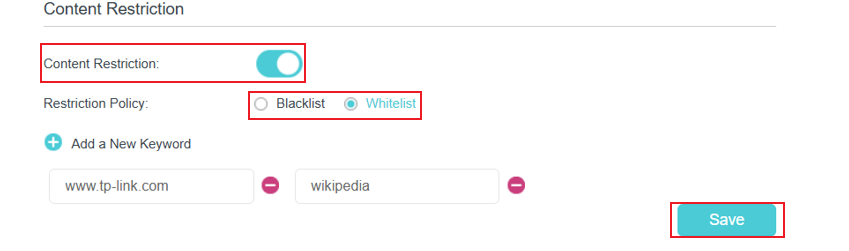
- Enter a web address (for example, www.tp-link.com) or a web address keyword (for example, wikipedia) to only allow or block access to the websites containing that keyword.
- Specify the domain suffix (for example, .edu or .org) to allow access only to the websites with that suffix.
Done! Now you can control your children's internet access as needed.
Is this faq useful?
Your feedback helps improve this site.
_1.0-R-package_normal_20240530021753z.png)

TP-Link Community
Still need help? Search for answers, ask questions, and get help from TP-Link experts and other users around the world.