How to Set Up a TP-Link DSL Modem Router Using the Tether App (New Interface)
This guide shows you how to set up a compatible TP-Link DSL modem router using the Tether app, whether your internet service arrives through a DSL phone line or an Ethernet cable. (Applicable Models: Archer VR400 V4 and Archer VX1800v)
If this interface doesn’t match your router, refer to this guide instead:
How to Set Up a TP-Link DSL Modem Router Using the Tether App (Classic Interface)
If you prefer to set up the router via the Web Management Page, refer to this guide instead:
How to Set Up a TP-Link DSL Modem Router via the Web Management Page (New Interface)
Key Takeaways
- Choose DSL-WAN Mode for a DSL phone line or EWAN Mode for an Ethernet internet connection.
- Confirm your ISP’s connection type and any required PPPoE credentials, VLAN ID, or DSL type (VDSL or ADSL) before setup.
- Check your model and hardware version, then follow the matching setup section.
- Apply your settings, reconnect to Wi-Fi if needed, and open a website to confirm internet access.
Before You Begin
1. Check the model and hardware version on the router’s label.
2. Identify Your Internet Cable and Determine the Correct Operation Mode.
A DSL modem router combines a DSL modem and a Wi-Fi router. Choose its operation mode based on the cable that brings internet service into the router:
- DSL phone cable (RJ11): Connect it to the smaller port labeled DSL. Use DSL-WAN Mode. If your ISP requires a splitter or filter, connect it as instructed.
- Ethernet cable (RJ45): Connect it to the larger port labeled LAN4/WAN. Use EWAN Mode. Connect the other end to your existing modem, fiber terminal/ONT, main router, or internet-enabled wall outlet.
For help identifying the connectors, see RJ11 vs. RJ45.
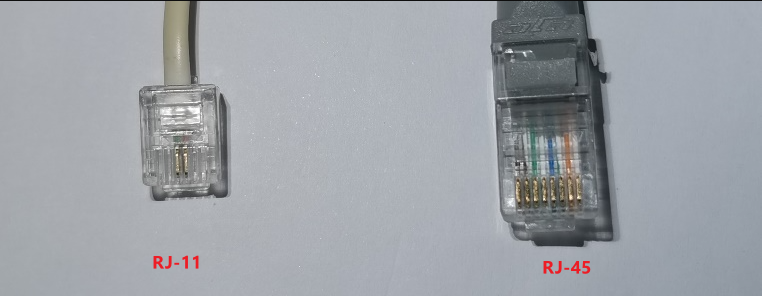
3. Gather Information from Your ISP.
Contact your Internet Service Provider (ISP) for the following:
1) Internet Connection Type:
- Dynamic IP: Typically requires no credentials.
- PPPoE: Requires a specific username and password provided by your ISP.
- Static IP: Requires a fixed IP address, Subnet Mask, Gateway, and DNS servers.
2) VLAN ID: Required by certain ISPs.
3) DSL Modulation Type (if using DSL): VDSL or ADSL.
Step-by-Step Guide
Guide for Setting DSL-WAN Mode
Step 1. Access the Router
Connect your phone to the router’s Wi-Fi. You can find the default Wi-Fi name (e.g., TP-Link_xxxx) on the router’s label. The label has a QR code for the default Wi-Fi network. If your phone's Wi-Fi list supports scanning QR codes, you can scan it directly to connect.
Open the Tether app, tap your router under Devices to begin setup.
Step 2. Connect Your Internet Cable and Restart Modem
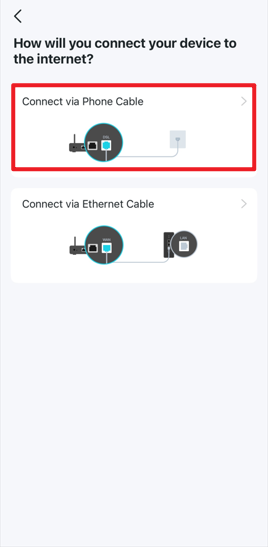
On the "How will you connect your device to the internet?" screen, select Connect Via Phone Cable.
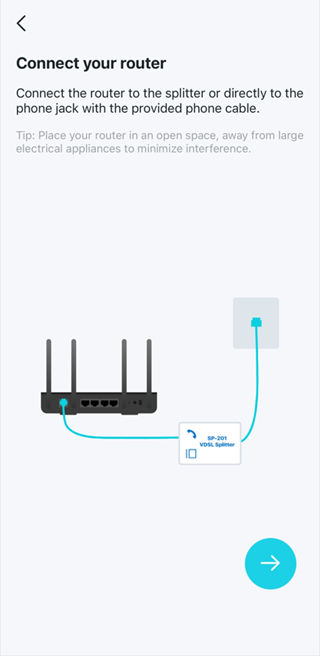
For RJ11 DSL Phone Cable, connect the phone cable to the DSL port.
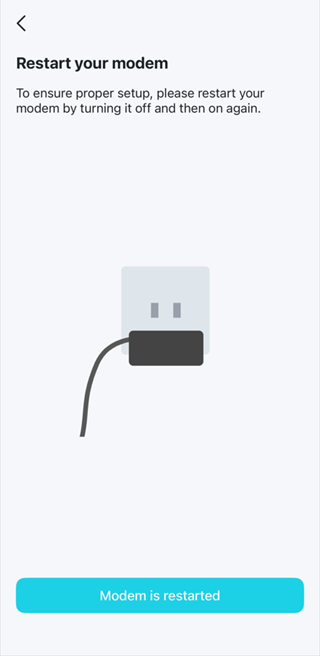
If you have one, restart your modem, then tap Modem is restarted.
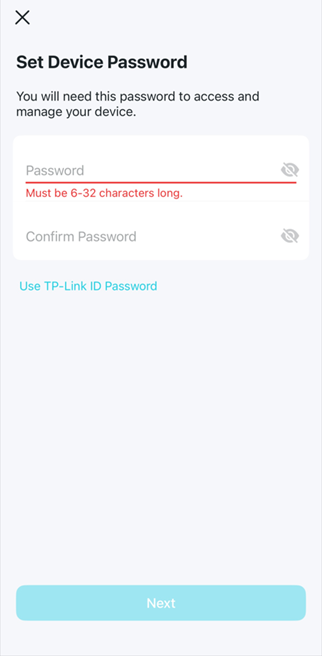
Step 3. Create a Device Login Password
Set an administrator password to manage your router, then tap Next.
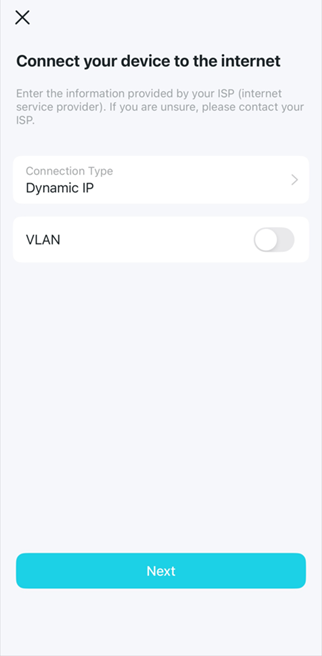
Step 4. Configure Internet Connection
Select your Internet Connection Type (e.g., Dynamic IP, PPPoE, or Static IP). If you select PPPoE, enter the username and password provided by your ISP.
If your ISP requires a VLAN ID, toggle on VLAN and enter the designated VLAN ID number.
Tap Next.
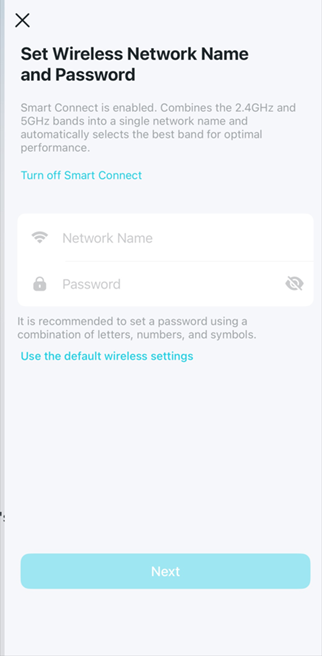
Step 5. Set Up Wi-Fi and Apply the Settings
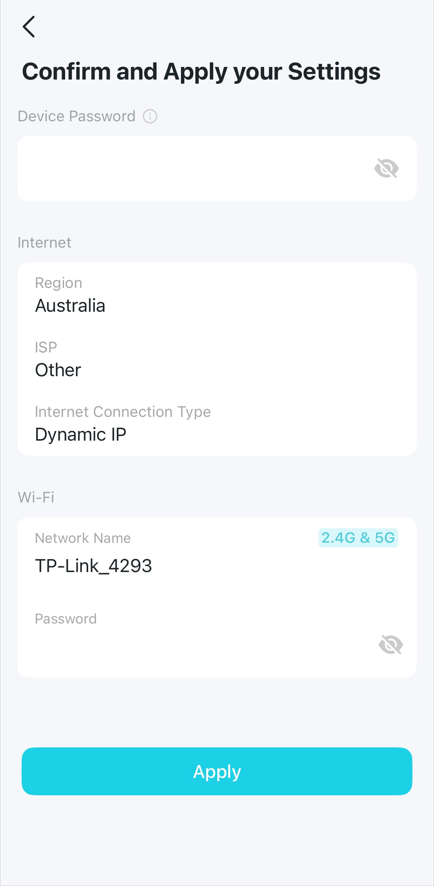
Customize the Wi-Fi name and password. If you want the 2.4G & 5G Wi-Fi names and passwords to be the same, turn on Smart Connect. If it is turned off, configure each band separately as needed. Tap Next. Review the settings and tap Apply.
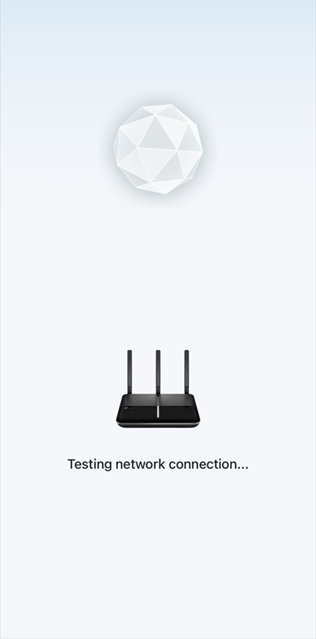
Step 6. Test the Internet and Complete Setup
Wait 1-2 minutes for the new Wi-Fi to activate. Reconnect to the new Wi-Fi in your phone's Wi-Fi list, then return to the Tether App.
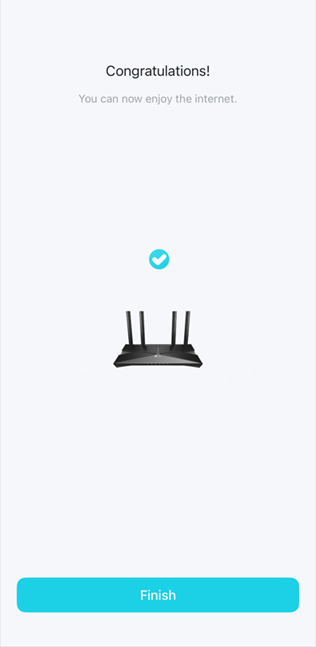
Wait for Tether to test the connection. If the test succeeds, tap Finish.
If the test fails, double-check your cable connection, operation mode, and ISP credentials.
Guide for Setting EWAN Mode
Step 1. Access the Router
Connect your phone to the router’s Wi-Fi. You can find the default Wi-Fi name (e.g., TP-Link_xxxx) on the router’s label. The label has a QR code for the default Wi-Fi network. If your phone's Wi-Fi list supports scanning QR codes, you can scan it directly to connect.
Open the Tether app, tap your router under Devices to begin setup.
Note: To ensure the router can be detected, wait for the Tether app to find your router before connecting the Ethernet cable to the LAN4/WAN port.
Step 2. Connect Your Internet Cable and Restart Modem
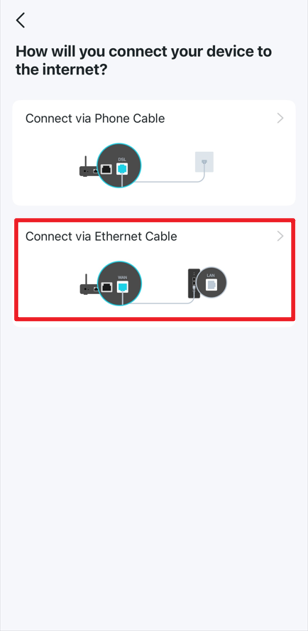
On the "How will you connect your device to the internet?" screen, select Connect Via Ethernet Cable.
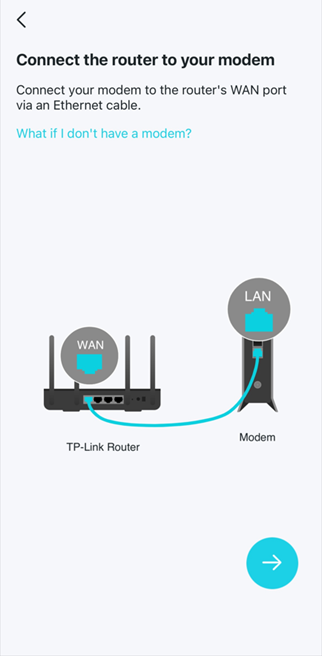
For RJ45 Ethernet Cable, connect the Ethernet cable to the LAN4/WAN port.
Restart your modem if you have one and tap Modem is restarted.
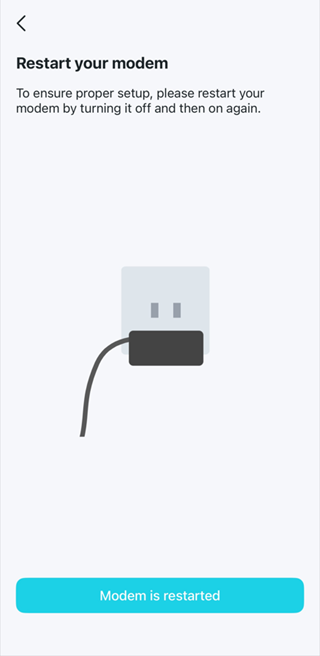
Step 3. Create a Device Login Password
Set an administrator password to manage your router, then tap Next.
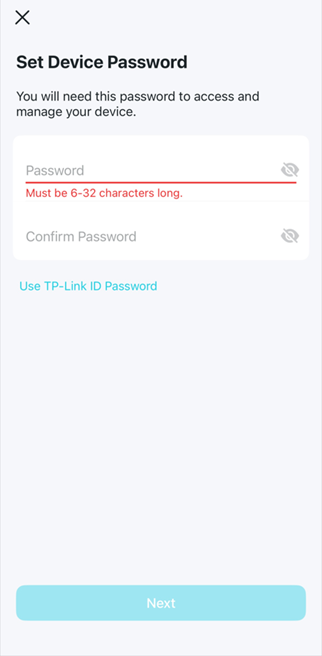
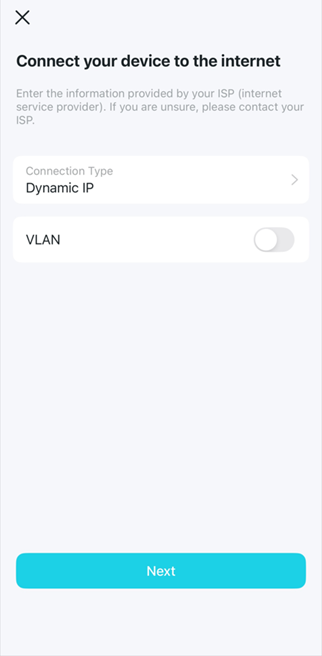
Step 4. Configure Internet Connection
Select your Internet Connection Type (e.g., Dynamic IP, PPPoE, or Static IP). If you select PPPoE, enter the username and password provided by your ISP.
If your ISP requires a VLAN ID, toggle on VLAN and enter the designated VLAN ID number.
Tap Next.
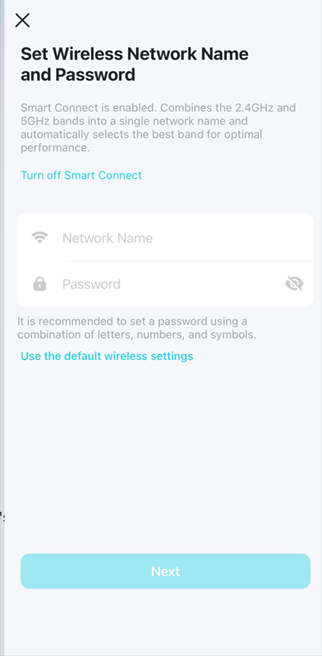
Step 5. Set Up Wi-Fi and Apply the Settings
Customize the Wi-Fi name and password. If you want the 2.4G & 5G Wi-Fi names and passwords to be the same, turn on Smart Connect. If it's off, configure each band separately as needed. Click Next. Review the settings and tap Apply.
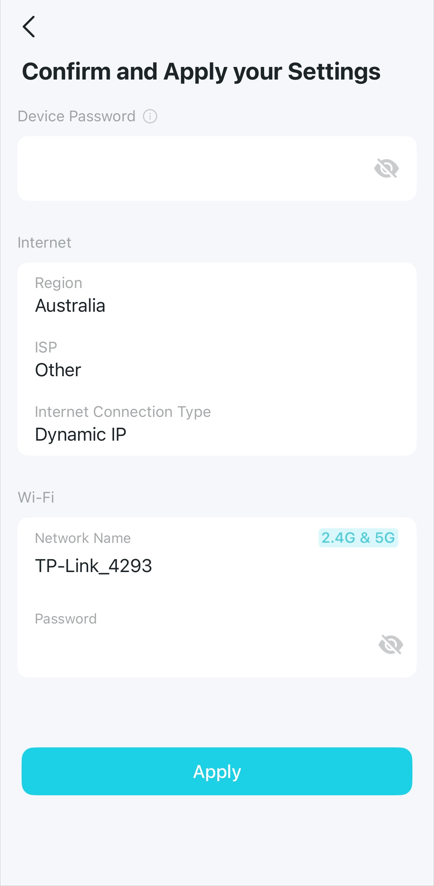
Step 6. Test the Internet and Complete Setup
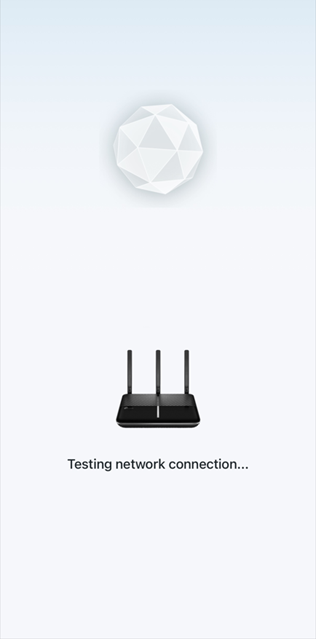
Wait 1-2 minutes for the new Wi-Fi to activate. Reconnect to the new Wi-Fi in your phone's Wi-Fi list, then return to the Tether App.
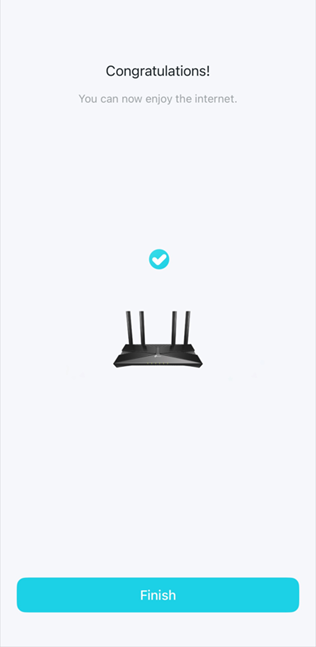
Wait for Tether to test the connection. If the test succeeds, tap Finish.
If the test fails, double-check your cable connection, operation mode, and ISP credentials.
Looking For More
Finden Sie diese FAQ hilfreich?
Mit Ihrer Rückmeldung tragen Sie dazu bei, dass wir unsere Webpräsenz verbessern.


TP-Link Community
Still need help? Search for answers, ask questions, and get help from TP-Link experts and other users around the world.
Von United States?
Erhalten Sie Produkte, Events und Leistungen speziell für Ihre Region