How to set up Deco/Router with BT (UK)
BT Broadband connections include FTTP/FTTH and FTTC connections, configurations on the Deco/Router vary depending on the connections available at your home.
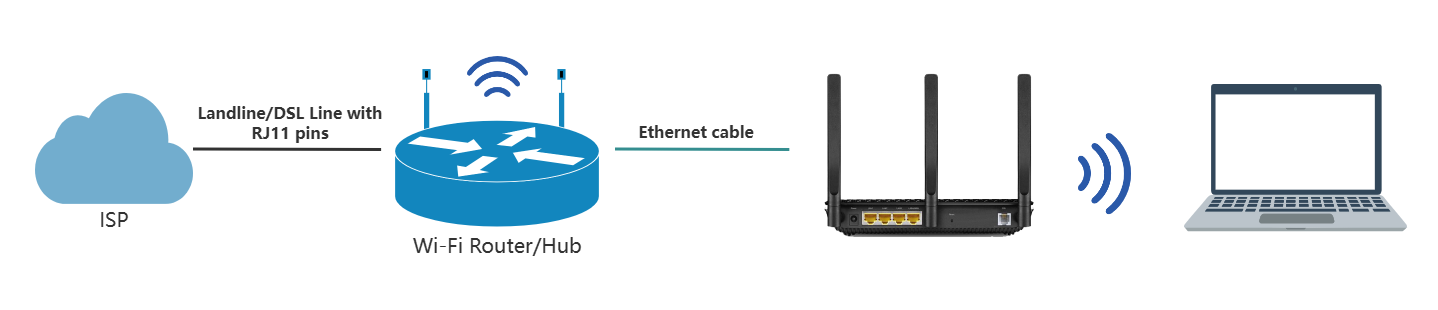
If you are a FTTP/FTTH or full fiber customer, it’s likely you’ll have an Openreach modem (or ONT) installed inside your house and an Wi-Fi hub(Wi-Fi router) provided by BT. You can either use Deco to replace your Wi-Fi hub or use both.

Please connect Deco to the Ethernet port of the BT Hub with an Ethernet cable and follow the in-app instructions.
At the step where to enter your internet connection type and VLAN ID, Please select “Dynamic IP” and turn “IPTV/VLAN Settings” off.

You will have double NAT in the network this way. If you’d like to avoid double NAT, you can then set up the Deco into AP mode, while you may note that you will lose some advanced features of Deco if Deco works in AP mode. To know the difference between Router mode and AP mode of Deco, please click here.
Once completed, it’s suggested to disable the Wi-Fi of the BT Hub to reduce interference to the Deco’s wireless network, you may refer to:
https://www.bt.com/help/broadband/how-do-i-turn-wi-fi-on-and-off-on-the-bt-hub-
Note: The steps above refer to most BT Hubs, but if you find yourself stuck while turning off the wireless signal, our advice is to reach out to the BT support team.

You need to connect the Deco to Ethernet Port of the Openreach modem and follow the in-app instruction.
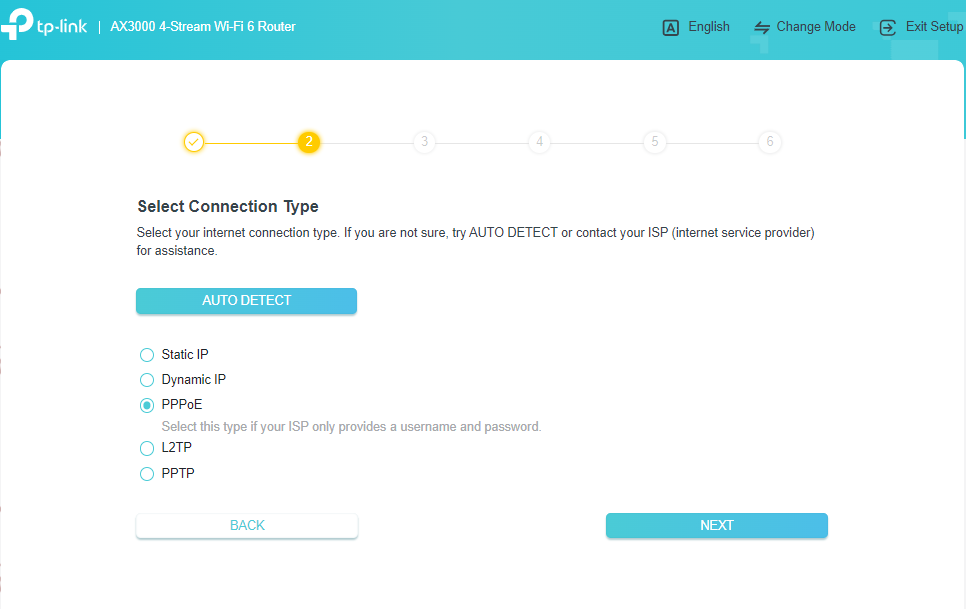
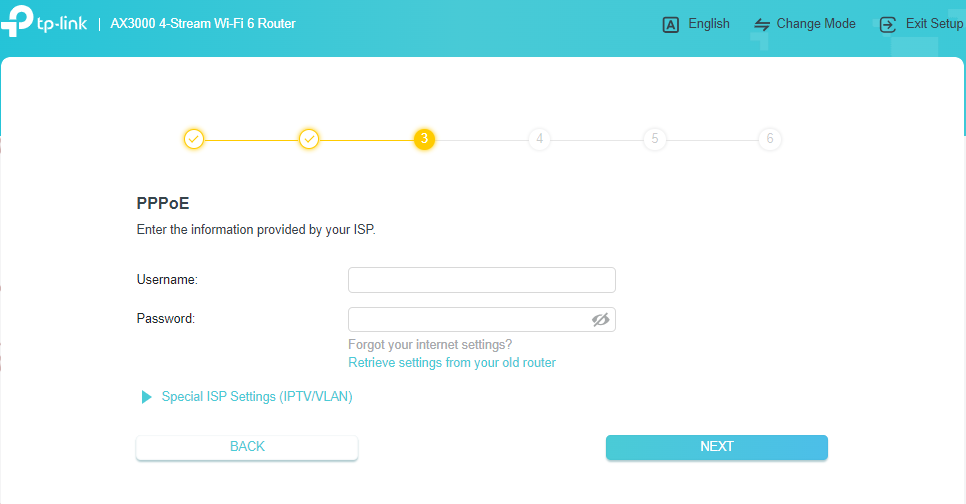
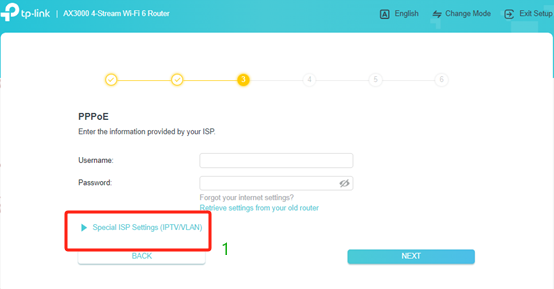
At the step where to enter your internet connection type and VLAN ID, Please select “PPPoE”, then you need to reach out to the BT to get your PPPoE username, password and VLAN ID(if needed) to enter to the Deco.


If you are a FTTC or VDSL customer, it’s likely you’ll be provided a BT Smart Hub (DSL modem router). It is recommended to use Deco with BT Smart hub in preference, or you can use Deco X20-DSL, Deco X50-DSL or Deco X73-DSL to replace your BT Smart Hub.

Please connect Deco to the Ethernet port of the BT Hub with an Ethernet cable and follow the in-app instructions.
At the step where to enter your internet connection type and VLAN ID, Please select “Dynamic IP” and turn “IPTV/VLAN Settings” off.
You will have double NAT in the network this way. If you’d like to avoid double NAT, you can then set up the Deco in AP mode, while you may note that you will lose some advanced features of Deco if Deco works in AP mode. To know the difference between Router mode and AP mode of Deco, please click here.
Once completed, it’s suggested to disable the Wi-Fi of the BT Hub to reduce interference to the Deco’s wireless network, you may refer to:
https://www.bt.com/help/broadband/how-do-i-turn-wi-fi-on-and-off-on-the-bt-hub
Note: The steps above refer to most BT Hubs, but if you find yourself stuck while turning off the wireless signal, our advice is to reach out to the BT support team.

You firstly need to reach out BT to get your PPPoE username, password and VLAN ID.
And then please connect the landline to Deco’s DSL port, and then follow the in-app instruction.
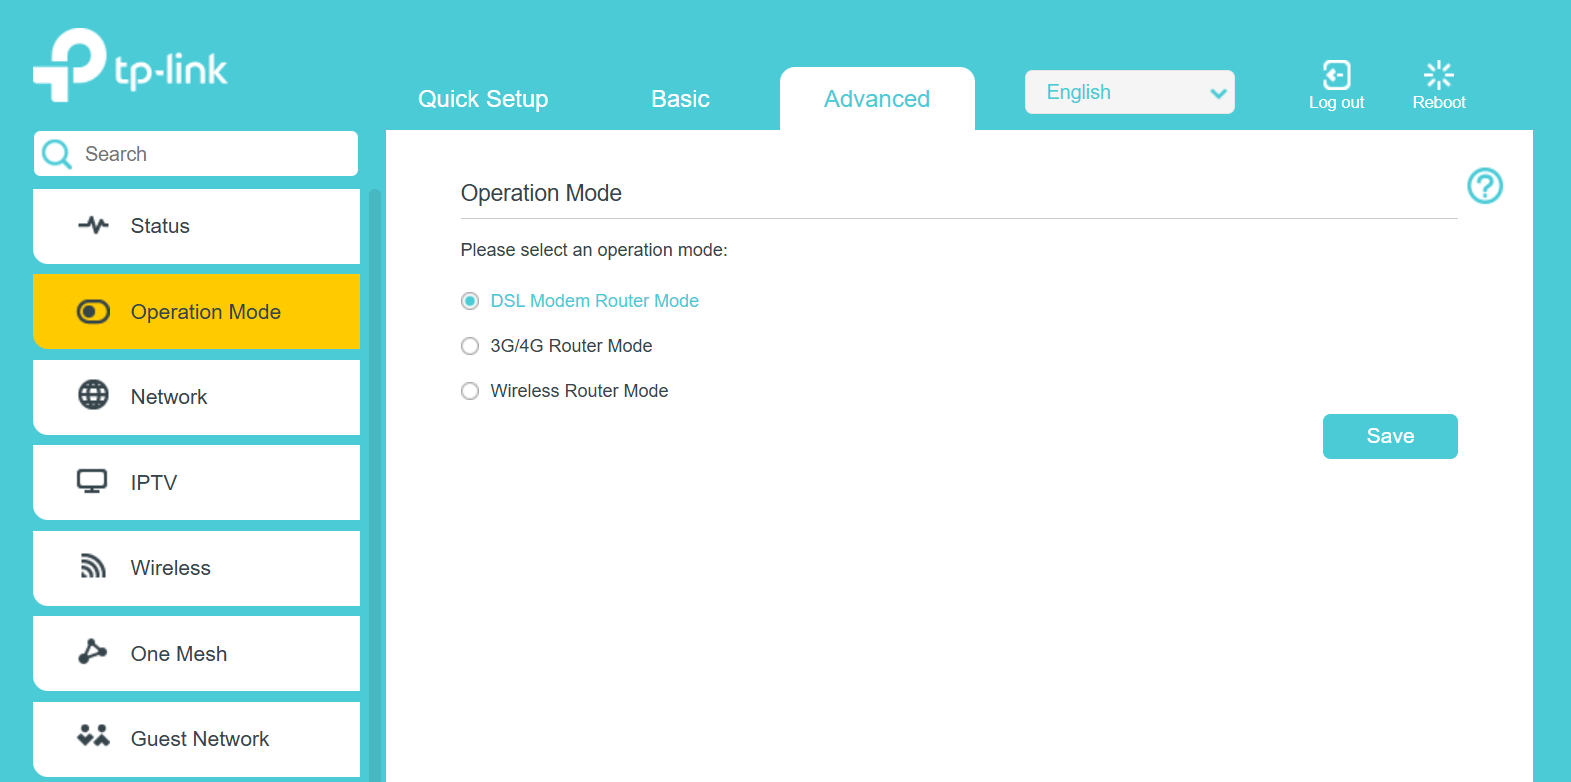
At the step where asks “how do you want to use your Product?” Please select “Use as a DSL Modem Router”.
At the step where to “Choose your current region and ISP”, select “BT_VDSL”.
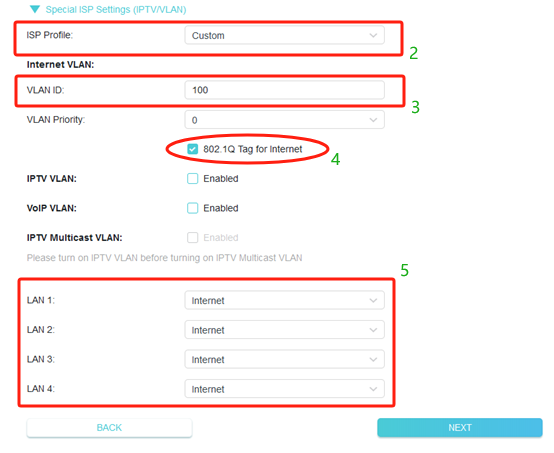
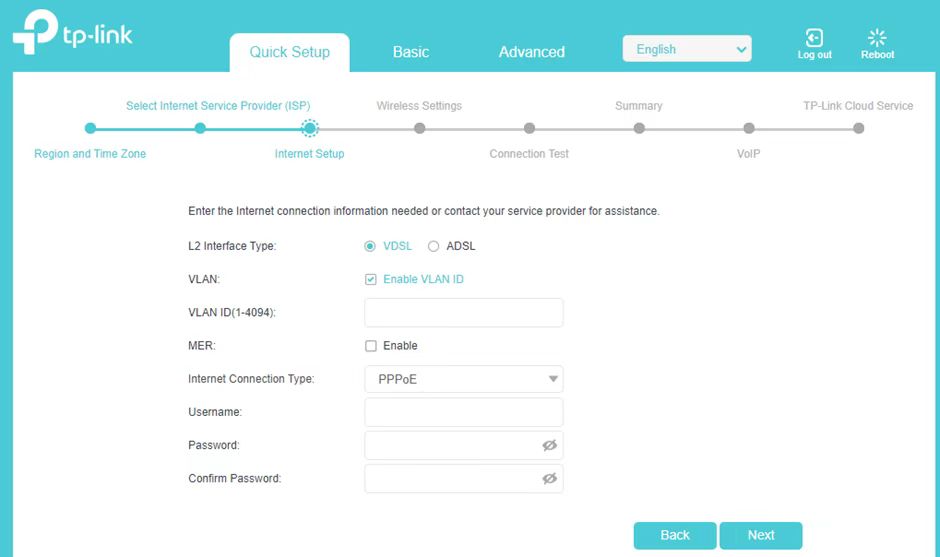
At the step where to enter your internet connection type and VLAN ID. Please select connection type as “PPPoE” and put in Username, Password, and VLAN ID.


If you are an FTTP/FTTH or full fiber customer, it’s likely you’ll have an Openreach modem (or ONT) installed inside your house and a Wi-Fi hub (TP-Link Wi-Fi router) provided by BT. You can either use a TP-Link router to replace your Wi-Fi hub or use both.
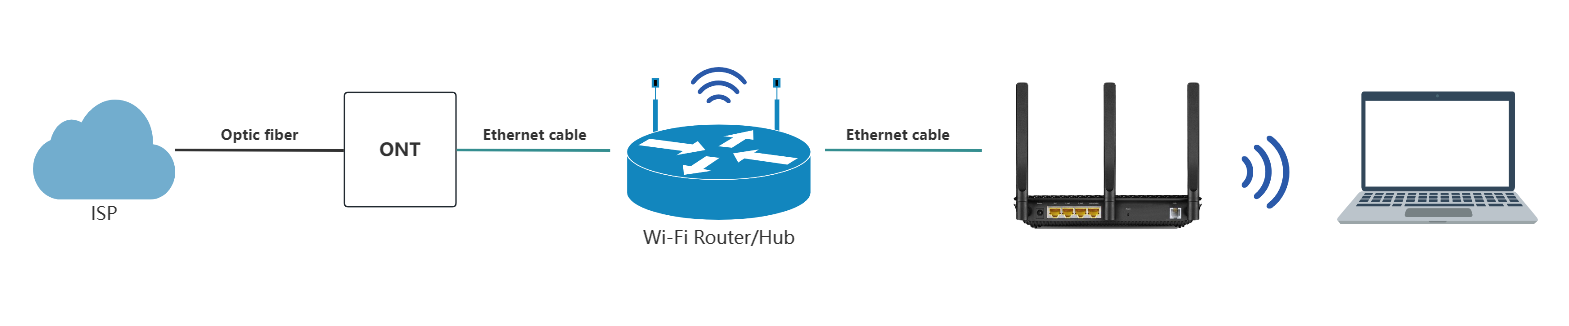
Please connect the TP-Link router to the BT Hub's Ethernet port with an Ethernet cable, then follow the instructions.
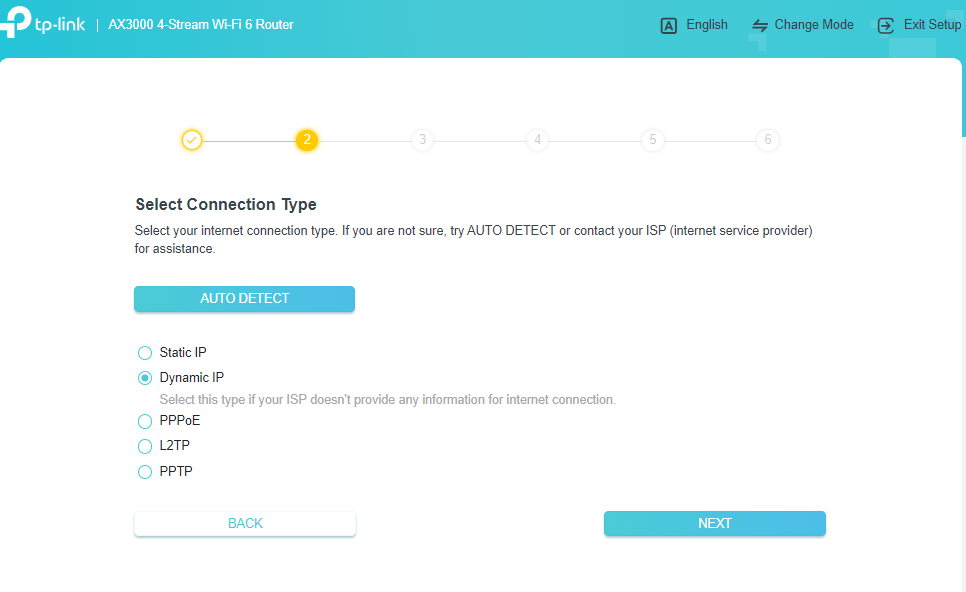
At the step where you select the connection type, please select Dynamic IP.
You will have double NAT in the network this way. If you’d like to avoid double NAT, you can then set up the TP-Link router into AP mode, though you’ll lose some advanced features if it’s working in AP mode. To learn the difference between router mode and AP mode on a TP-Link router, please click HERE.
Once completed, it’s suggested to disable the Wi-Fi of the BT Hub to reduce interference to the TP-Link router’s wireless network. You may refer to:
https://www.bt.com/help/broadband/how-do-i-turn-wi-fi-on-and-off-on-the-bt-hub--
Note: The steps above apply to most BT Hubs, but if you get stuck turning off the wireless signal, our advice is to reach out to the BT support team.
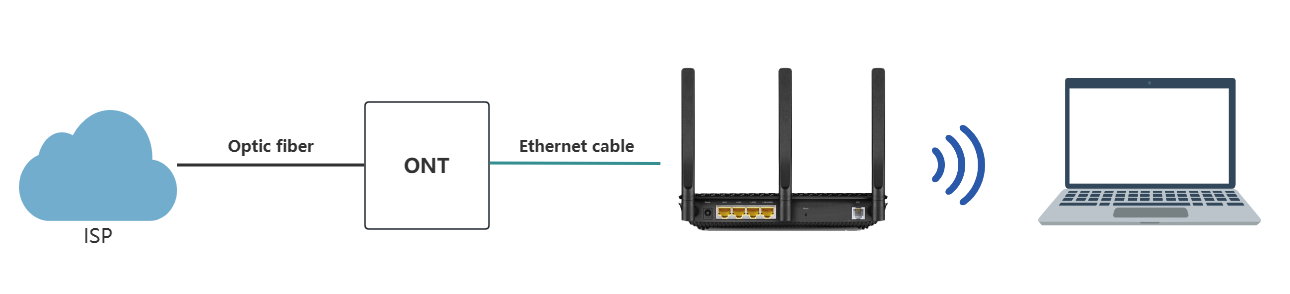
You need to connect the TP-Link router to Ethernet Port of the Openreach modem and follow the instructions.
If you are an FTTC or VDSL customer, it’s likely you’ll be provided a BT Smart Hub (DSL modem router). It is recommended to use a router with a BT Smart Hub in preference, or you can use Archer VX1800v, Archer VR400, Archer VR2100, or another TP-Link DSL modem router to replace your BT Smart Hub.
Please connect the TP-Link router to the BT Hub's Ethernet port with an Ethernet cable, then follow this instruction.
At the step where to enter the Internet connection type, please select Dynamic IP.
You will have double NAT in the network this way. If you’d like to avoid double NAT, you can then set up TP-Link router into AP mode, though you’ll lose some advanced features of TP-Link router if router works in AP mode. To learn the difference between router mode and AP mode on a TP-Link router, please click Here.
Once completed, it’s suggested to disable the Wi-Fi of the BT Hub to reduce interference to the TP-Link router’s wireless network. You may refer to:
https://www.bt.com/help/broadband/how-do-i-turn-wi-fi-on-and-off-on-the-bt-hub-.
Note: The steps above apply to most BT Hubs, but if you get stuck turning off the wireless signal, our advice is to reach out to the BT support team.
You first need to reach out to BT to get your PPPoE username, password, and VLAN ID.
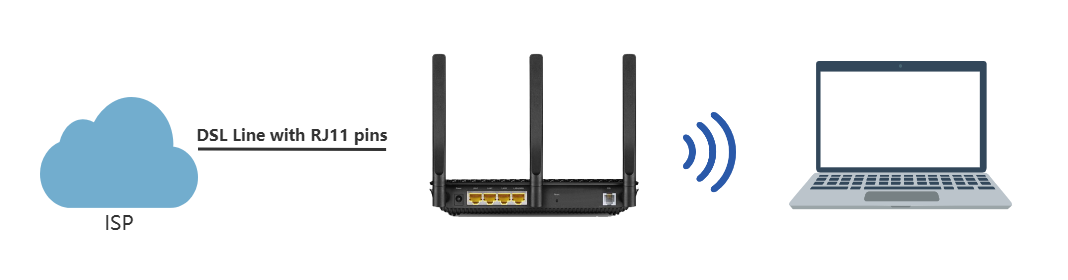
And then please connect the landline to the router’s DSL port, and then follow the this guide.
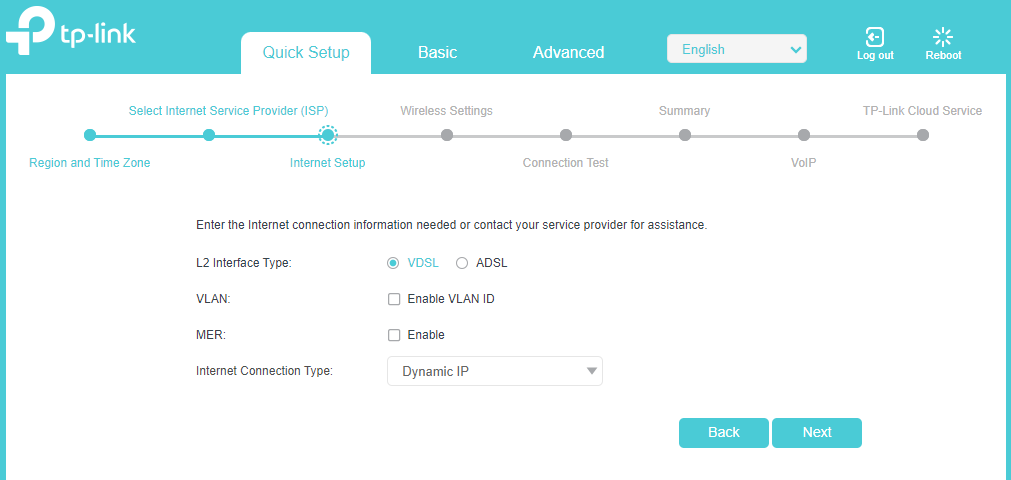
At the step where to select the operation mode. Please select DSL Modem router.
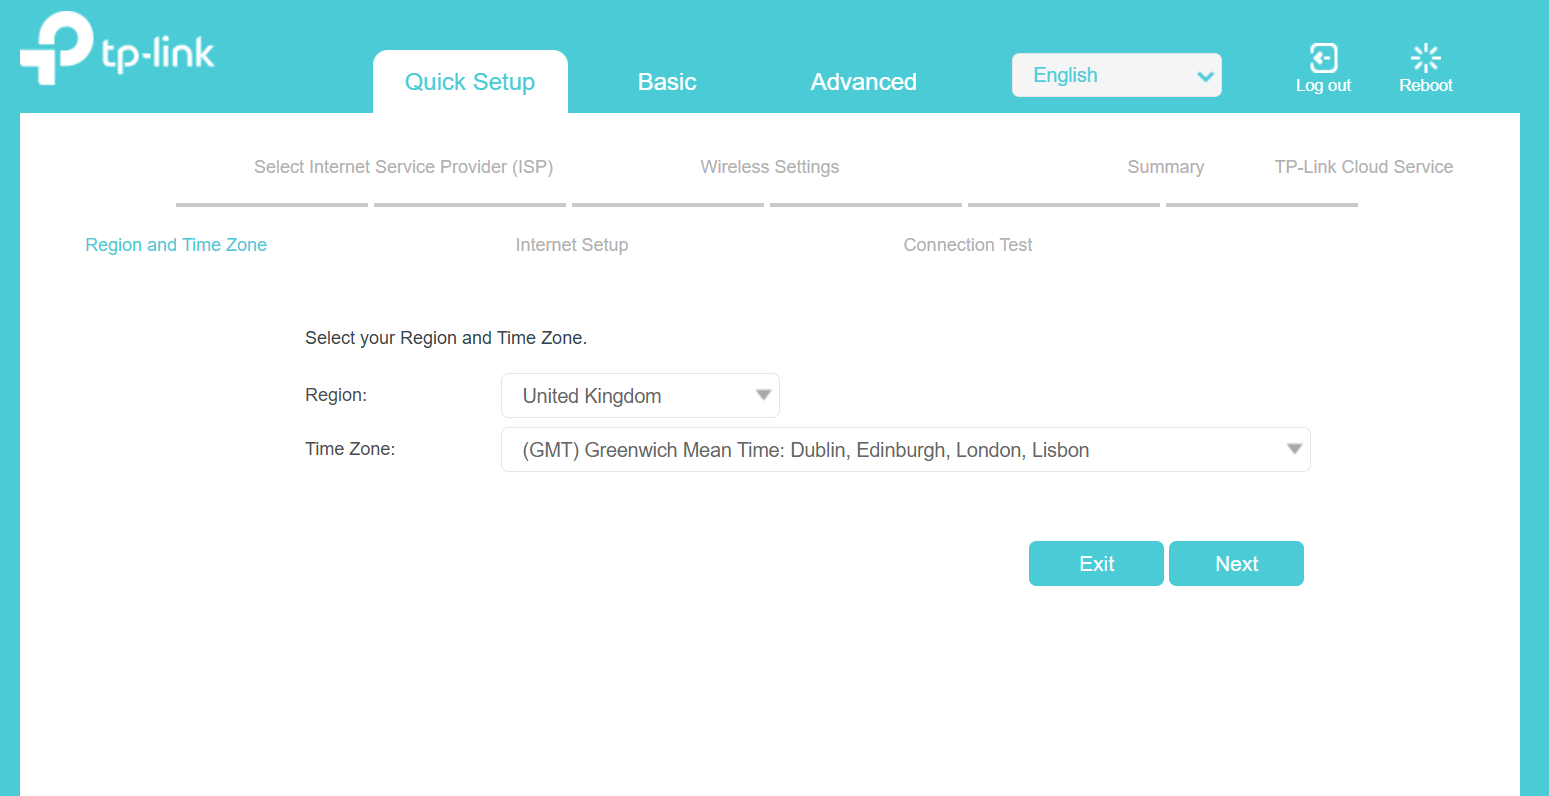
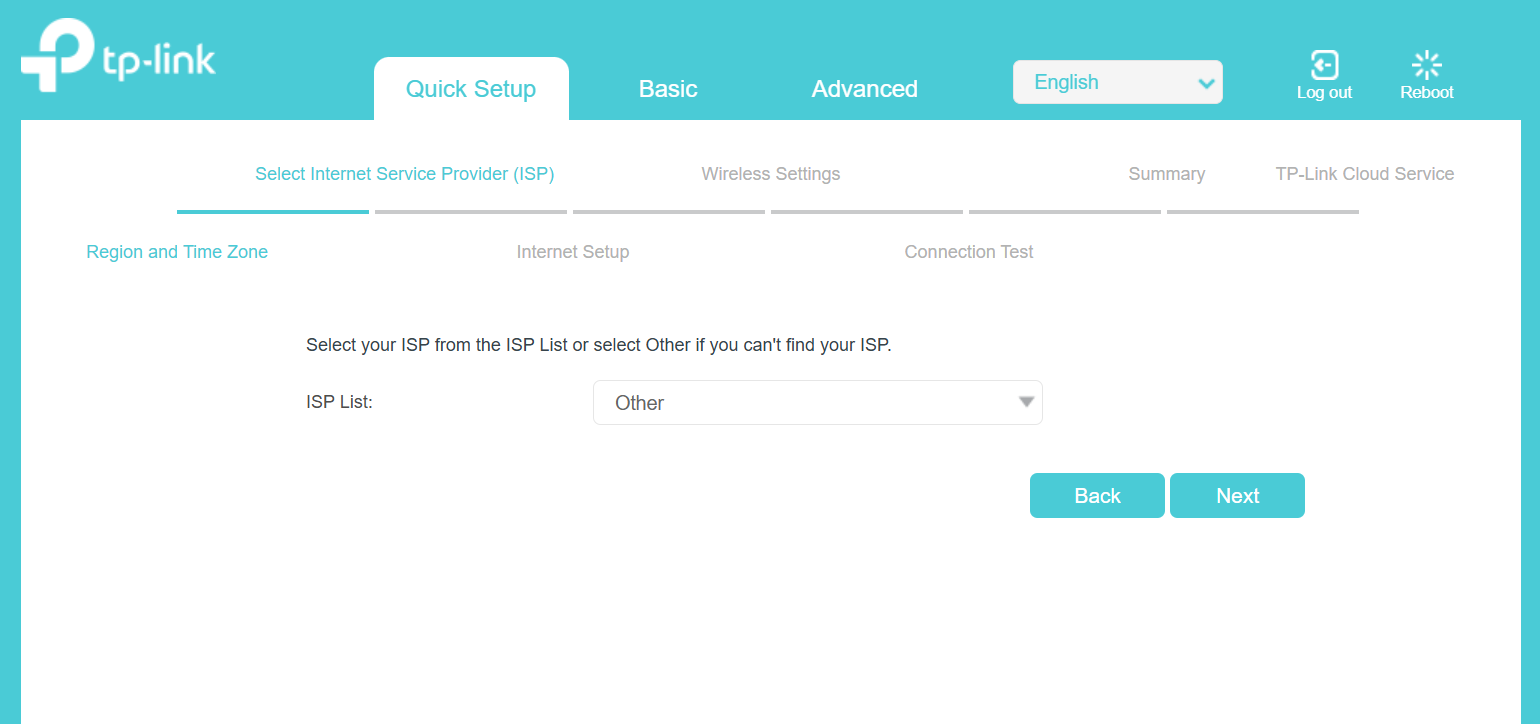
At the step where to choose your current region and ISP, select BT_VDSL or Other.
At the step where to enter your internet connection type and VLAN ID. Please select the connection type as PPPoE and enter the Username, Password, and VLAN ID.
Is this faq useful?
Your feedback helps improve this site.
1.0_normal_20210812031127k.png)


TP-Link Community
Still need help? Search for answers, ask questions, and get help from TP-Link experts and other users around the world.