How to Set Up Multi-WAN Backup on TP-Link Wi-Fi Router
Do you want to keep your home internet running even when your main connection goes down? The Multi-WAN Backup feature on your TP-Link router allows you to connect two or more internet sources. You can choose between two modes:
- Failover Mode – If your primary WAN connection fails, the router automatically switches to a secondary WAN (like a USB modem, Ethernet backup, or phone tethering), keeping you online without interruptions.
- Load Balance Mode – Use both internet connections at the same time to split traffic, boost overall speed, and improve bandwidth efficiency.
This guide walks you through the entire setup process, step by step.
Key Takeaways
- Multi-WAN Backup allows your router to connect two or more internet sources (e.g., USB modem, secondary Ethernet) at the same time. It supports two modes: Failover and Load Balance.
- Failover Mode is the default and best for reliability. It ensures your internet stays online by automatically switching to a backup connection if your primary WAN fails.
- Load Balance Mode lets you use multiple connections simultaneously, distributing traffic to maximize speed and bandwidth.
- Before starting, ensure your router is in Wireless Router mode, and the firmware is up to date.
- Log into the router’s web interface at tplinkwifi.net or 192.168.0.1 and go to Advanced > Network > Internet > Multi-WAN to configure it.
Before You Start
- Update your router’s firmware – Older firmware may not support the Multi-WAN feature. Go to Advanced > System > Firmware Update to check for updates.
- Make sure your router is in Wireless Router mode. If it’s in Access Point (AP) or other mode, this feature won’t be available. Go to Advanced > System > Operation Mode to switch.
Step-by-Step Setup Guide
Step 1: Access the Router Management page
Connect your computer or phone to the router via Wi-Fi or an Ethernet cable.
Open a web browser and enter one of the following addresses:
Log in with your admin password.
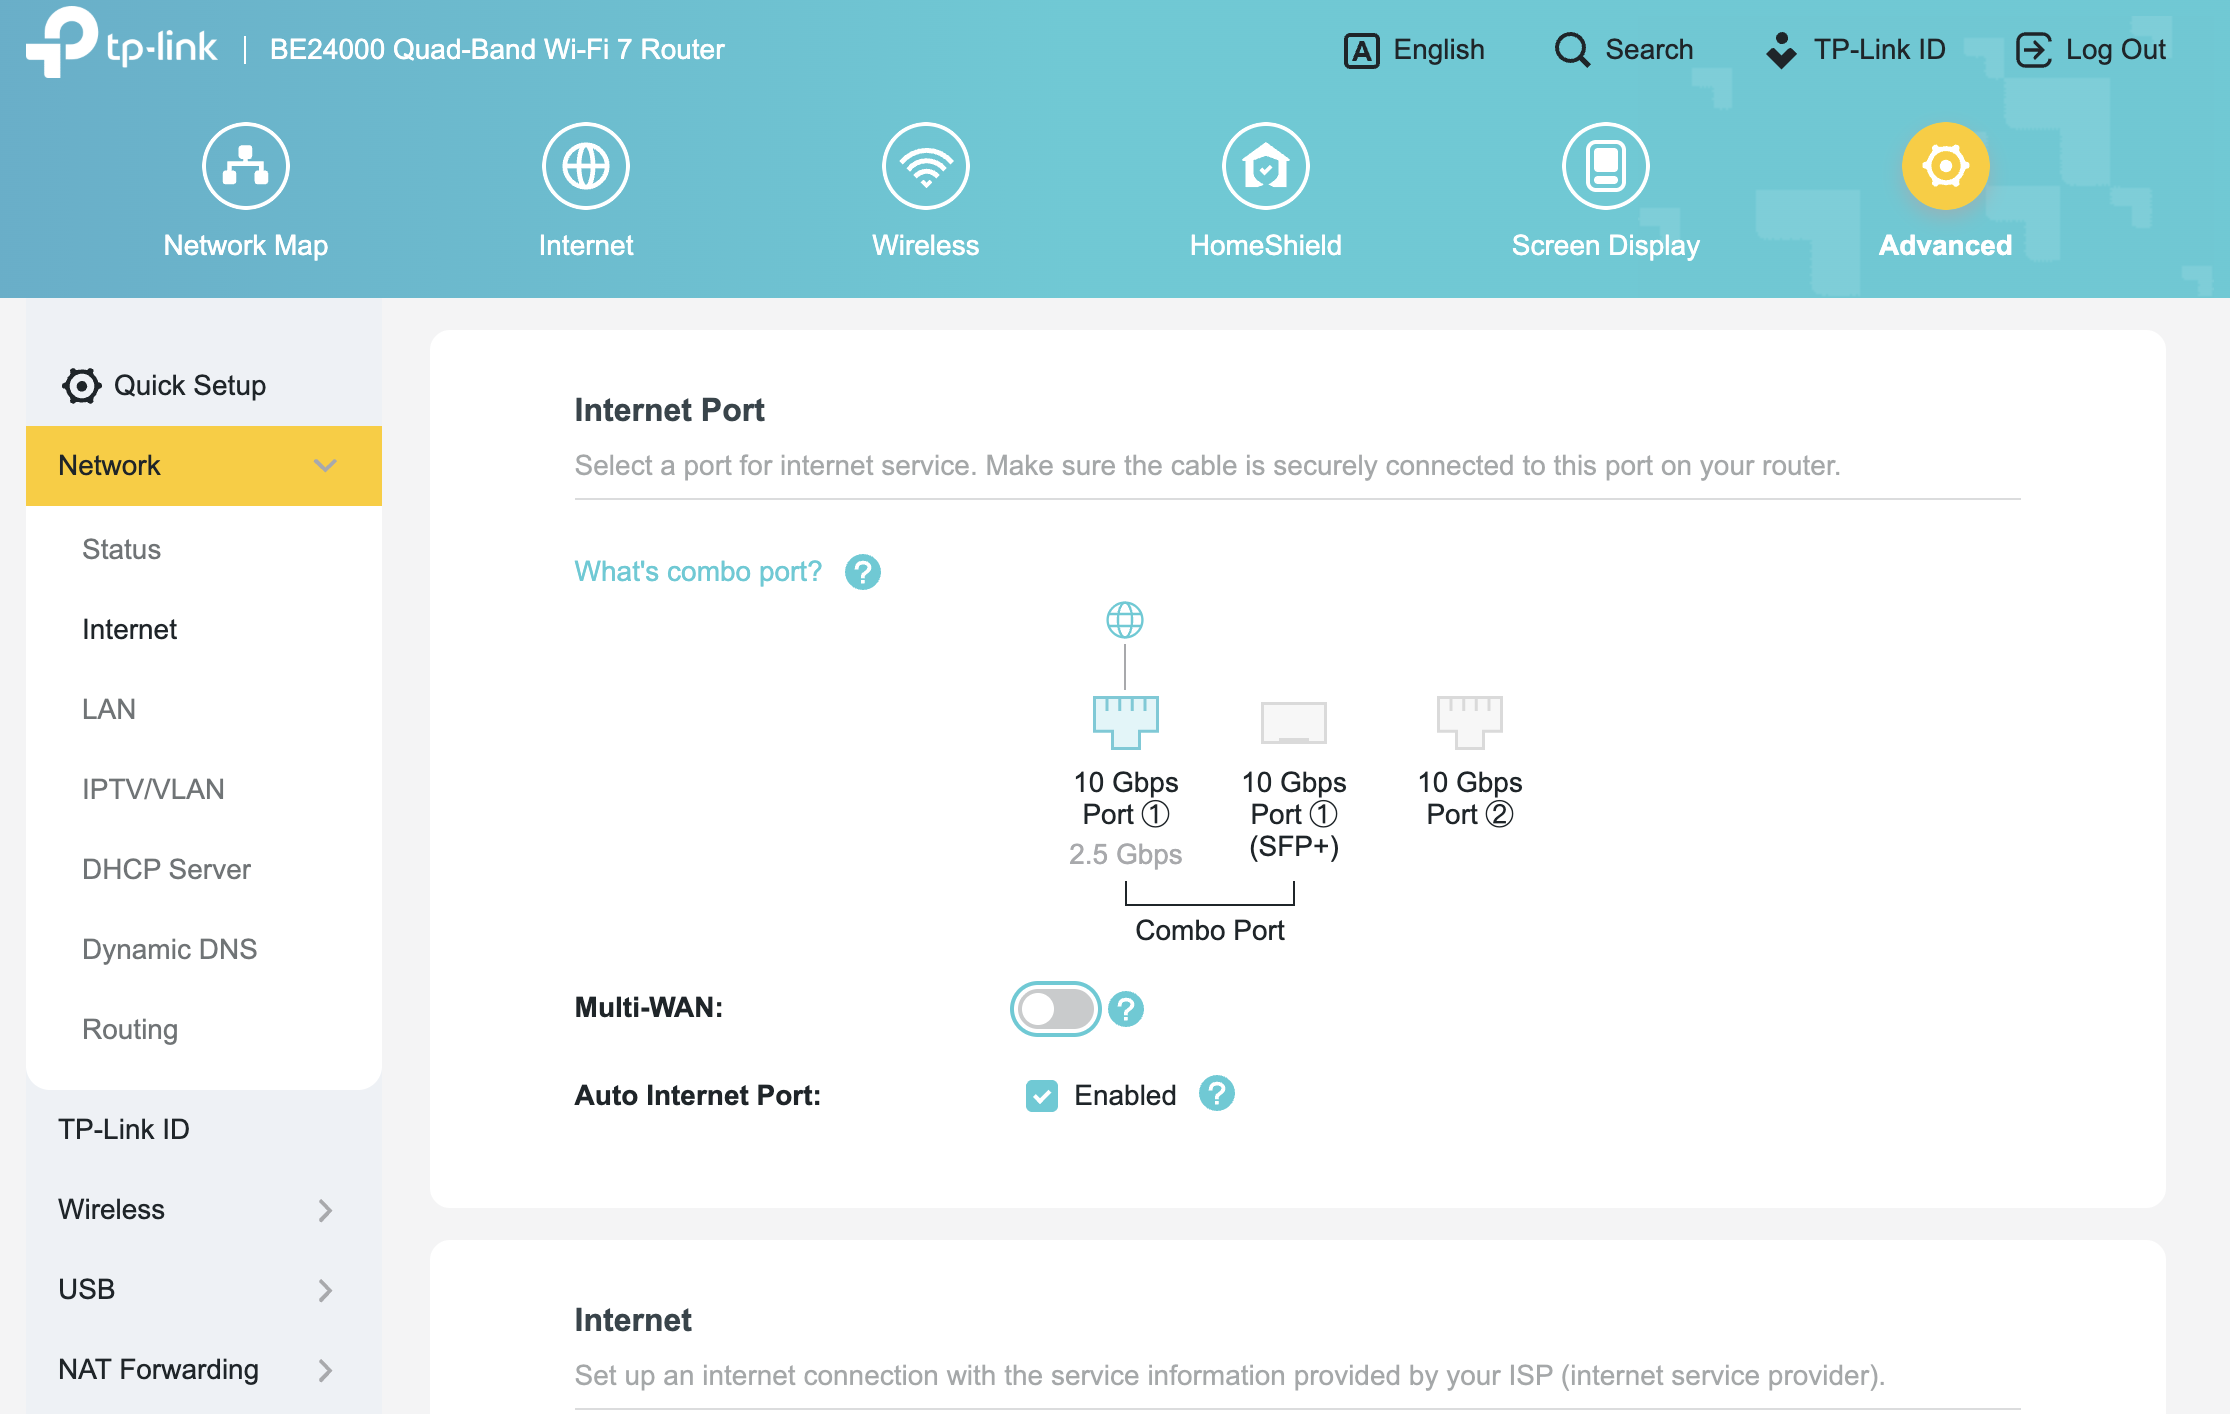
Step 2: Enable the Multi-WAN Feature
Go to Advanced > Network > Internet > Multi-WAN.
Toggle the switch to On.
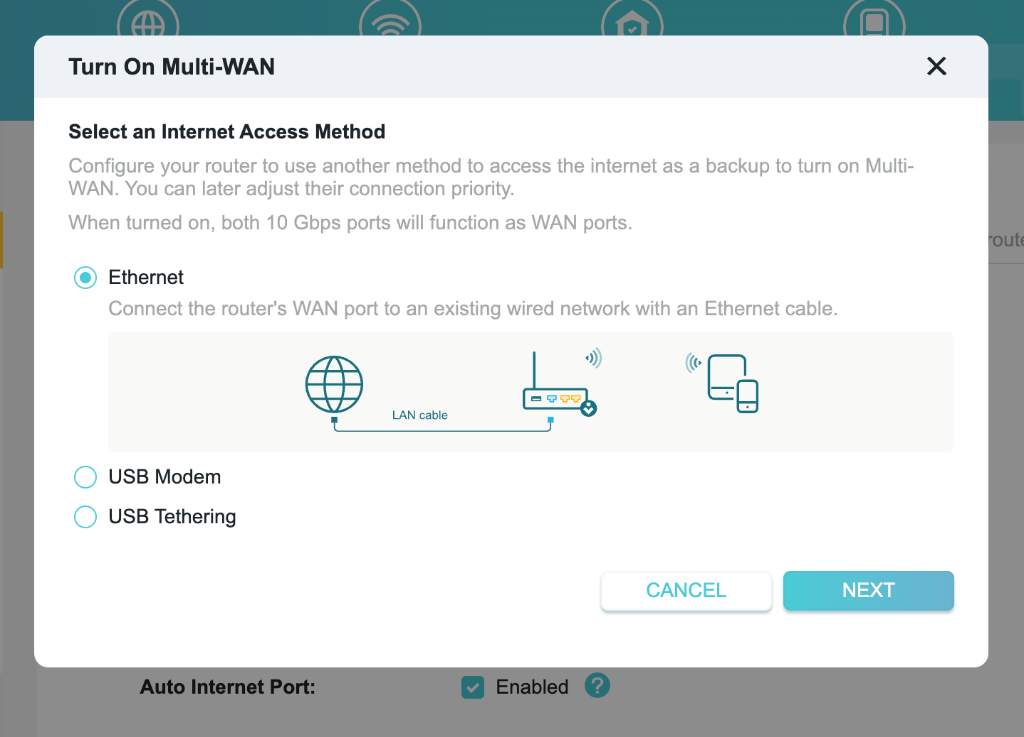
Follow the on-screen guide to select your secondary Internet Access Method (WAN type):
- Ethernet – Connect to a second router or modem via cable
- USB Modem – Plug a 3G/4G/5G USB dongle into the router’s USB port
- USB Tethering – Connect your phone via USB for mobile data
Example: We’ll use Ethernet as the secondary WAN.
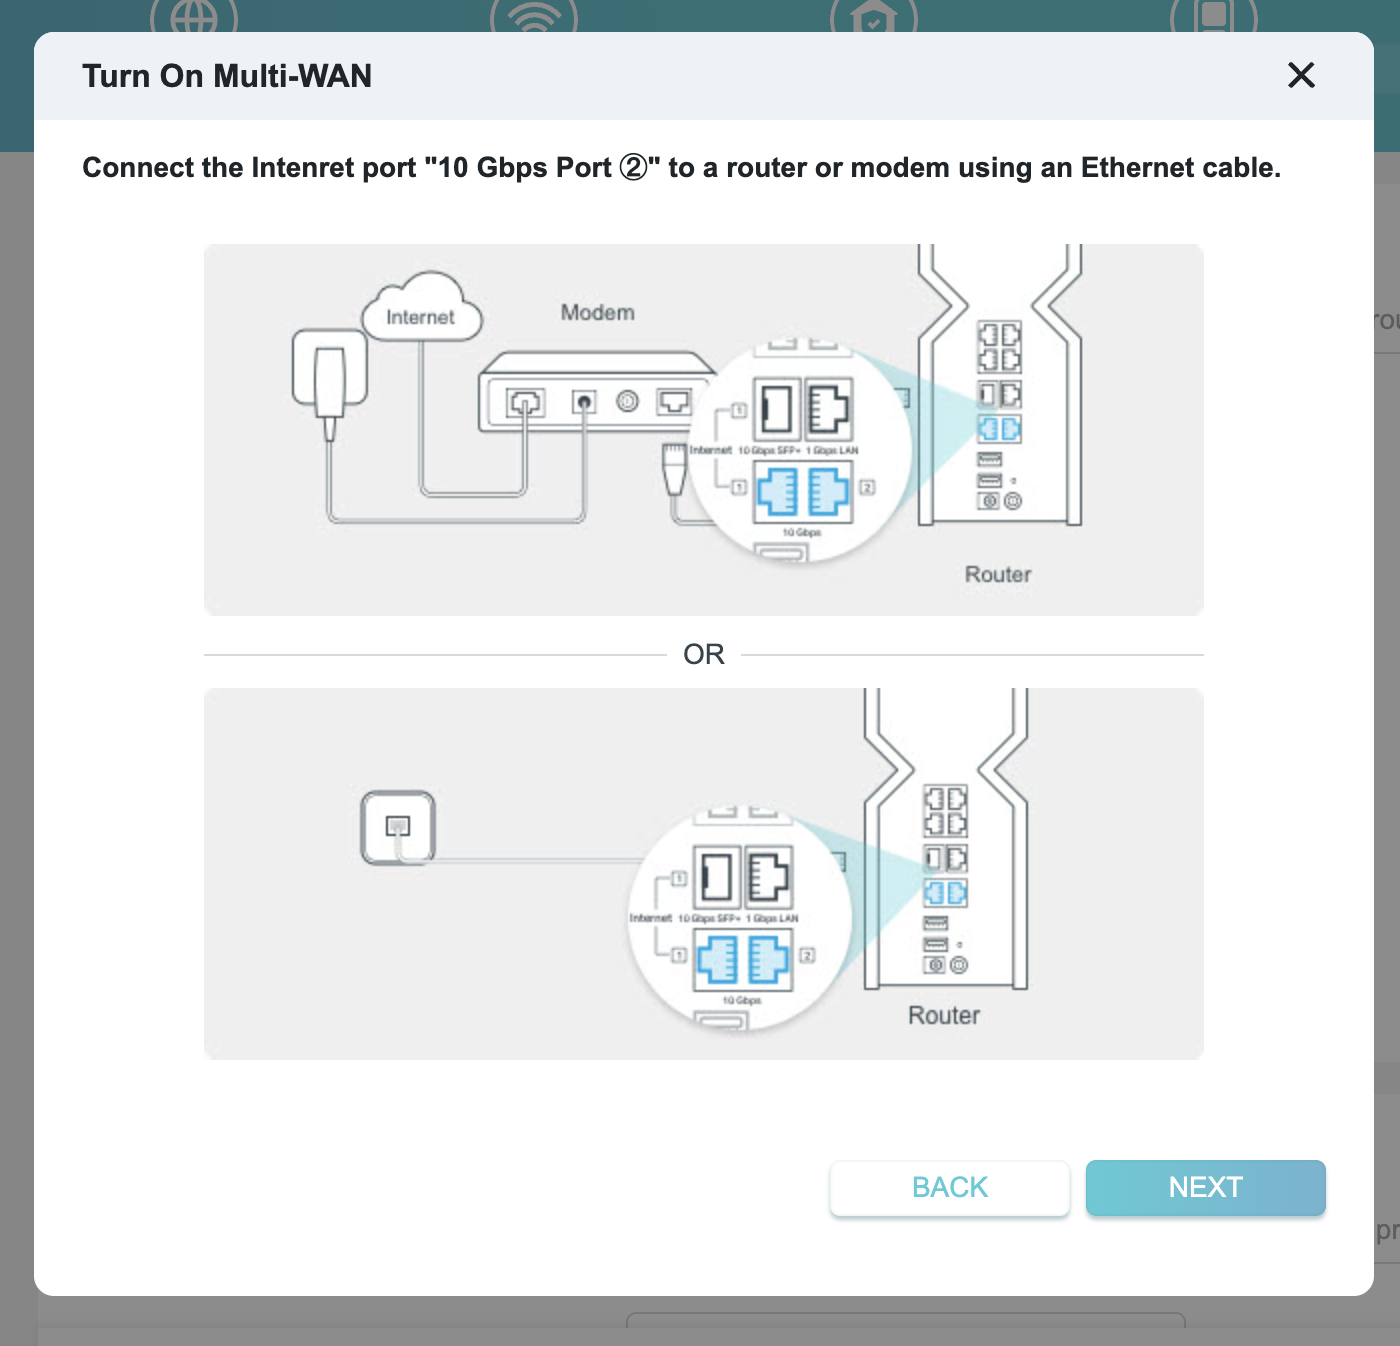
Click Next and follow the detailed connection instructions.
Once connected, click Next again.
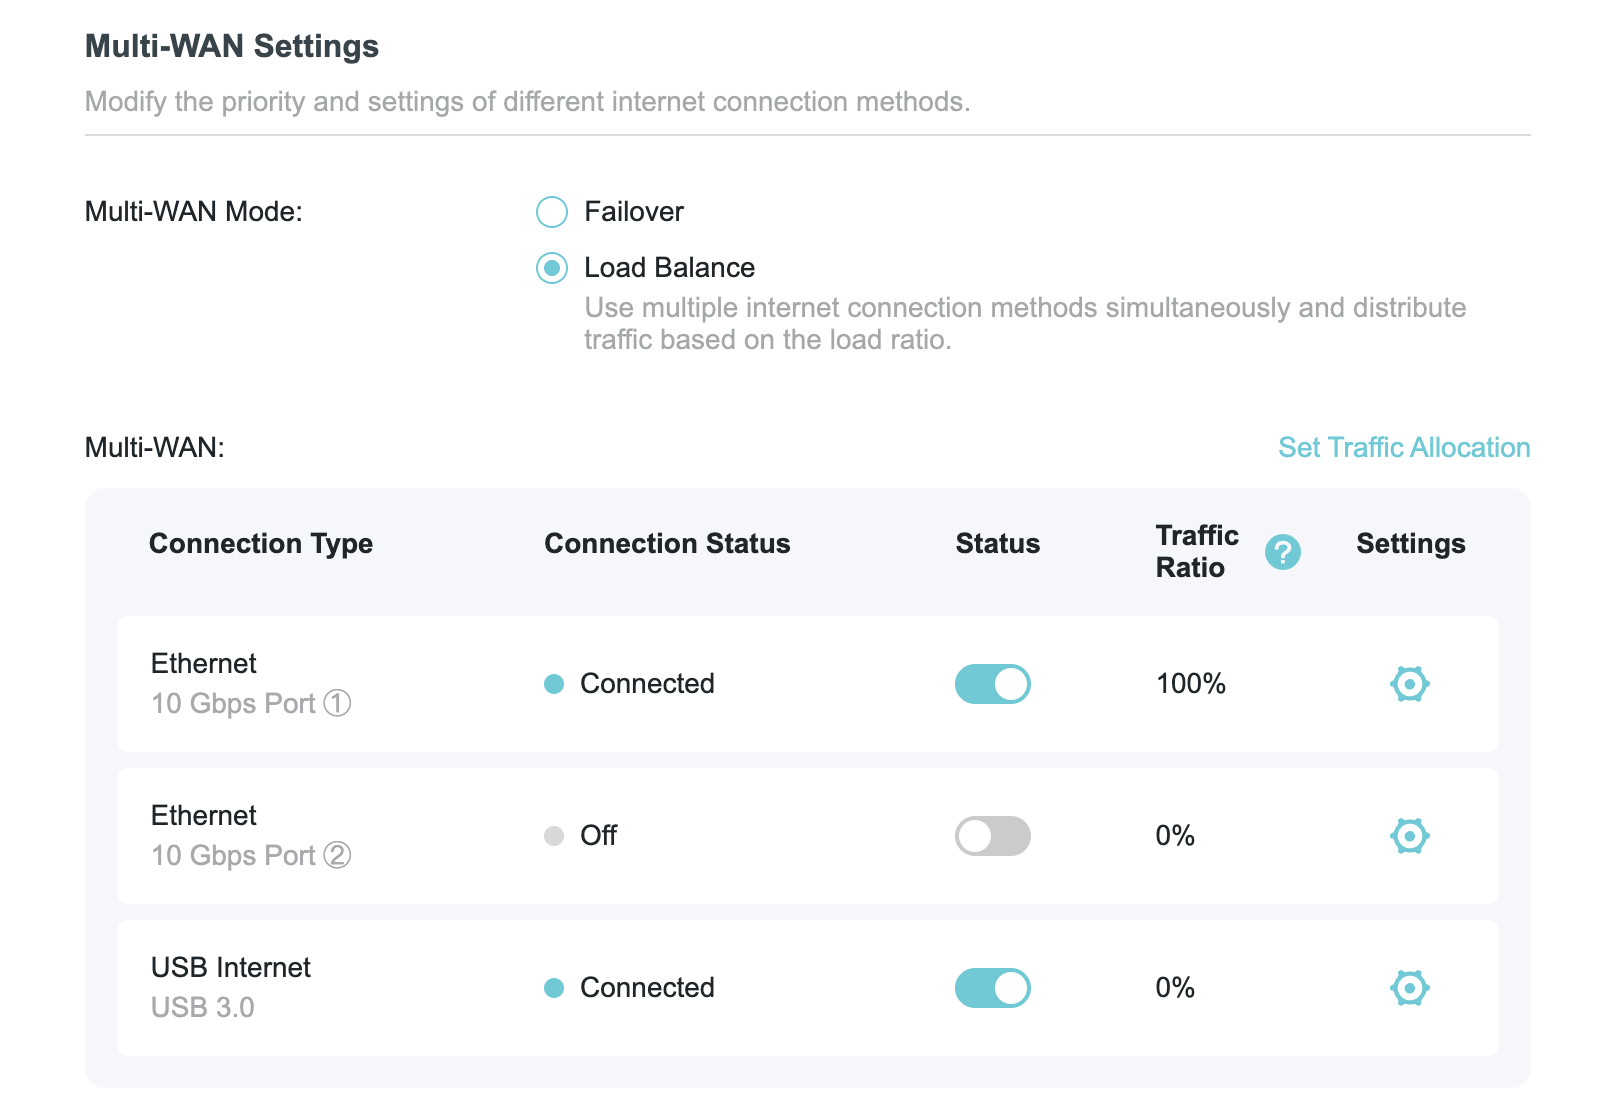
Step 3: Select a Multi-WAN Mode
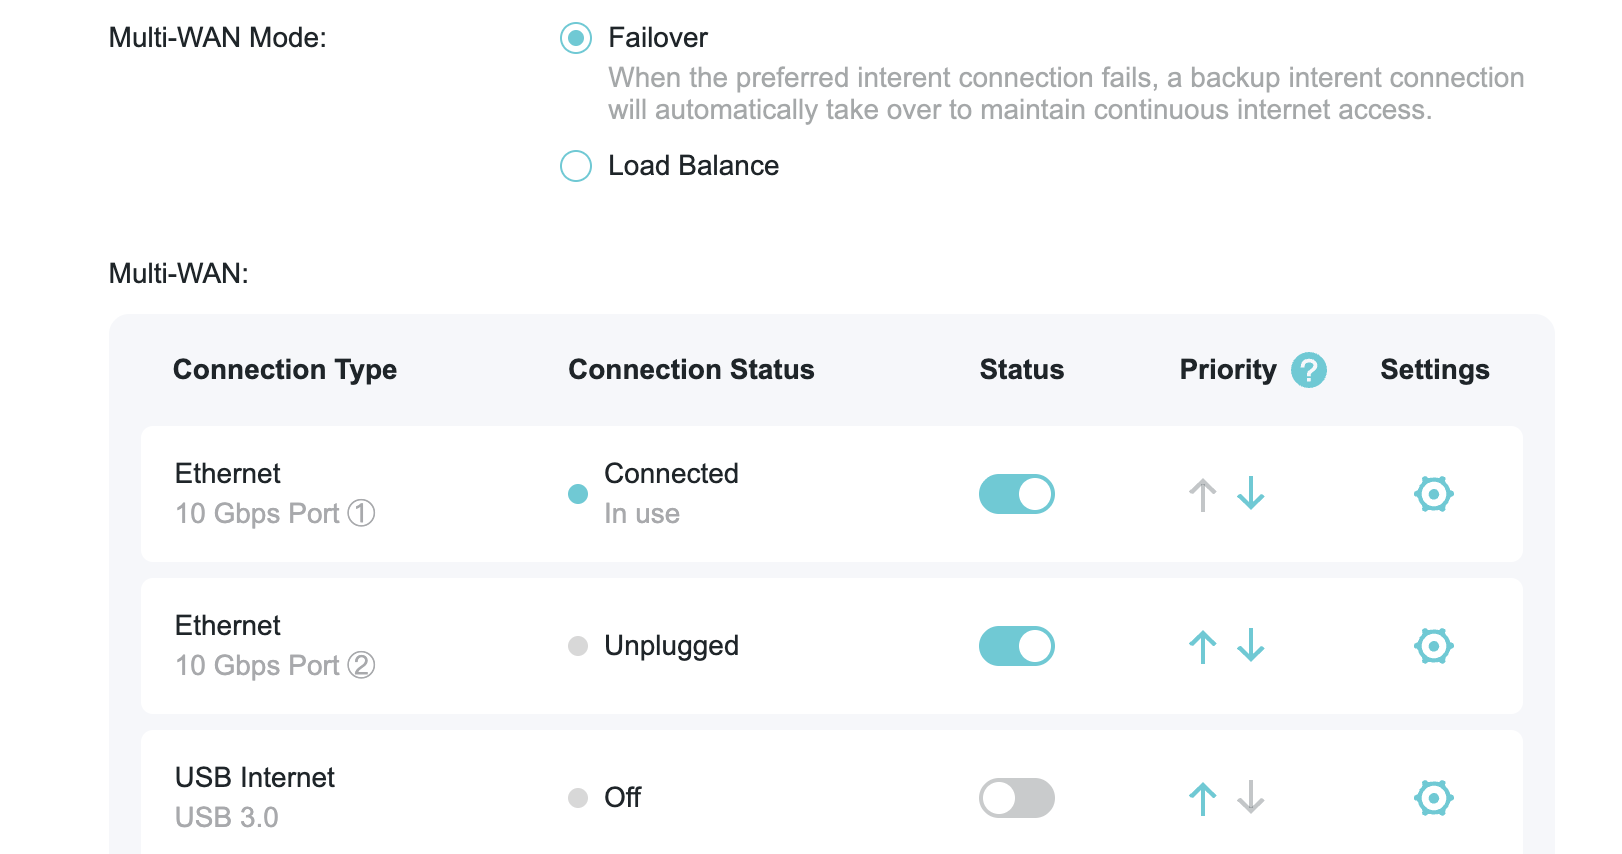
You can choose between two modes. The default is Failover.
- Failover: The router uses the primary WAN by default. If it fails, it automatically switches to the secondary WAN. You can adjust connection priority.
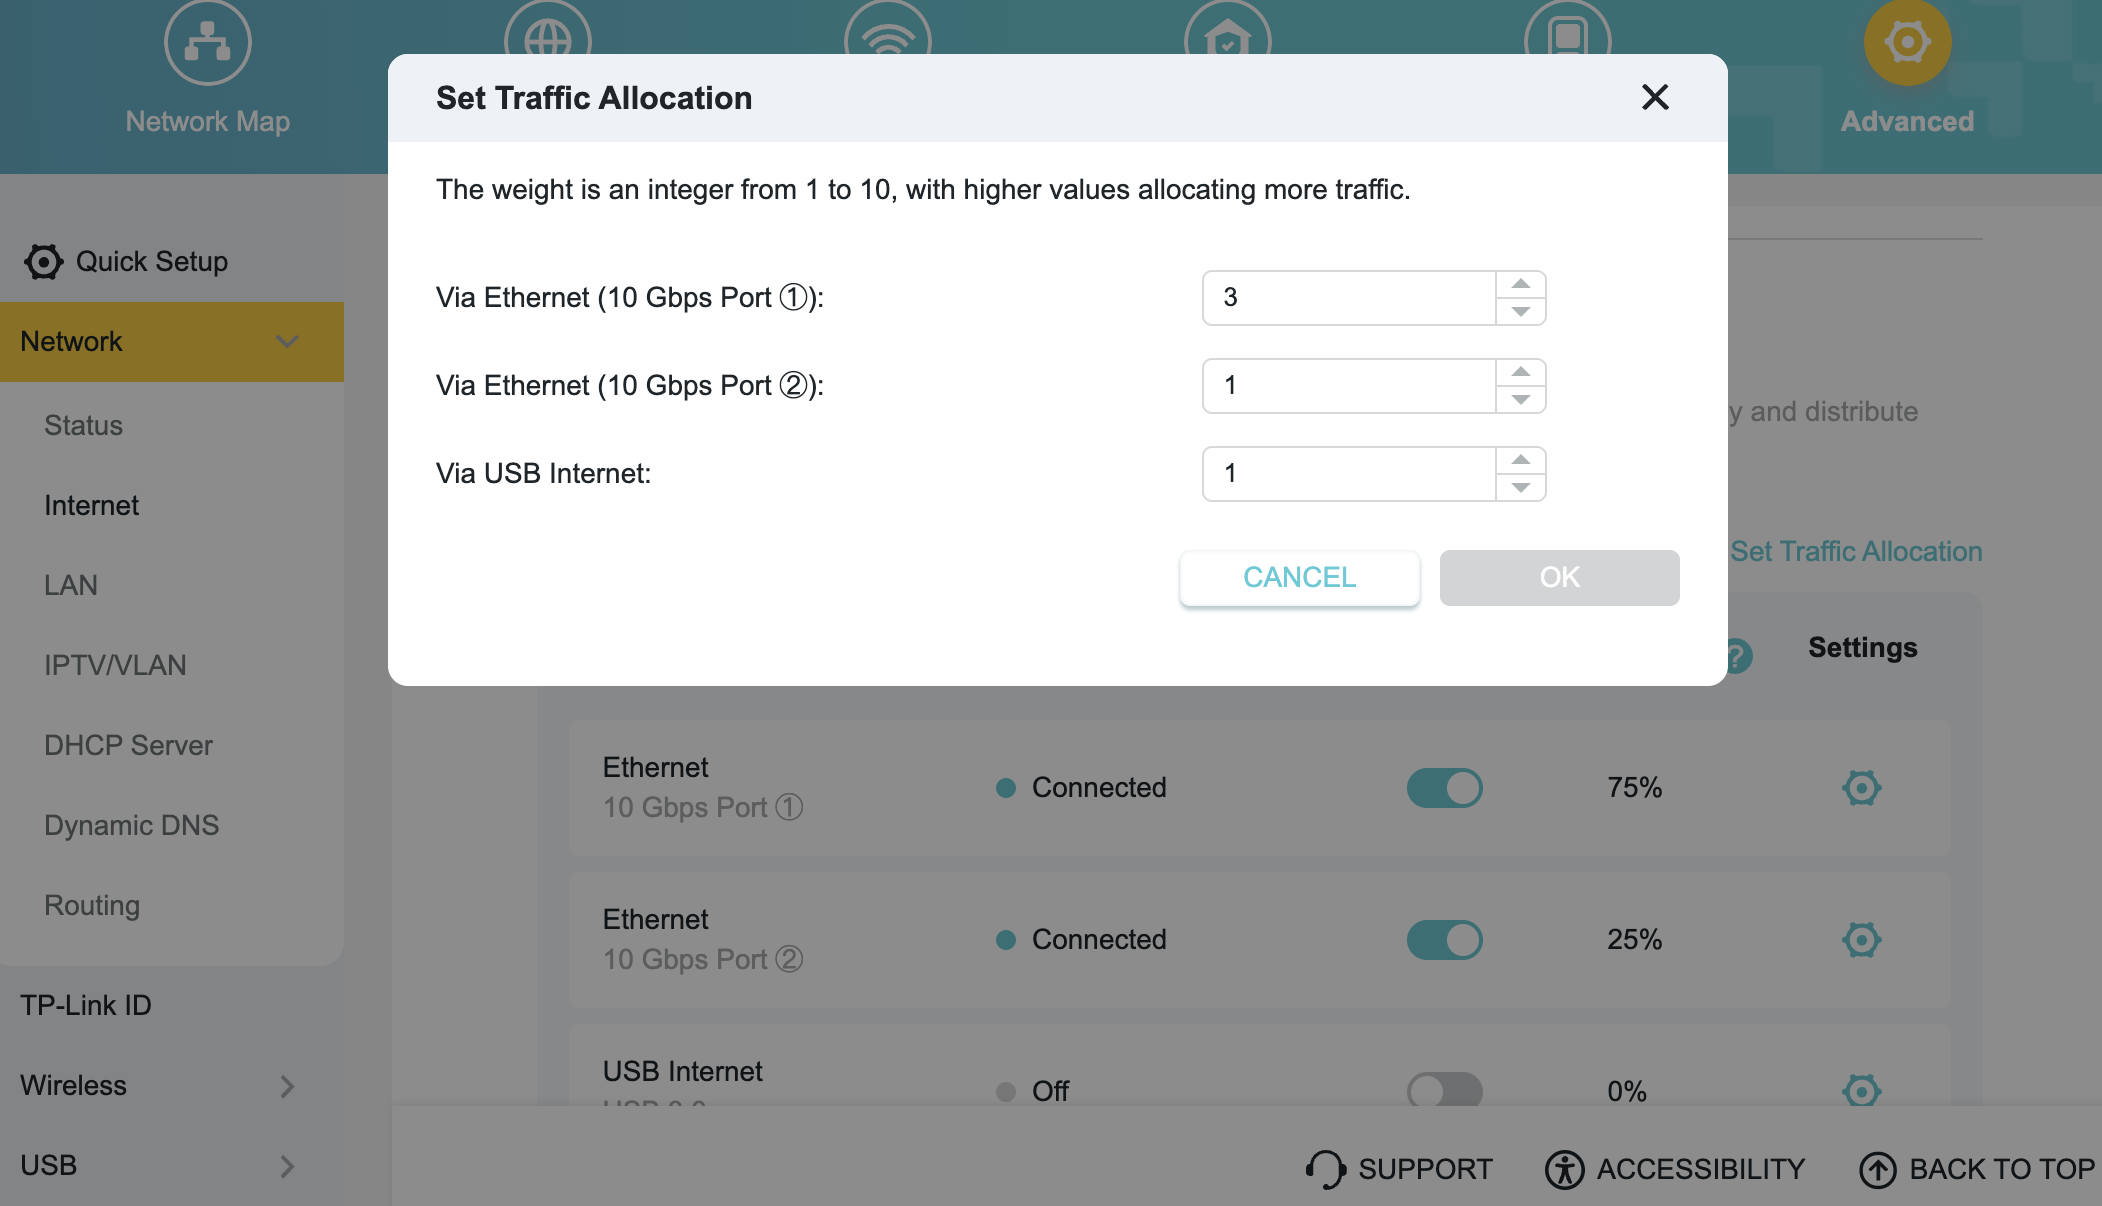
- Load Balance: The router uses multiple WAN connections at the same time. Click Set Traffic Allocation to control the traffic ratio.
To get to know more details of each function and configuration, please go to the Download Center to download the manual for your product.
Looking For More
Is this faq useful?
Your feedback helps improve this site.


TP-Link Community
Still need help? Search for answers, ask questions, and get help from TP-Link experts and other users around the world.