如何使用 iPad 設定 TL-WPS510U 並於 Windows 10 使用
注意:TL-WPS510U 預設以 Ad-Hoc 模式運作,SSID 為 WLAN-PS。但由於 Windows 10 無法連接 Ad-Hoc 無線網絡,因此本文將以 iPad 作為示範來設定 TL-WPS510U,使其連接至主要路由器,然後再於 Windows 10 完成後續安裝程序。
為了更清楚說明設定流程,以下假設網絡環境如下:
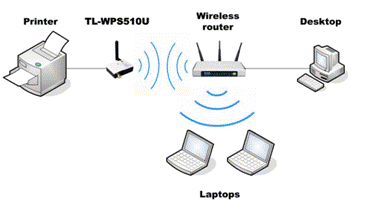
無線路由器是整個無線網絡的中心,所有裝置皆透過無線路由器與 TL-WPS510U 通訊。在本範例中,路由器閘道(Gateway)為 10.0.0.1,本地網絡網段為 10.0.0.* / 255.255.255.0。如果您不清楚您的網絡設定,請搜尋如何查看電腦的網段資訊,或聯絡路由器技術支援。
接下來開始設定。
步驟 1
接通 TL-WPS510U 電源並連接至您的 USB 印表機。等待數分鐘,確認無線指示燈已亮起。
如需重設 TL-WPS510U 但不清楚操作方式,請參閱以下 FAQ:
如何將 TP-Link Print Server 恢復原廠設定
步驟 2
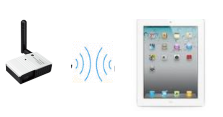
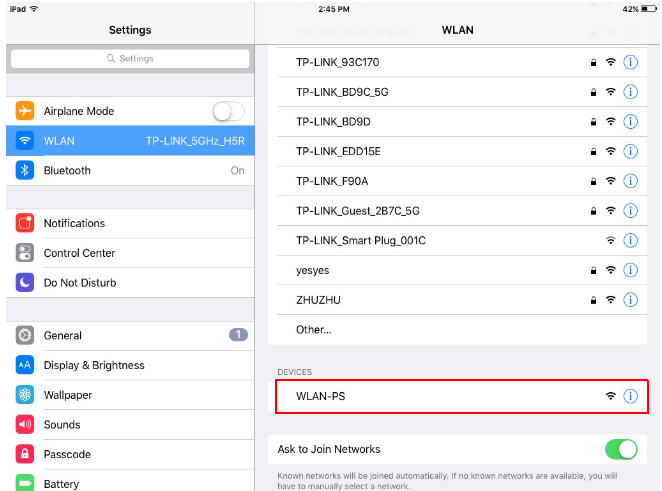
將 iPad 連接至 TL-WPS510U 的無線網絡 WLAN-PS。
進入 iPad 的「設定(Settings)」,找到 WLAN-PS 並加入該網絡。
步驟 3
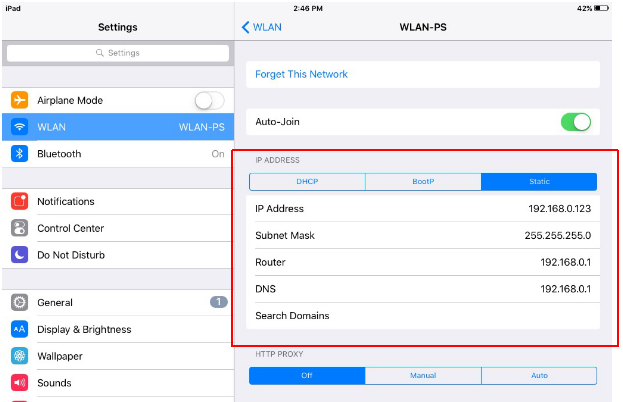
為 iPad 設定固定 IP 位址。
由於 TL-WPS510U 的預設 IP 位址為 192.168.0.10,因此需要將 iPad 設定於相同網段:
192.168.0.x / 255.255.255.0
步驟 4
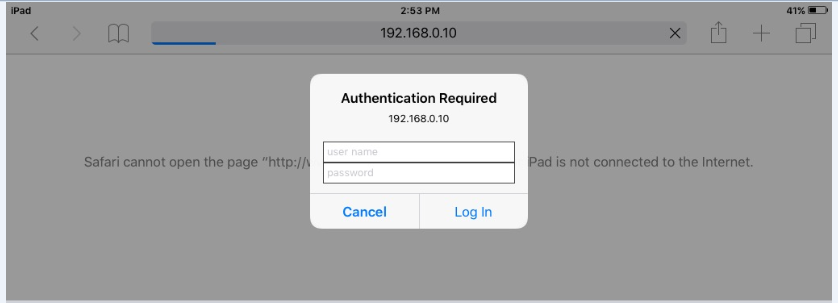
開啟 Safari,於網址列輸入:
192.168.0.10
即可登入 TL-WPS510U 管理介面。
使用以下預設帳號資訊:
- Username:admin
- Password:admin
然後進入:
Setup → TCP/IP → Use the following TCP/IP settings
輸入 Print Server 的 IP 資訊。
注意:TL-WPS510U 預設 IP 為 192.168.0.10,可能與您路由器所在網段不同。因此需要修改為與路由器相同網段的 IP 位址。
以本範例為例:
- Router Gateway:10.0.0.1
- IP Range:10.0.0.*
設定如下:
- IP Address:10.0.0.10
- Subnet Mask:255.255.255.0
- Default Router:10.0.0.1
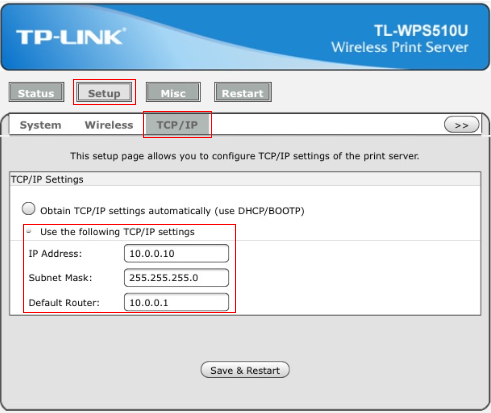
點擊 Save & Restart 並等待設備重新啟動。
步驟 5
返回 iPad,將 Wi‑Fi 的固定 IP 改為:
10.0.0.123 / 255.255.255.0
然後重新連接 Ad-Hoc 網絡 WLAN-PS。
如忘記如何修改 IP 設定,請參閱步驟 3。
步驟 6
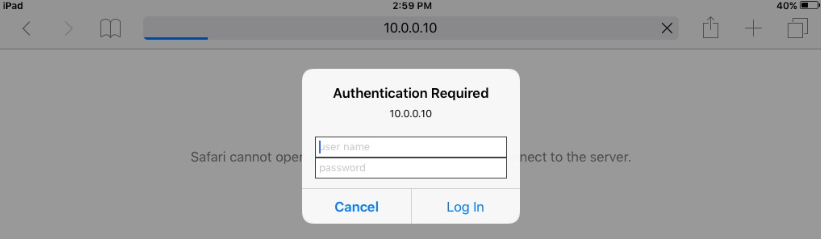
使用新的 IP 位址登入 TL-WPS510U(本範例為 10.0.0.10),並依據您的無線網絡設定配置無線參數。
進入:
Setup → Wireless
向下捲動至頁面底部,在 Site Survey 清單中找到您的路由器 Wi‑Fi 並點選。
於 Advanced Settings 中:
- 選擇與路由器相同的 Security Type(加密類型)
- 輸入 Wi‑Fi 密碼
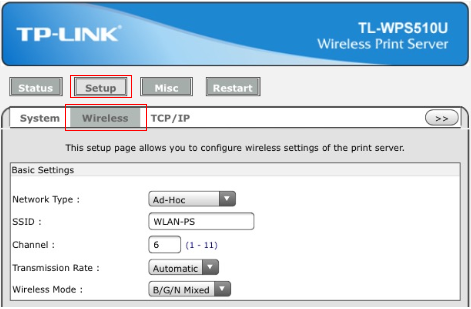
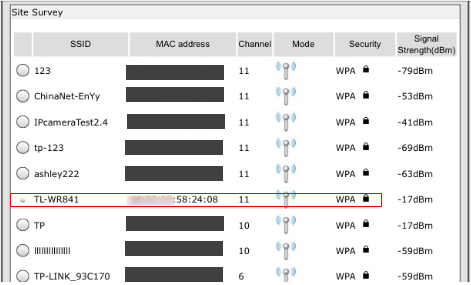
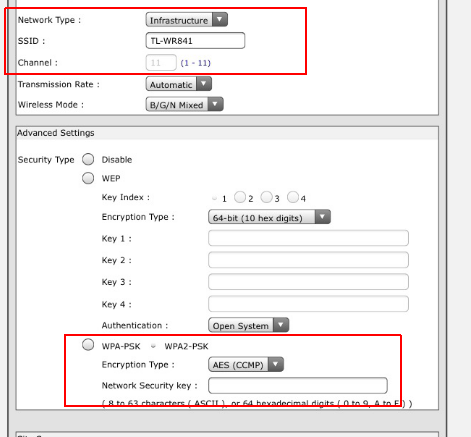
點擊 Save & Restart,再次等待設備重新啟動。
至此,TL-WPS510U 已成功連接至主要路由器的 Wi‑Fi,接下來開始在 Windows 10 上安裝。
步驟 7
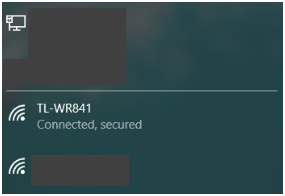
回到 Windows 10 筆記型電腦,連接至同一台無線路由器的 Wi‑Fi。
步驟 8
為印表機新增 Standard TCP/IP Port。
前往:
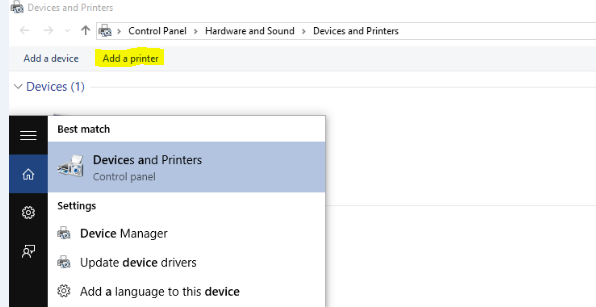
Control Panel → Hardware and Sound → Devices and Printers
步驟 9
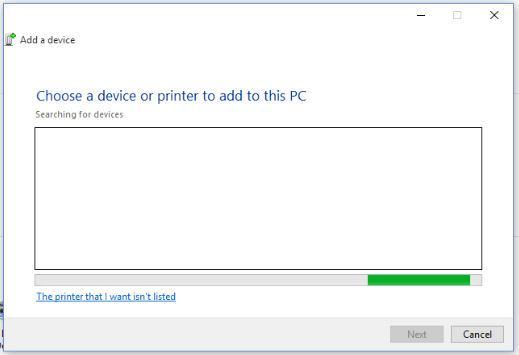
點擊 Add a Printer。
系統會自動搜尋印表機,請忽略搜尋結果,直接點擊:
The printer that I want isn’t listed
步驟 10
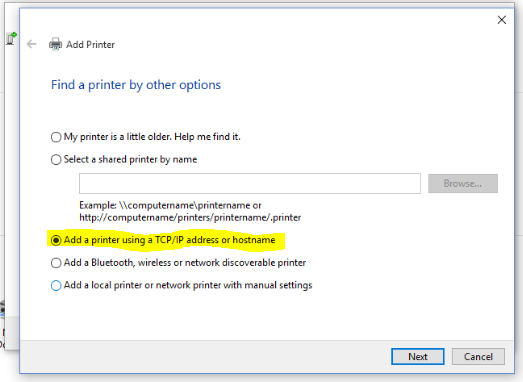
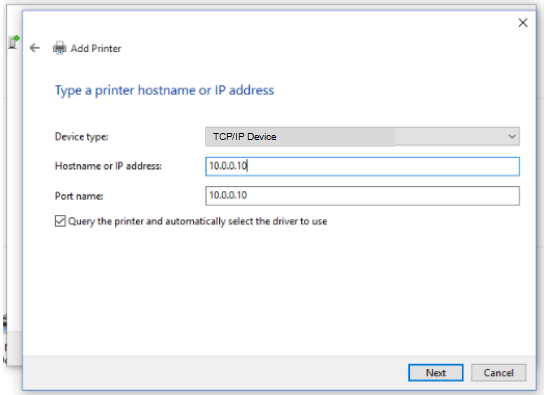
選擇:
TCP/IP Device
並輸入 TL-WPS510U 的 IP 位址(本範例為 10.0.0.10),然後按 Next。
步驟 11
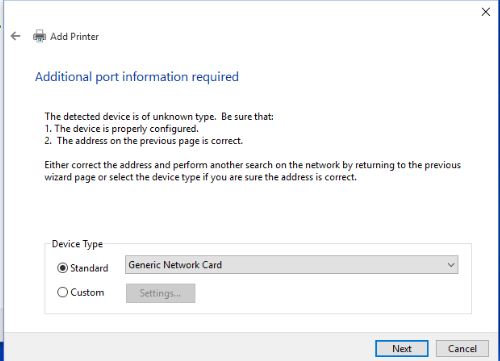
出現以下畫面時直接按 Next。
步驟 12
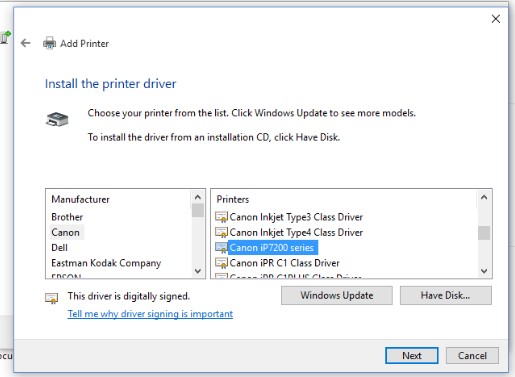
選擇對應的印表機驅動程式後按 Next。
若清單中沒有您的印表機型號,可點擊:
Have Disk...
手動安裝印表機驅動程式。
步驟 13
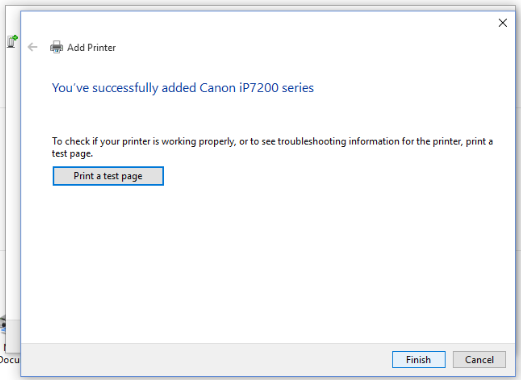
完成安裝後,建議先執行:
Print a test page
測試列印功能是否正常。
至此安裝完成。
您可於以下位置查看已新增的印表機:
Control Panel → Hardware and Sound → Devices and Printers
這篇faq是否有用?
您的反饋將幫助我們改善網站


TP-Link Community
Still need help? Search for answers, ask questions, and get help from TP-Link experts and other users around the world.