How to Use Channel Zero to View Multiple Cameras on VIGI NVR
Contents
Configure Channel Zero in the NVR GUI
Configure Channel Zero in the Web Management Page
Introduction
The channel zero function integrates multiple channels into a single new channel, enabling real-time viewing of various channels by pulling a single zero-channel stream. This article introduces how to configure channel zero on the VIGI NVR. It also includes how to view the stream through the RTSP protocol.
Requirements
- VIGI NVR
- A PC with RTSP-compatible streaming software (e.g., VLC) installed
Configuration
Configure Channel Zero in the NVR GUI
Step 1. Log in to NVR’s management page.
Step 2. Right-click on the Live View screen and click Settings in the Main Menu.
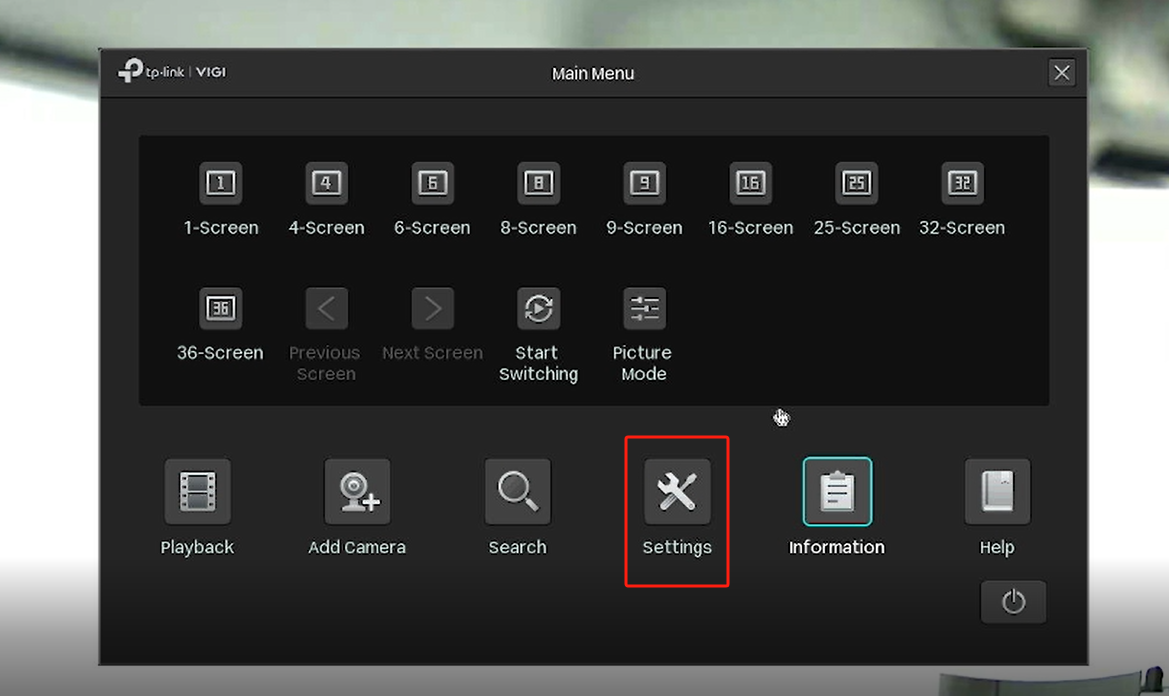
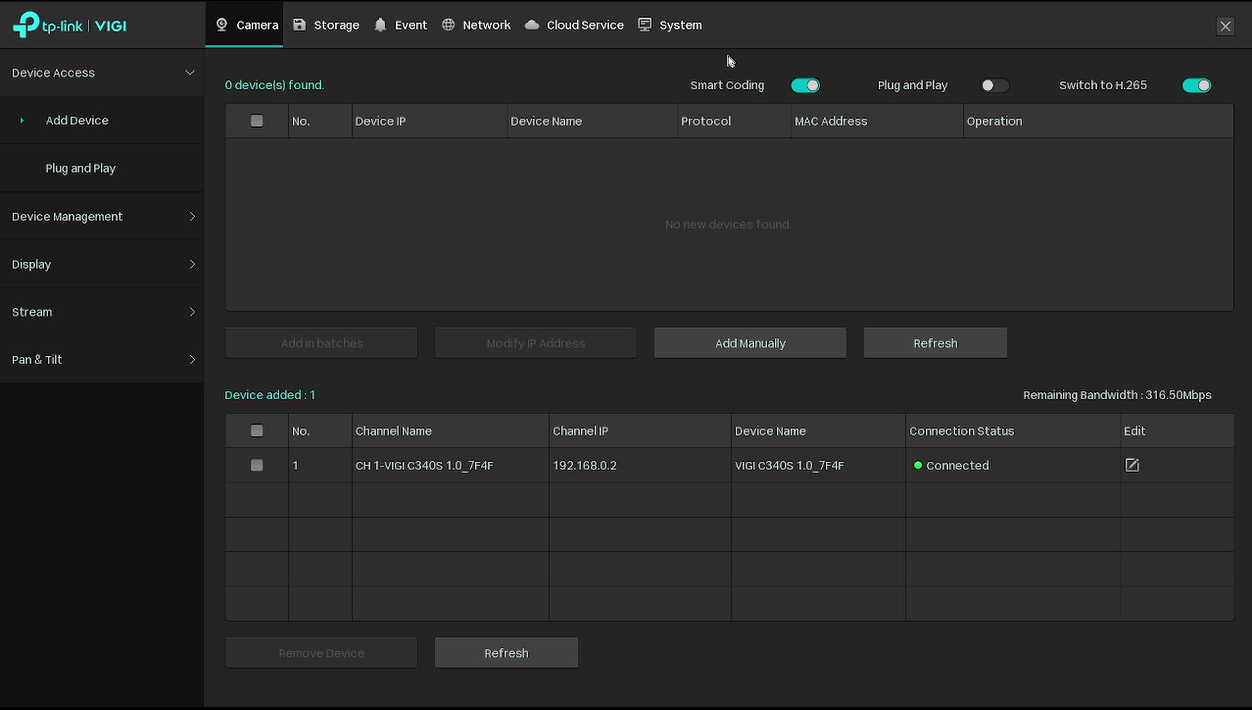
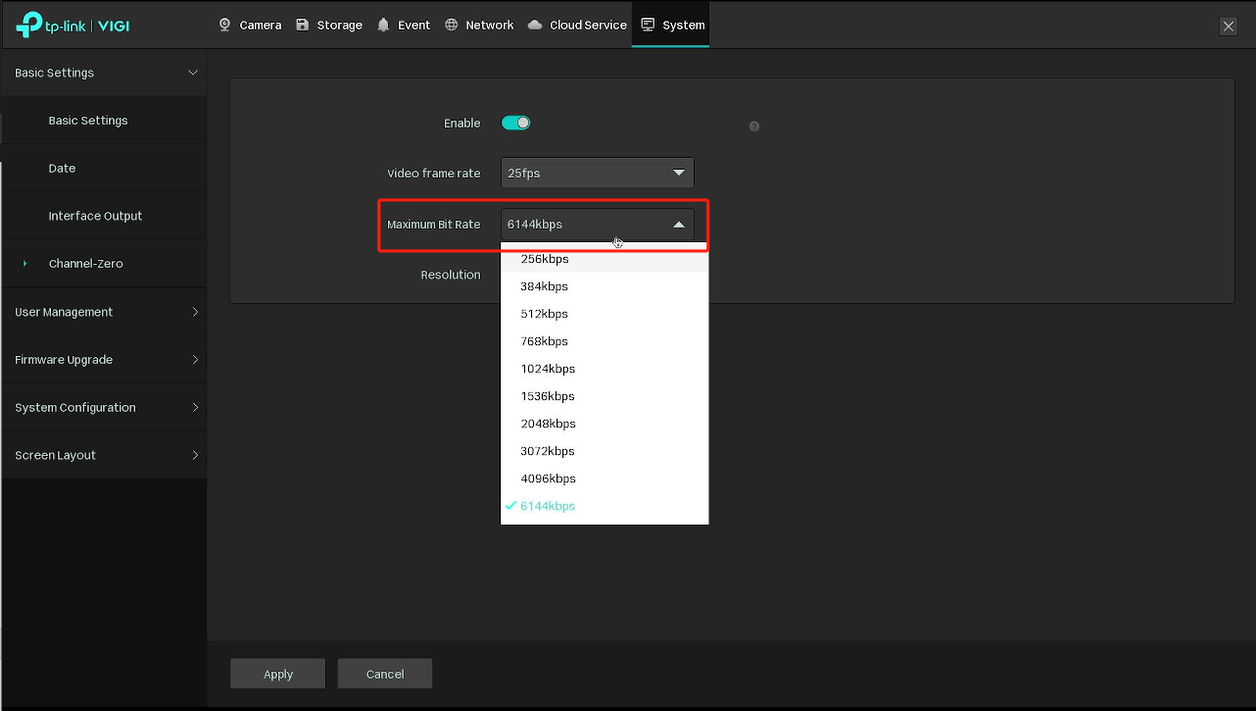
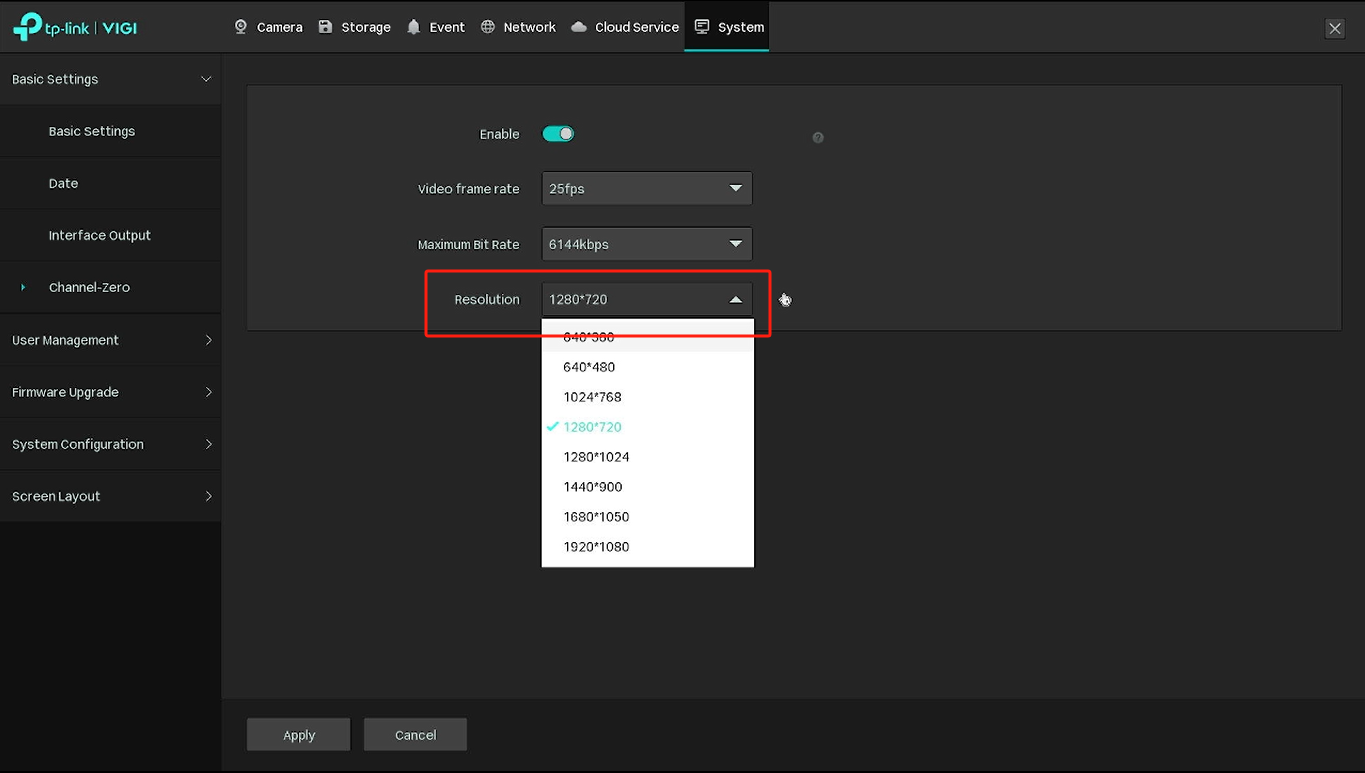
Step 3. Go to System > Basic Settings > Channel-Zero, check the box to enable the function.
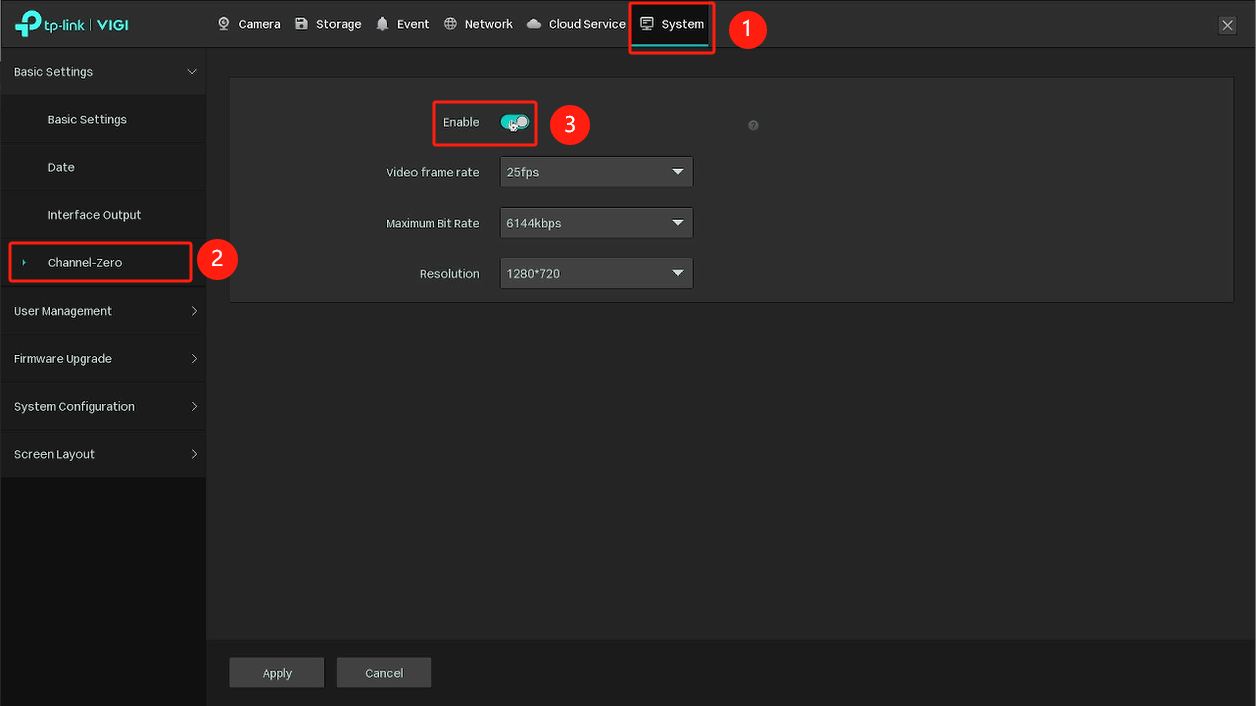
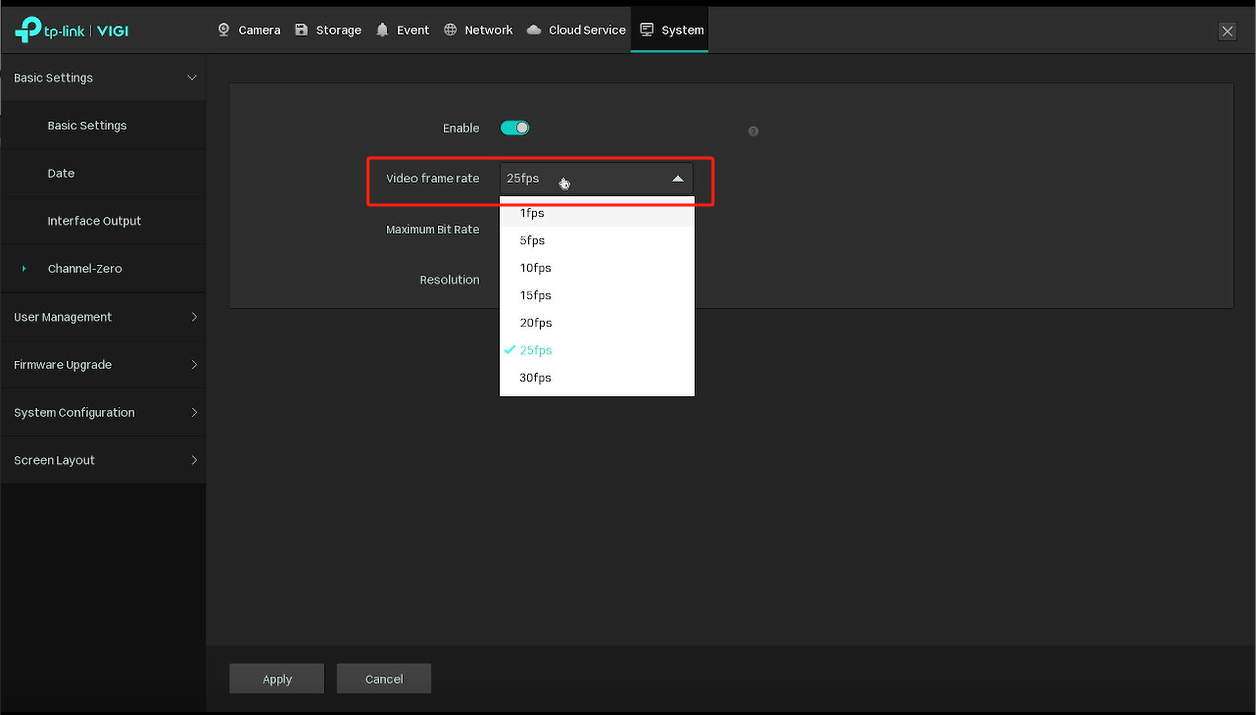
Step 4. You can modify the video frame rate, maximum bit rate, and resolution on this page.
Step 5. Add your NVR to streaming software. (using VLC as an example).
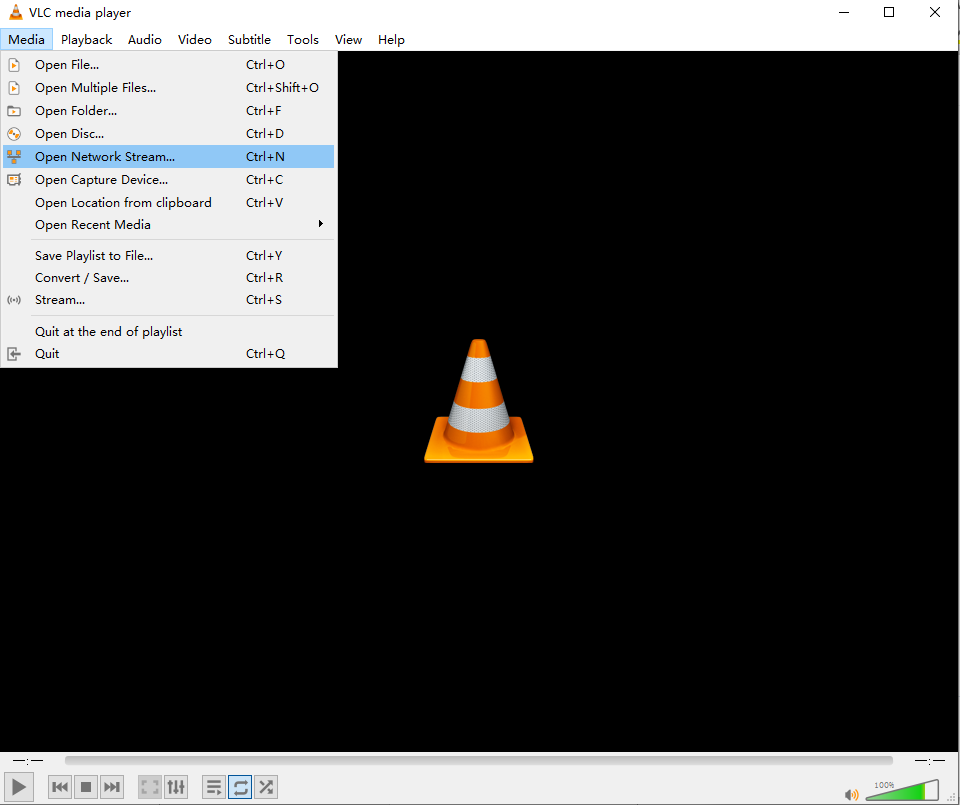
Open the VLC software, select Media > Open Network Stream.
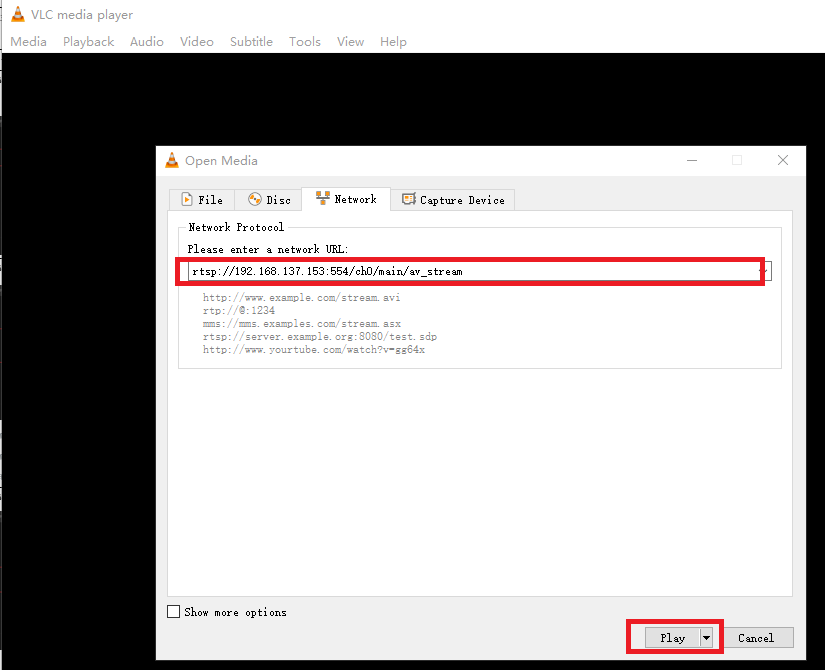
Step 6. Fill in the URL of the NVR. Then click Play.
Note:
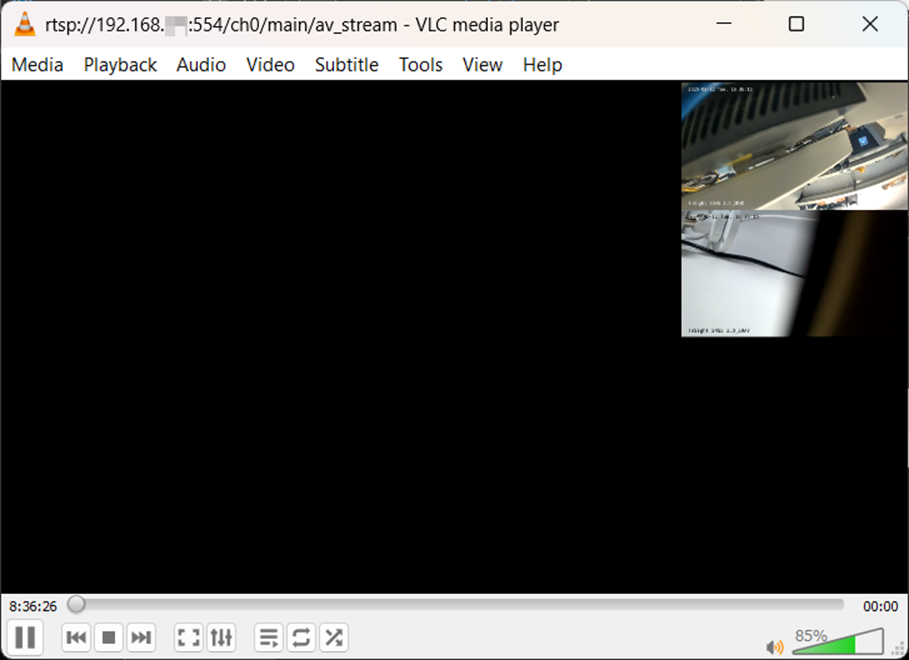
The URL of the RTSP live stream for the VIGI NVR channel zero will be: rtsp://IP Address:554/ch0/main/av_stream.
NVR’s IP address can be found at Settings> Network > Connection.
Step 7. Enter the NVR device user name and password.
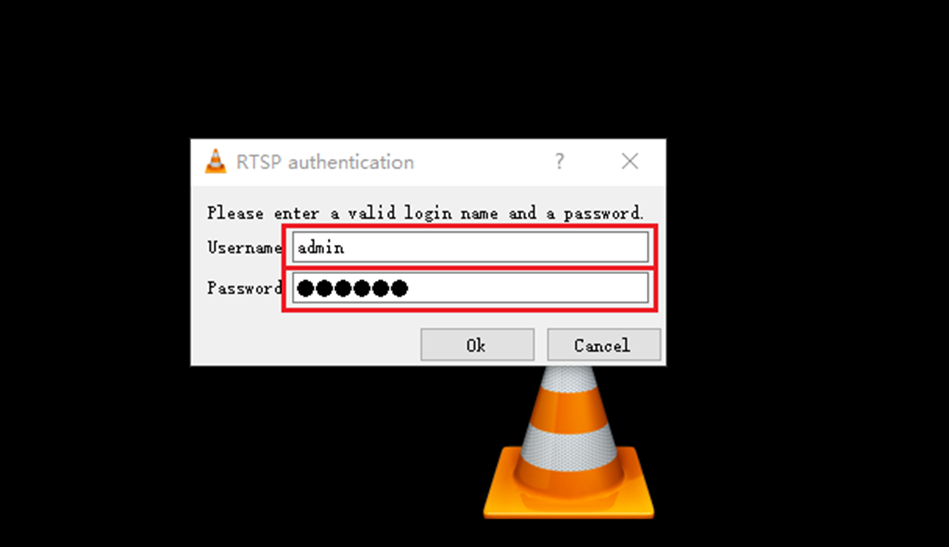
Note: When using VLC to preview a zero-channel screen, please stay on the preview screen on the NVR GUI.
Step 8. Now you can see a zero-channel screen via VLC.
Configure Channel Zero in the Web Management Page
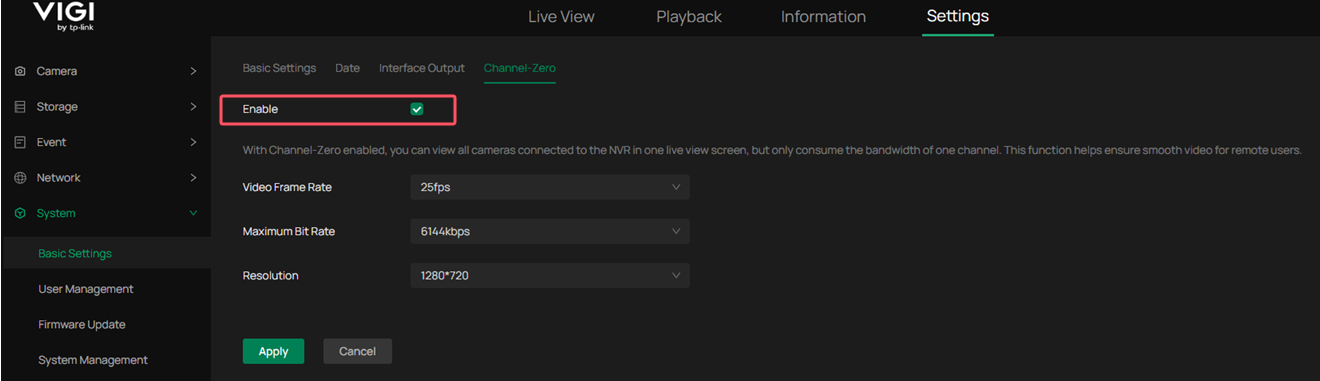
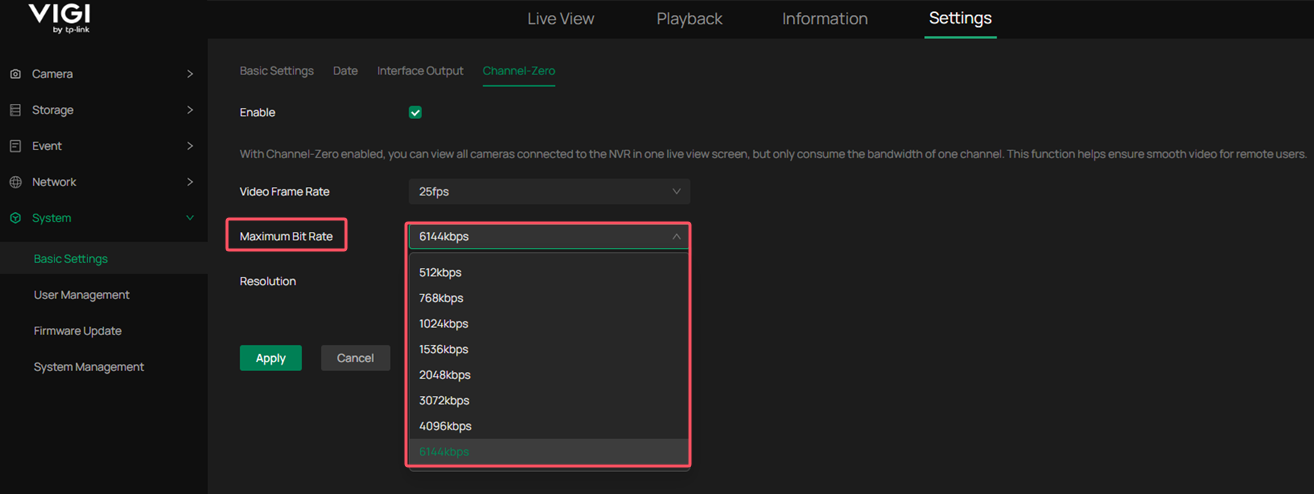
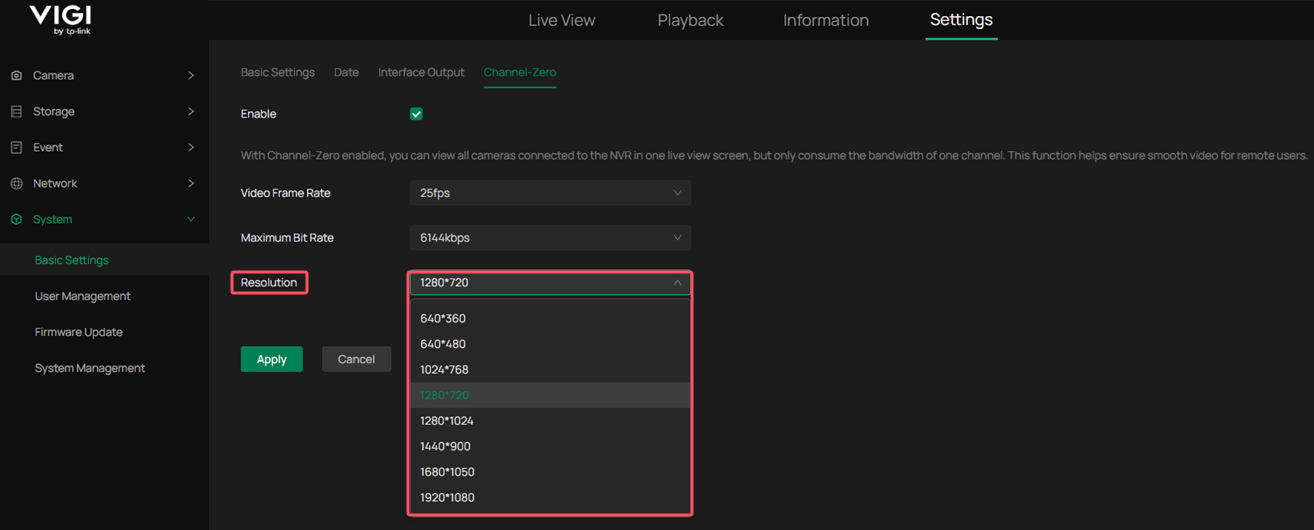
Step 1. Log in to the NVR’s management web interface, navigate to Settings > System > Basic Settings > Channel-Zero, and enable the function by checking the box.
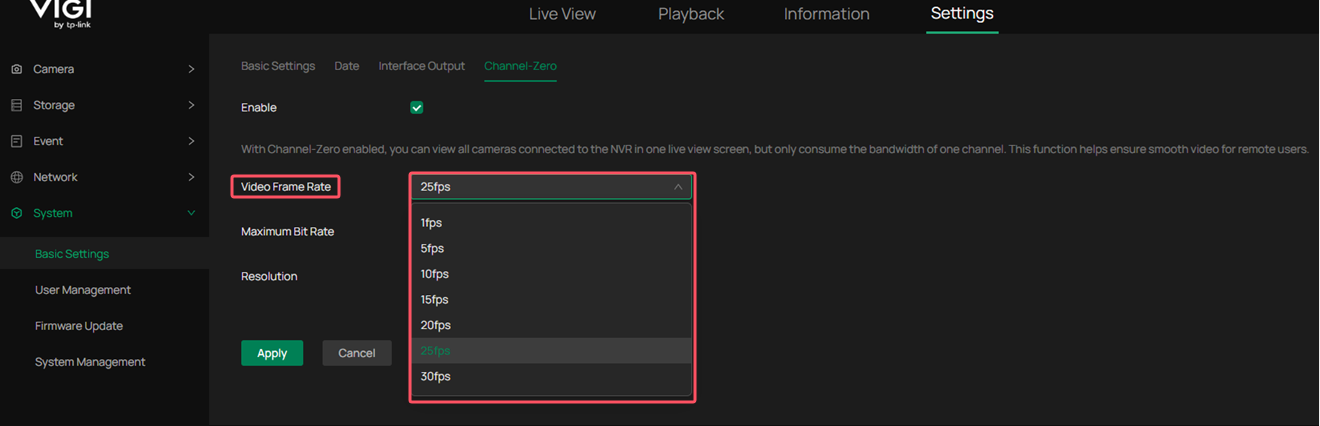
Step 2. You can modify the video frame rate, maximum bit rate, and resolution on this page.
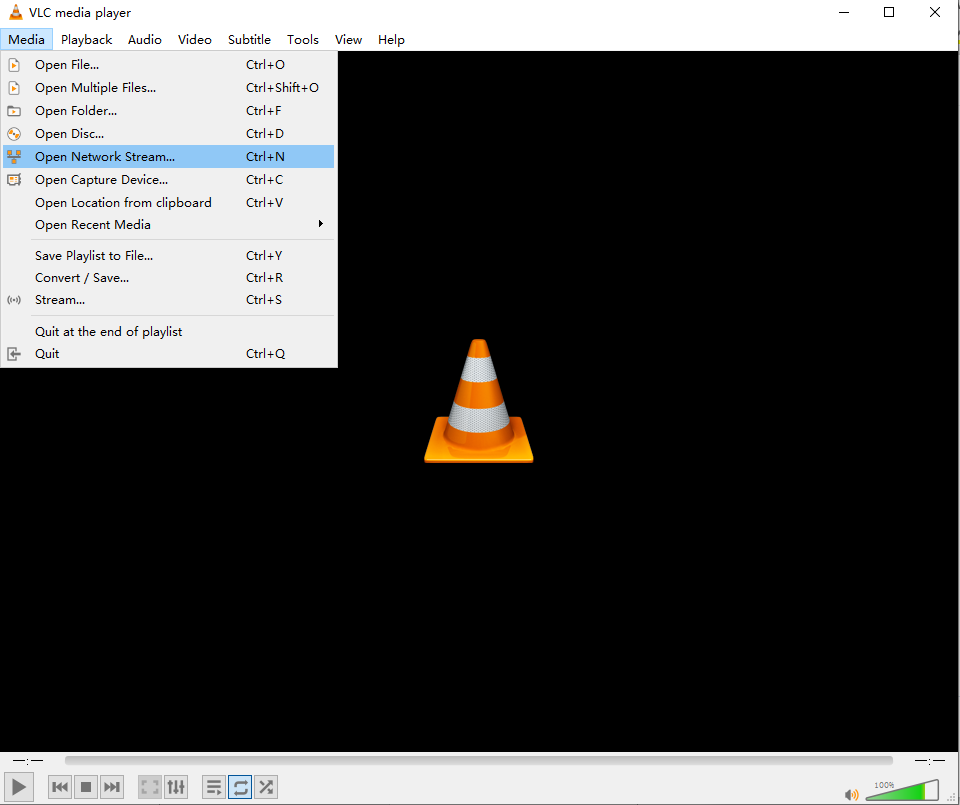
Step 3. Add your NVR to streaming software. (using VLC as an example).
Open the VLC software, select Media > Open Network Stream.
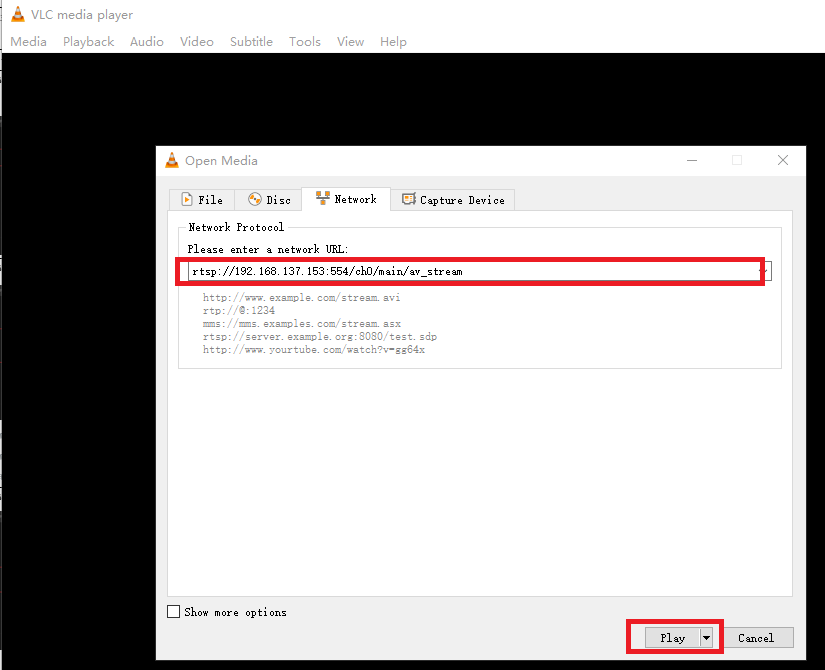
Step 4. Fill in the URL of the NVR. Then click Play.
Note:
The URL of the RTSP live stream for the VIGI NVR channel zero will be: rtsp://IP Address:554/ch0/main/av_stream.
NVR’s IP address can be found at Settings> Network > Connection.
Step 5. Enter the NVR device user name and password.
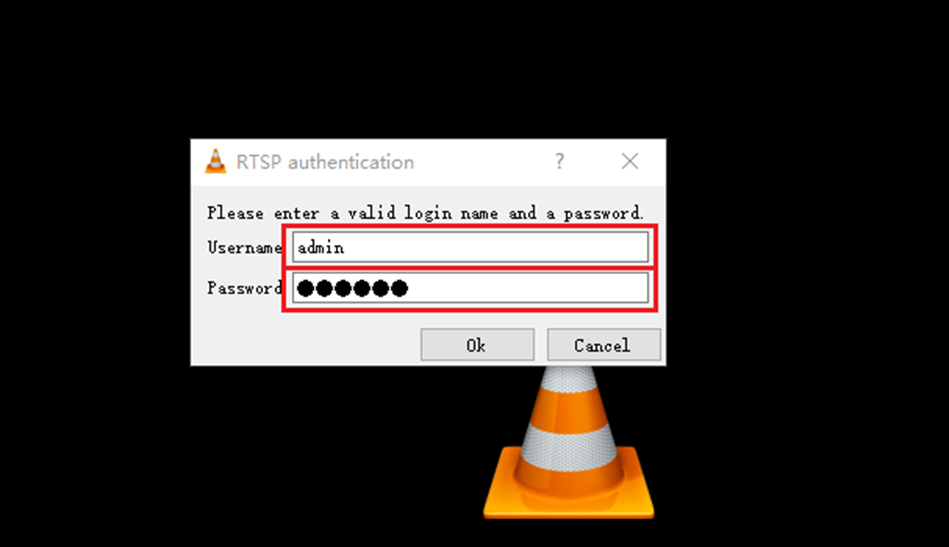
Note: When using VLC to preview a zero-channel screen, please stay on the preview screen on the NVR GUI.
Step 6. Now you can see a zero-channel screen via VLC.
Conclusion
With the steps above, you have successfully configured the channel zero function on VIGI NVR.
To learn more about each function and configuration, please visit Support Home to download or check the manual for your product.
Ищете больше информации?
Полезен ли этот FAQ?
Ваши отзывы помогают улучшить этот сайт.



TP-Link Community
Still need help? Search for answers, ask questions, and get help from TP-Link experts and other users around the world.
From United States?
Получайте информацию о продуктах, событиях и услугах для вашего региона.