如何安裝支援太陽能板的攝影機 4K(雙鏡頭套組)
Solar Cam 2K Dual(雙攝影機套組)包含一台 CentralHubTM 與兩台太陽能攝影機,這是一套能為您家提供電力、防護與連線的系統。本文提供逐步說明,協助您根據需求進行安裝。
安裝您的攝影機
為電池充電
電池出廠時已部分充電。我們建議在安裝前將電池完全充飽電。完全充飽電最多可能需要 6 小時。
註:
1. 使用前請撕下攝影機上的保護膜。
2. 設定完成後,請在 Tapo App 上檢查電池狀態。
3. 攝影機掉落後可能無法開機。請插入 USB 充電器以再次開機。
4. 不使用時,請將連接埠緊密蓋好,以確保防水防塵效能。
5. 請勿用力撕下矽膠部分,否則可能會影響防水防塵效能。
6. 請使用隨附的 USB 纜線為電池充電。某些第三方纜線可能會導致充電緩慢或失敗。
7. 當您插入 USB 充電器時,LED 指示燈應會快速閃爍橘燈 3 秒鐘。如果沒有,請確認電源已開啟並檢查您的連線。
太陽能板安裝提示
太陽能板的位置和傾斜角度會大大影響太陽能效率。
- 選擇一個讓太陽能板全年都能接收最多陽光的位置。定期擦拭面板以清除灰塵和碎屑。
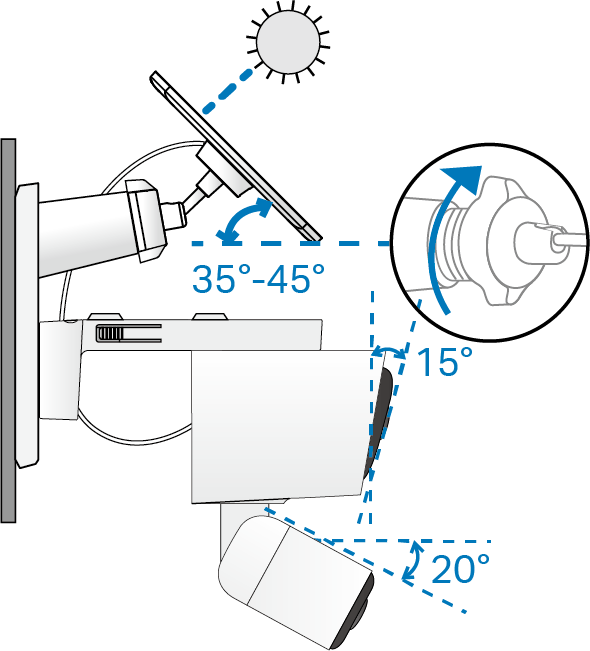
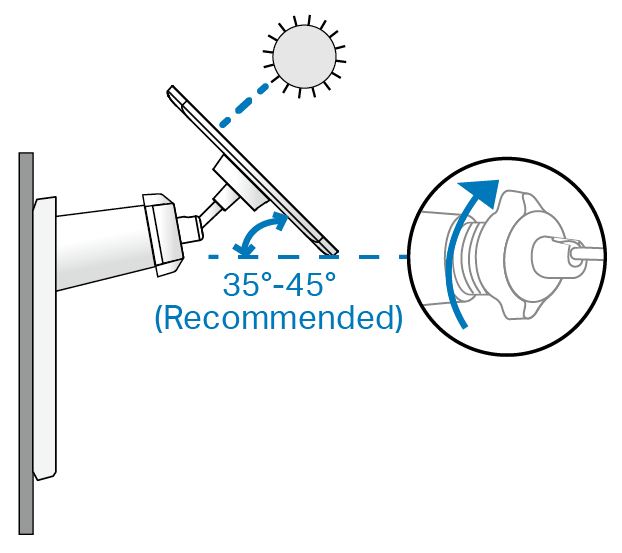
- 在北半球將面板朝南放置,在南半球則朝北放置。面板與水平地面之間的建議傾斜角度為 35° ~ 45°。
攝影機安裝提示
- 避免放置在窗戶或玻璃後方。窗戶和玻璃都會阻擋攝影機的移動感測器,導致無法進行移動偵測。
- 選擇您的安裝位置。正確安裝攝影機將可避免頻繁的錯誤警報等問題。
- 避免將攝影機直接對準搖晃的樹木。
- 避免將攝影機對準高流量區域,除非那是您想要監控的位置。
- 避免將攝影機直接對準路燈或陽光。
- 請勿將攝影機倒置。
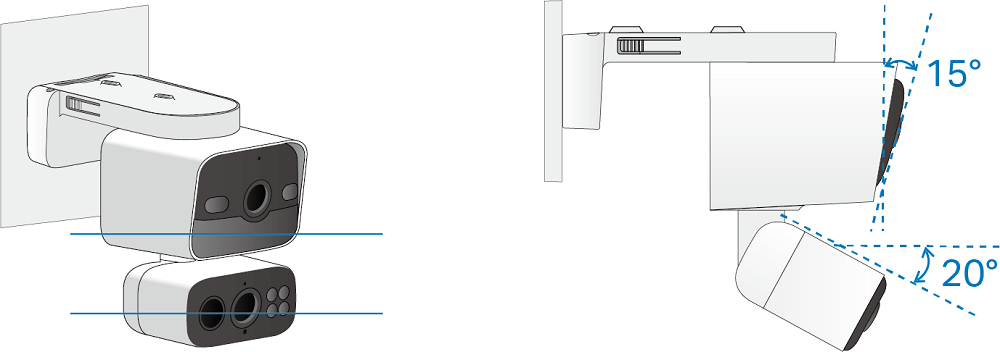
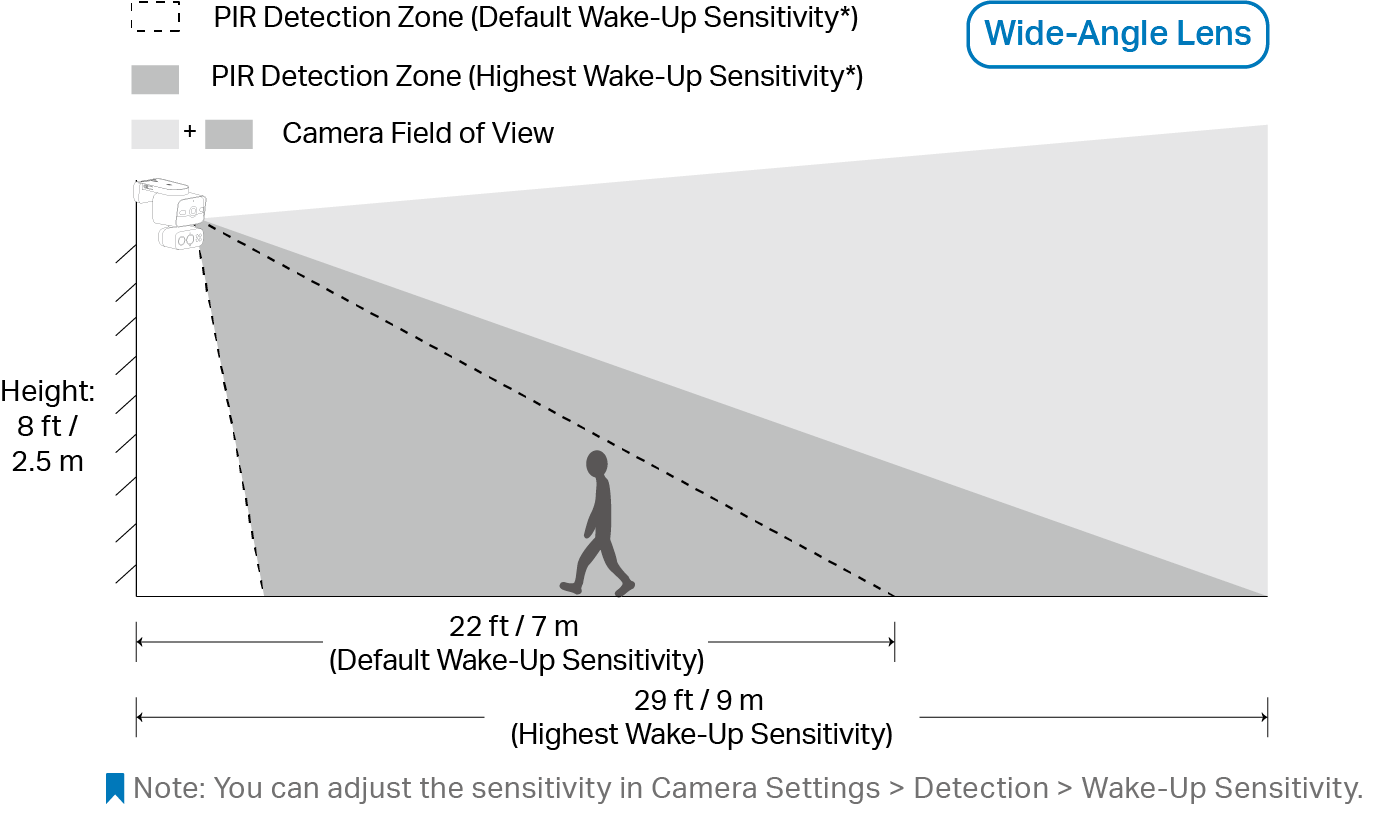
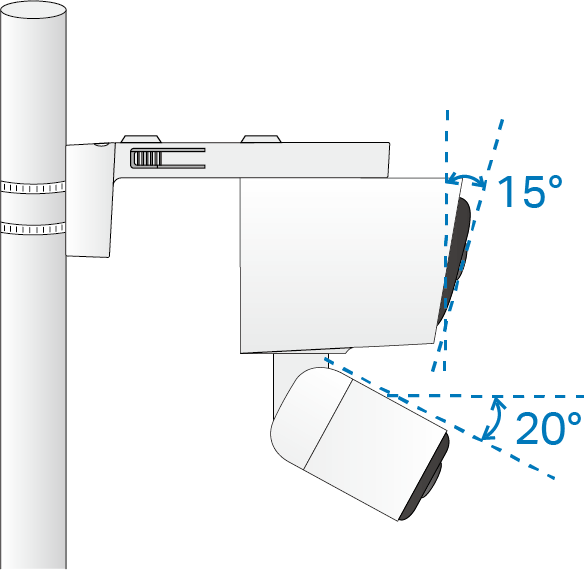
- 為了獲得最佳效果,請保持移動感測器水平,將攝影機的廣角鏡頭向下傾斜約 15°,並將長焦鏡頭向下傾斜約 20°。
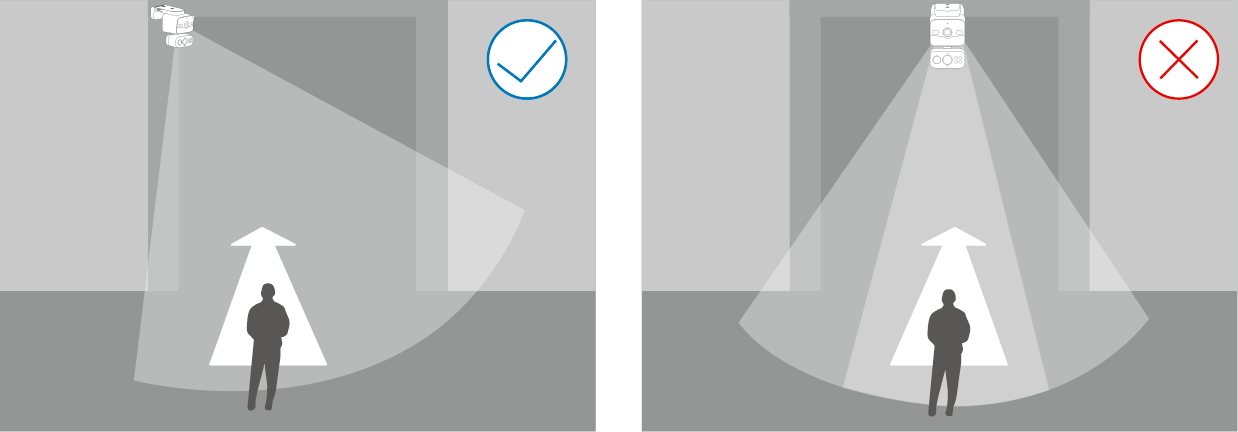
- 將攝影機以特定角度安裝,讓移動物體橫跨鏡頭的視野,將可提供更準確的移動和 AI 偵測。
註:請勿正對著物體移動的方向安裝。
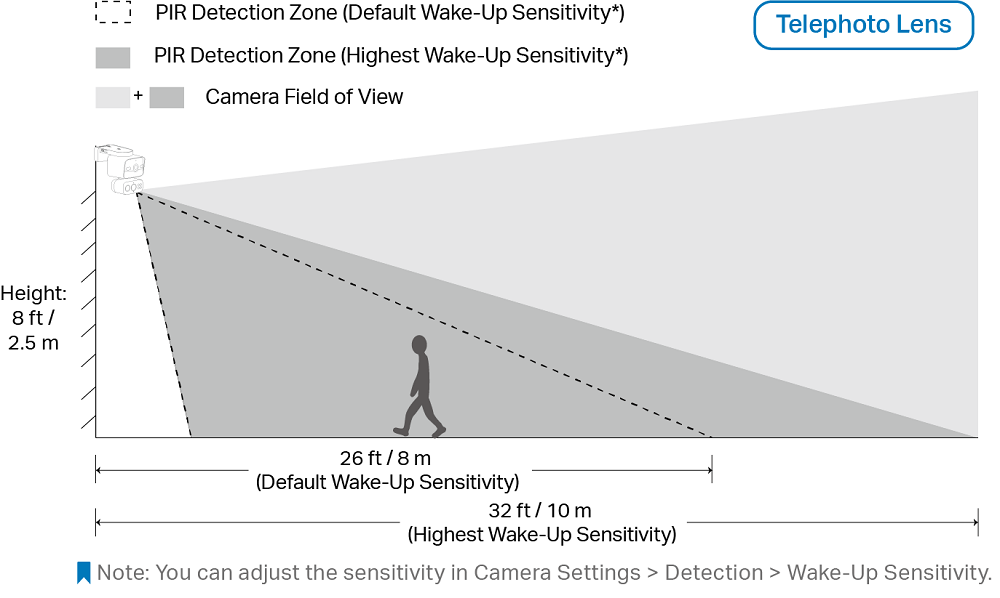
- 為了獲得最佳偵測效能,請將攝影機安裝在距離地面 8 英尺(2.5 公尺)的高處。
註:您可以在「攝影機設定 (Camera Settings) > 偵測 (Detection) > 喚醒靈敏度 (Wake-Up Sensitivity)」中調整靈敏度。
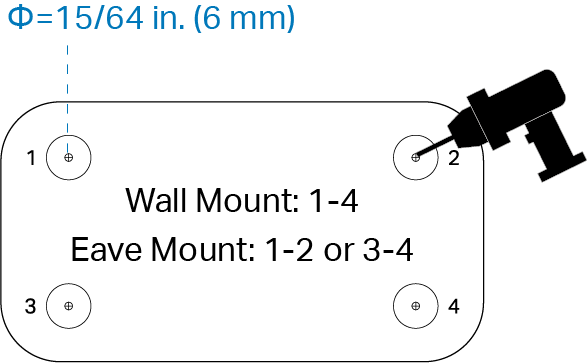
選項 1:整合式安裝
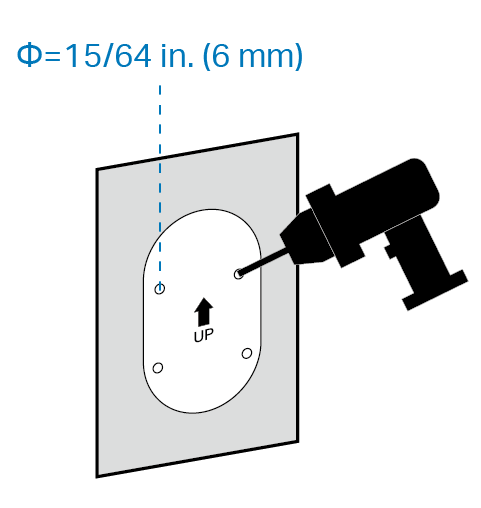
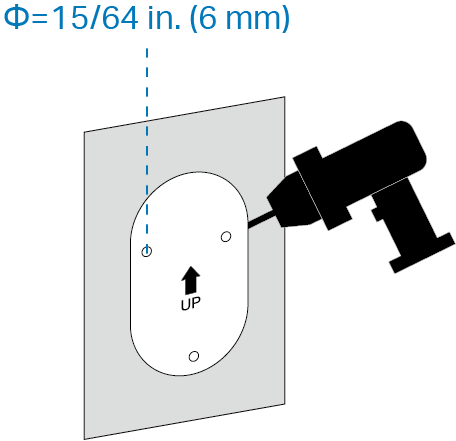
- 將安裝定位貼紙貼在堅固且平整的牆面上。根據定位貼紙鑽出四個孔。
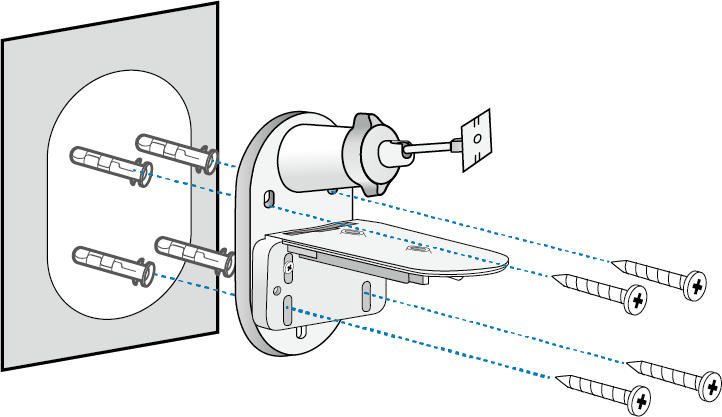
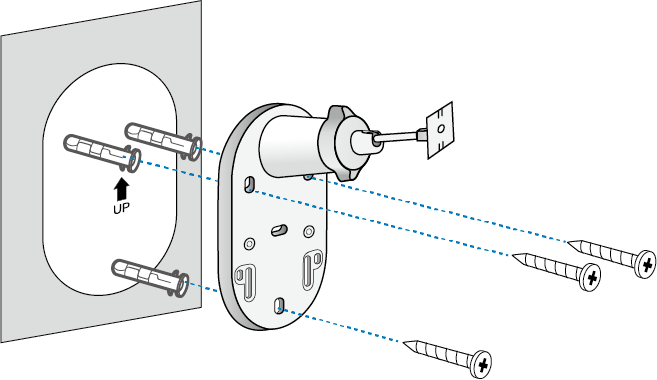
- 將壁錨插入孔中,並使用螺絲將支架固定在壁錨上。
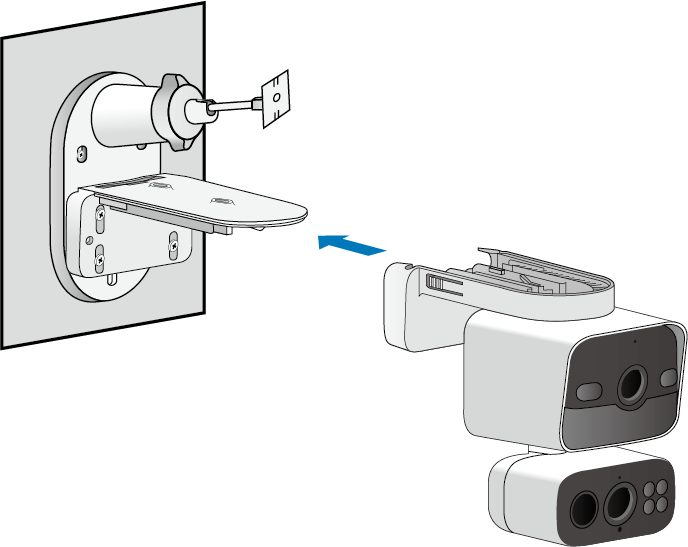
- 將攝影機滑入攝影機支架,直到發出「喀」一聲卡入定位。
- 將太陽能板滑入太陽能板支架,直到發出「喀」一聲卡入定位。
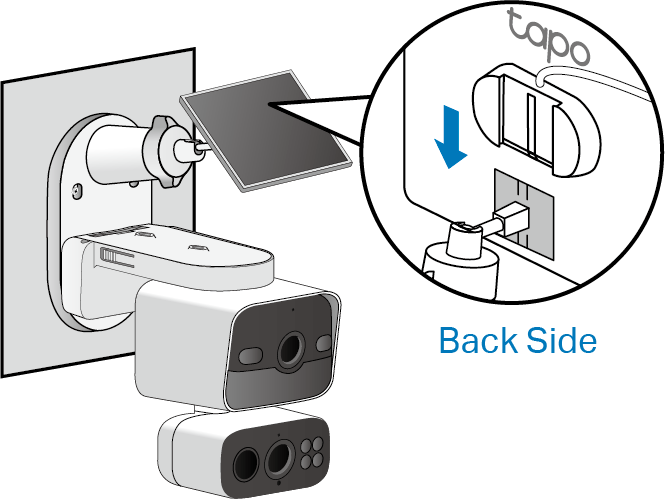
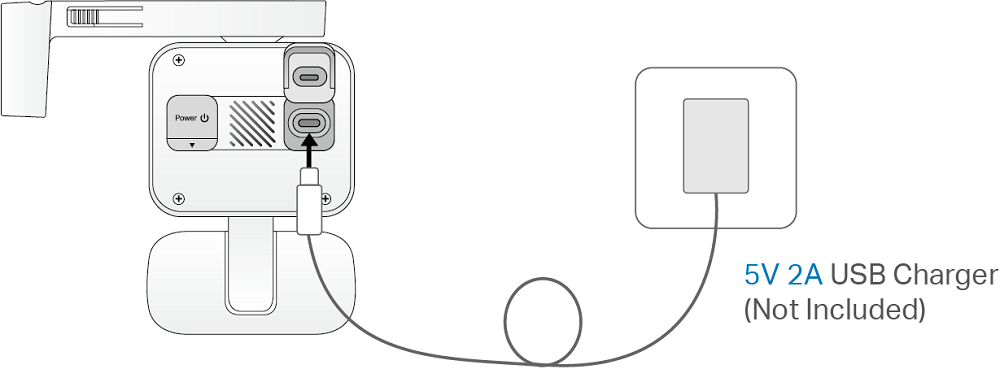
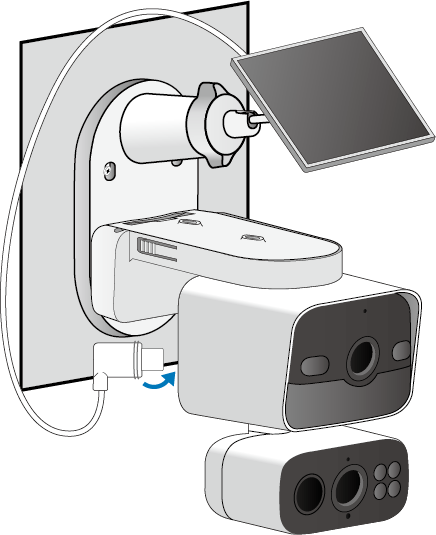
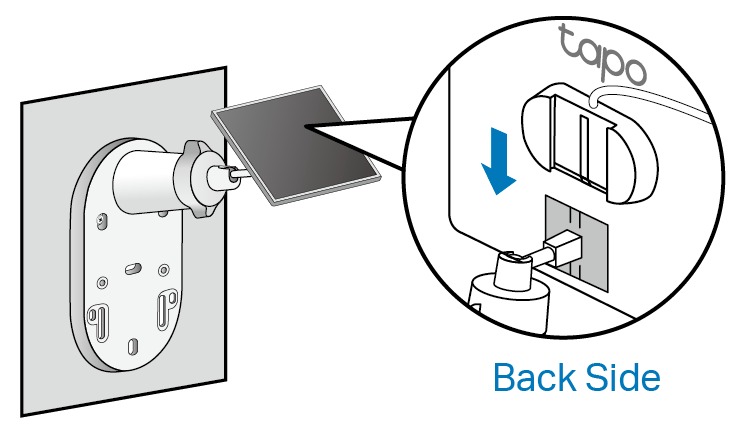
- 將接頭插入攝影機的充電埠直到緊密貼合,即可開始充電。
- (1) 鬆開可調式螺絲,將太陽能板傾斜至所需角度,然後重新鎖緊螺絲。
(2) 將廣角鏡頭向下傾斜約 15°,並將長焦鏡頭向下傾斜約 20°。
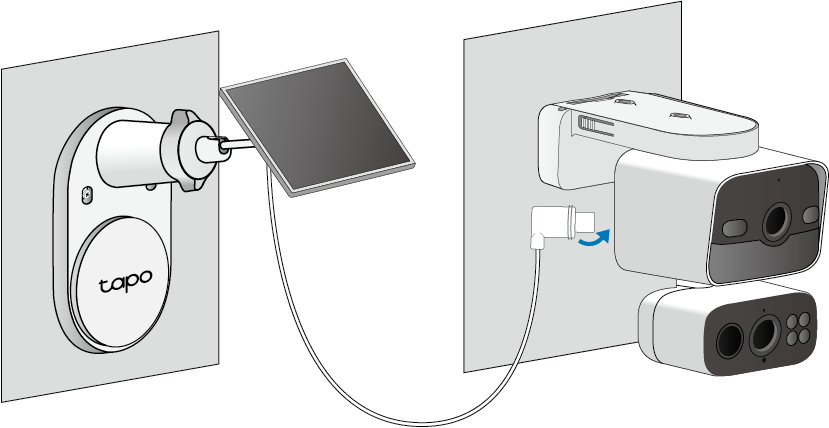
選項 2:獨立安裝
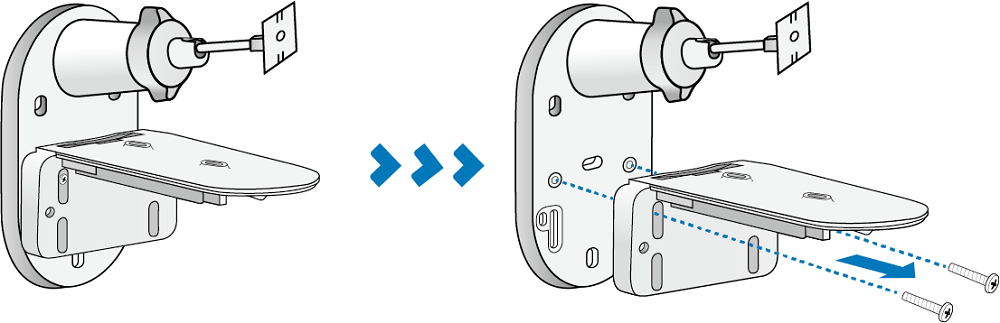
在開始之前,請轉下兩顆支架螺絲,將攝影機支架和太陽能板支架分開。
安裝攝影機(牆面 / 屋簷)
- 將安裝定位貼紙貼在堅固且平整的牆面上。根據定位貼紙鑽出四個孔(牆面安裝)或兩個孔(屋簷安裝)。
- 將壁錨插入孔中,並使用螺絲將攝影機支架固定在壁錨上。
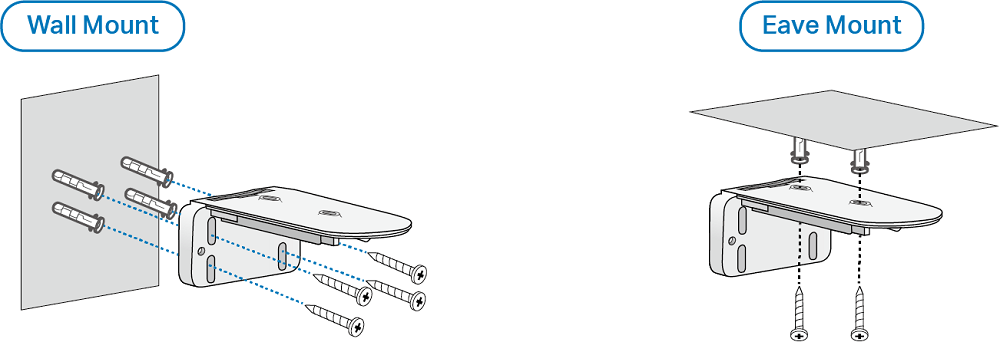
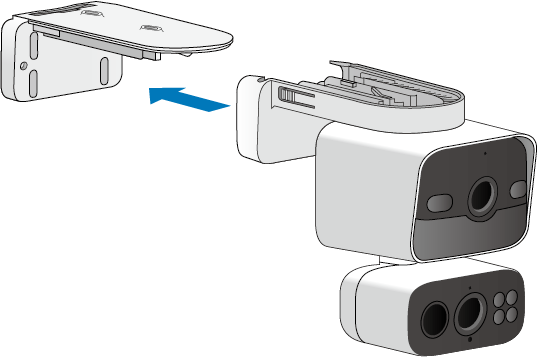
- 將攝影機滑入攝影機支架,直到發出「喀」一聲卡入定位。
- 將廣角鏡頭向下傾斜約 15°,並將長焦鏡頭向下傾斜約 20°。

安裝攝影機(柱子)
- 使用兩個柱子安裝環(環寬 ≤ 0.47 英吋/12 公釐)將支架安裝在柱子上。
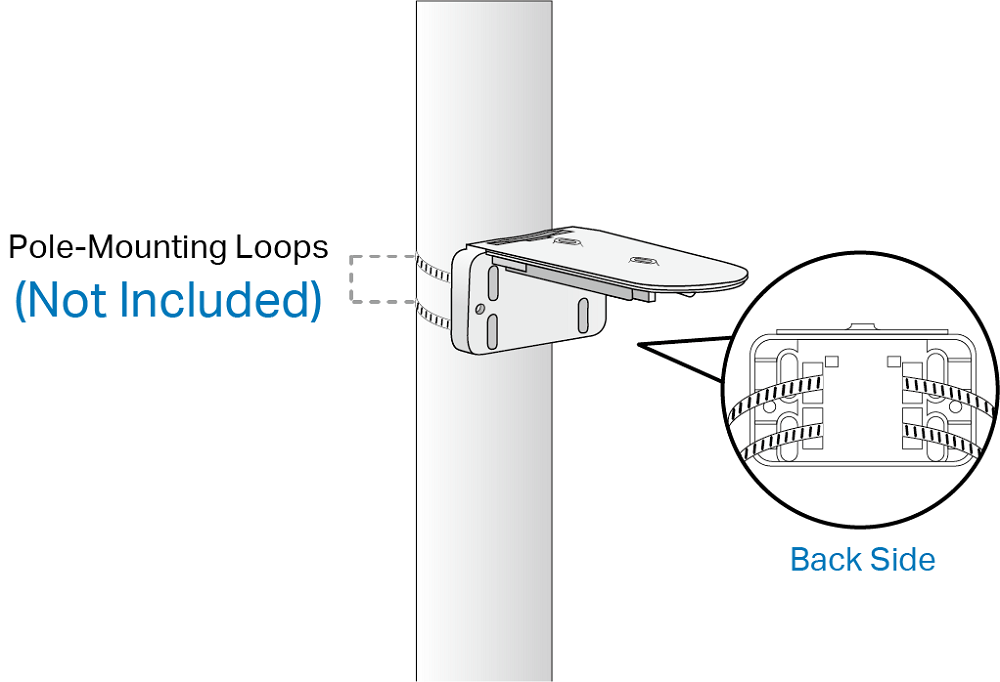
- 將攝影機滑入攝影機支架,直到發出「喀」一聲卡入定位。
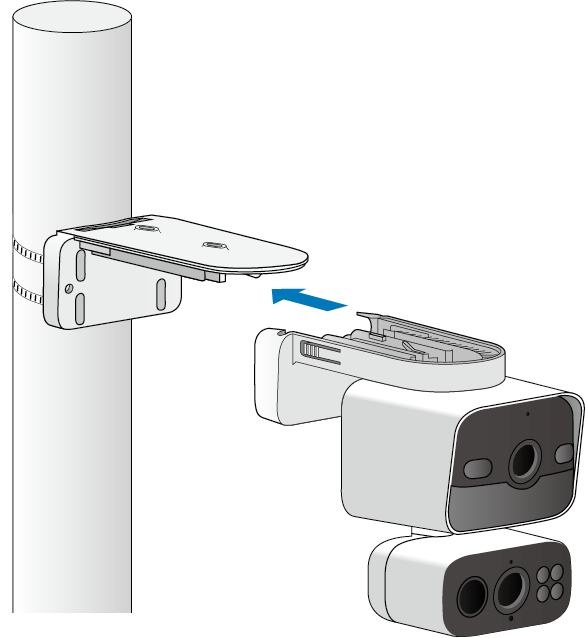
- 將廣角鏡頭向下傾斜約 15°,並將長焦鏡頭向下傾斜約 20°。
安裝太陽能板
- 將安裝定位貼紙貼在堅固且平整的牆面上。根據定位貼紙鑽出三個孔。
- 將壁錨插入孔中,並使用螺絲將太陽能板支架固定在壁錨上。
- 將太陽能板滑入太陽能板支架,直到發出「喀」一聲卡入定位。
- 鬆開可調式螺絲,將太陽能板傾斜至所需角度,然後重新鎖緊螺絲。
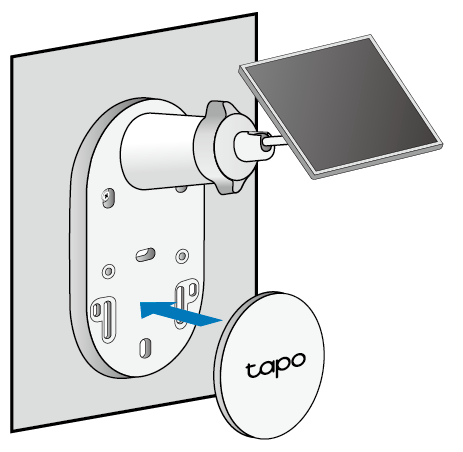
- 將裝飾底蓋安裝到太陽能板支架上。
- 將接頭插入攝影機的充電埠直到緊密貼合,即可開始充電。
如果電源線太短...
請使用隨附的延長線。將接頭插入延長線直到緊密貼合,然後連接至您的攝影機。
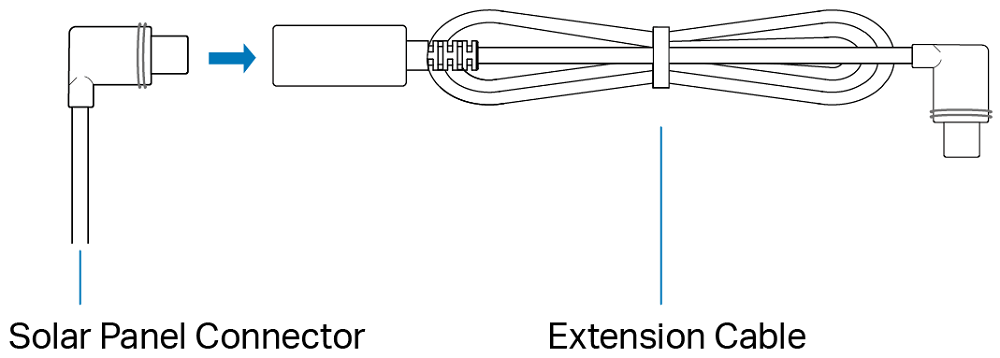
如果電源線太長
使用隨附的束線帶將多餘的線材綑綁起來。束線帶一旦拉緊,就不易調整。若要鬆開束線帶,您必須將其剪斷。

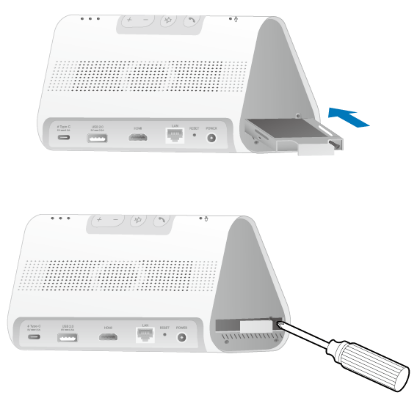
(選用)擴充您的 CentralHubTM 本地儲存空間
智慧 CentralHubTM 內建 16 GB 的本地儲存空間,您也可以安裝額外的 HDD/SSD 硬碟(2.5 吋)來擴充本地儲存空間。
開始之前
- 安裝前請備份硬碟上的所有資料,因為 Tapo 可能需要格式化您的硬碟。
- 當您安裝或移除硬碟時,必須關閉 CentralHubTM 的電源。
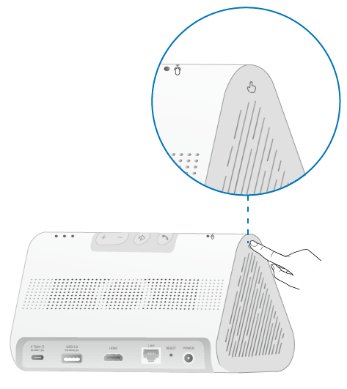
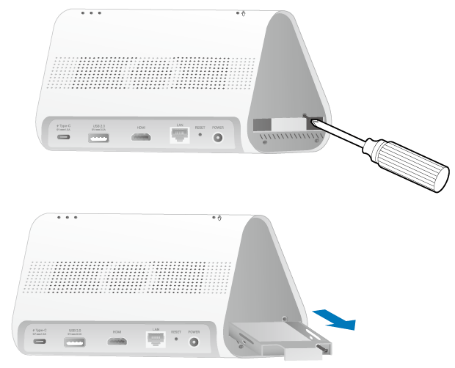
安裝您的硬碟
- 向下推動外蓋將其取下。
 符號標示了您應該按壓的位置。
- 鬆開螺絲並拉出硬碟支架。
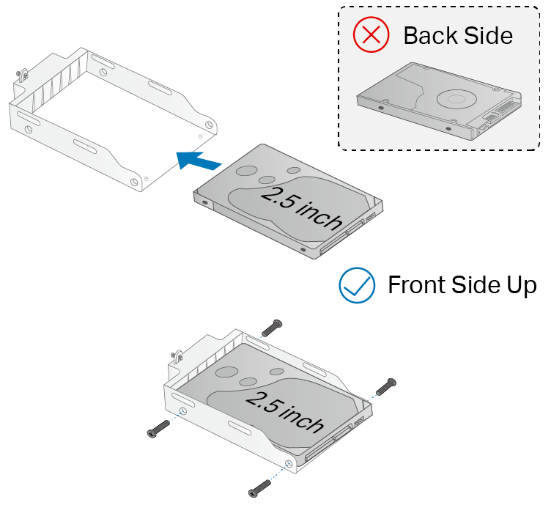
- 將硬碟正面朝上放入支架中。使用螺絲將其固定到位。
- 將支架插回 CentralHubTM。用螺絲固定,然後裝回外蓋。
註:請在 Tapo App 中將硬碟初始化。
更多相關文章
這篇faq是否有用?
您的反饋將幫助我們改善網站

TP-Link Community
Still need help? Search for answers, ask questions, and get help from TP-Link experts and other users around the world.