Table of Contents
VIGI InSight Series Turret Network Camera_Installation Guide
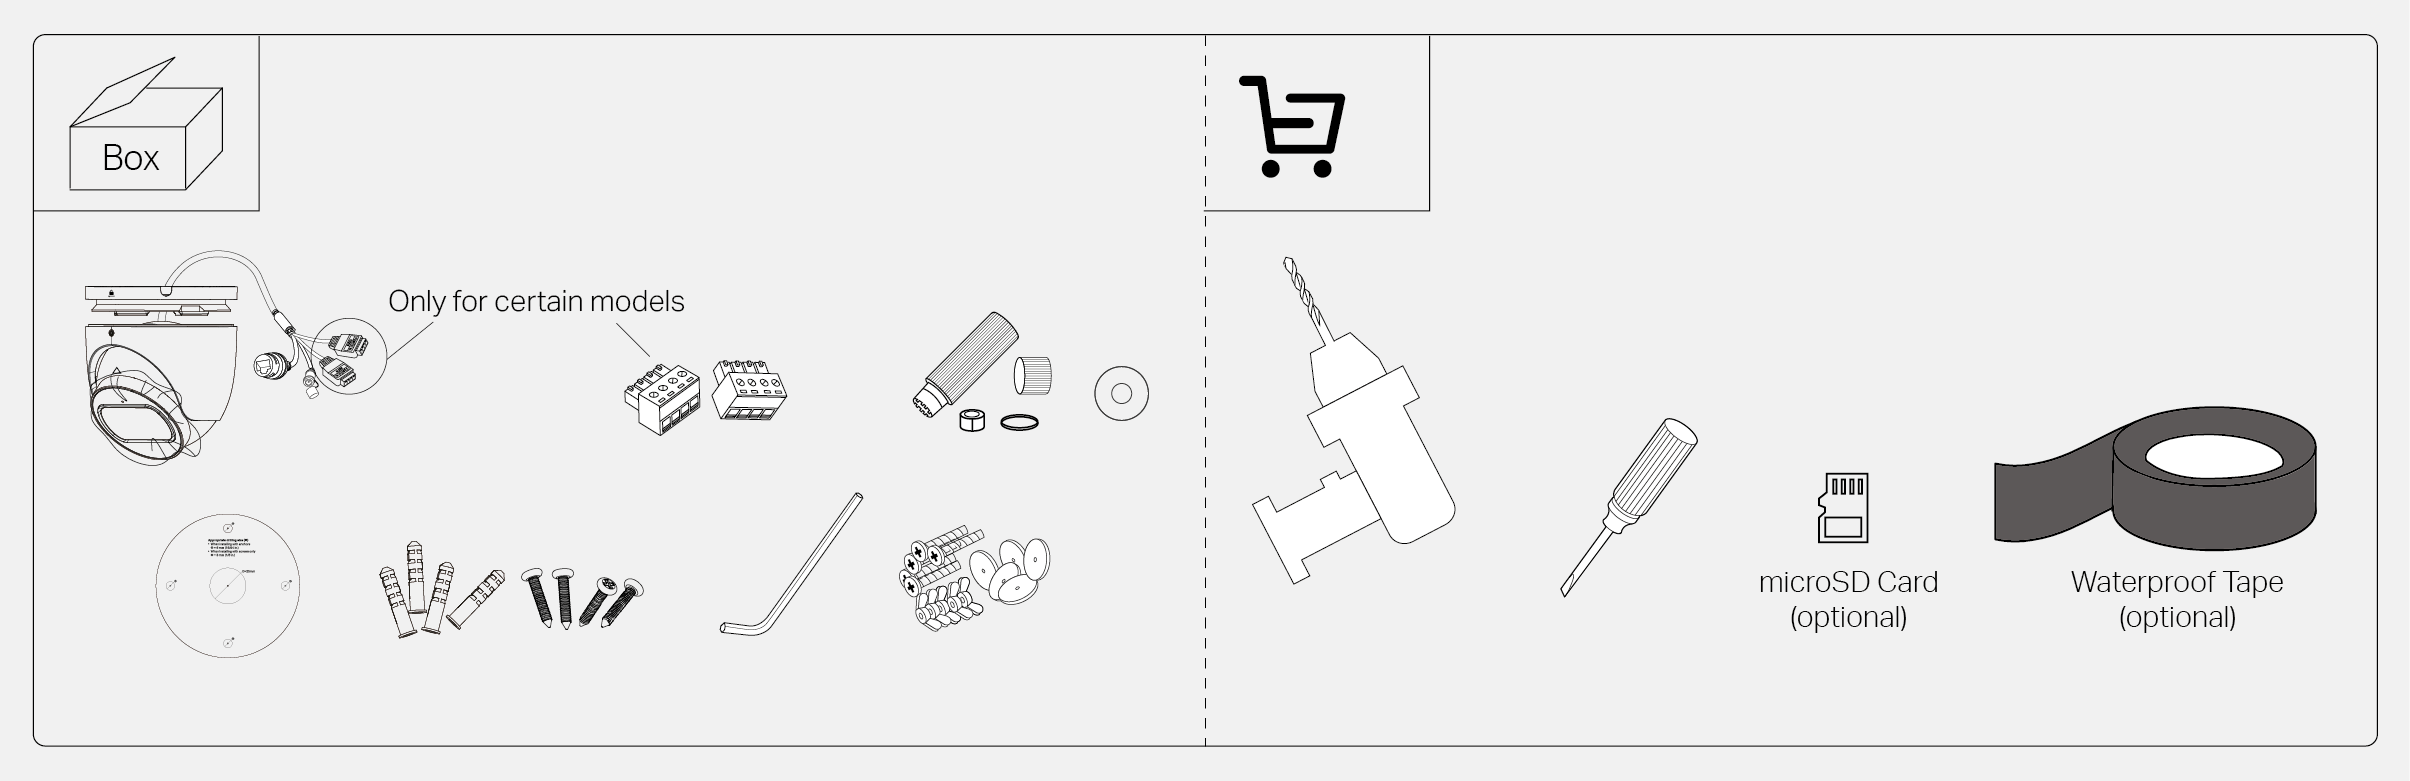
Get Ready
For optimal performance, visit https://www.tp-link.com/support/faq/4841/ to get installation precautions and instructions.
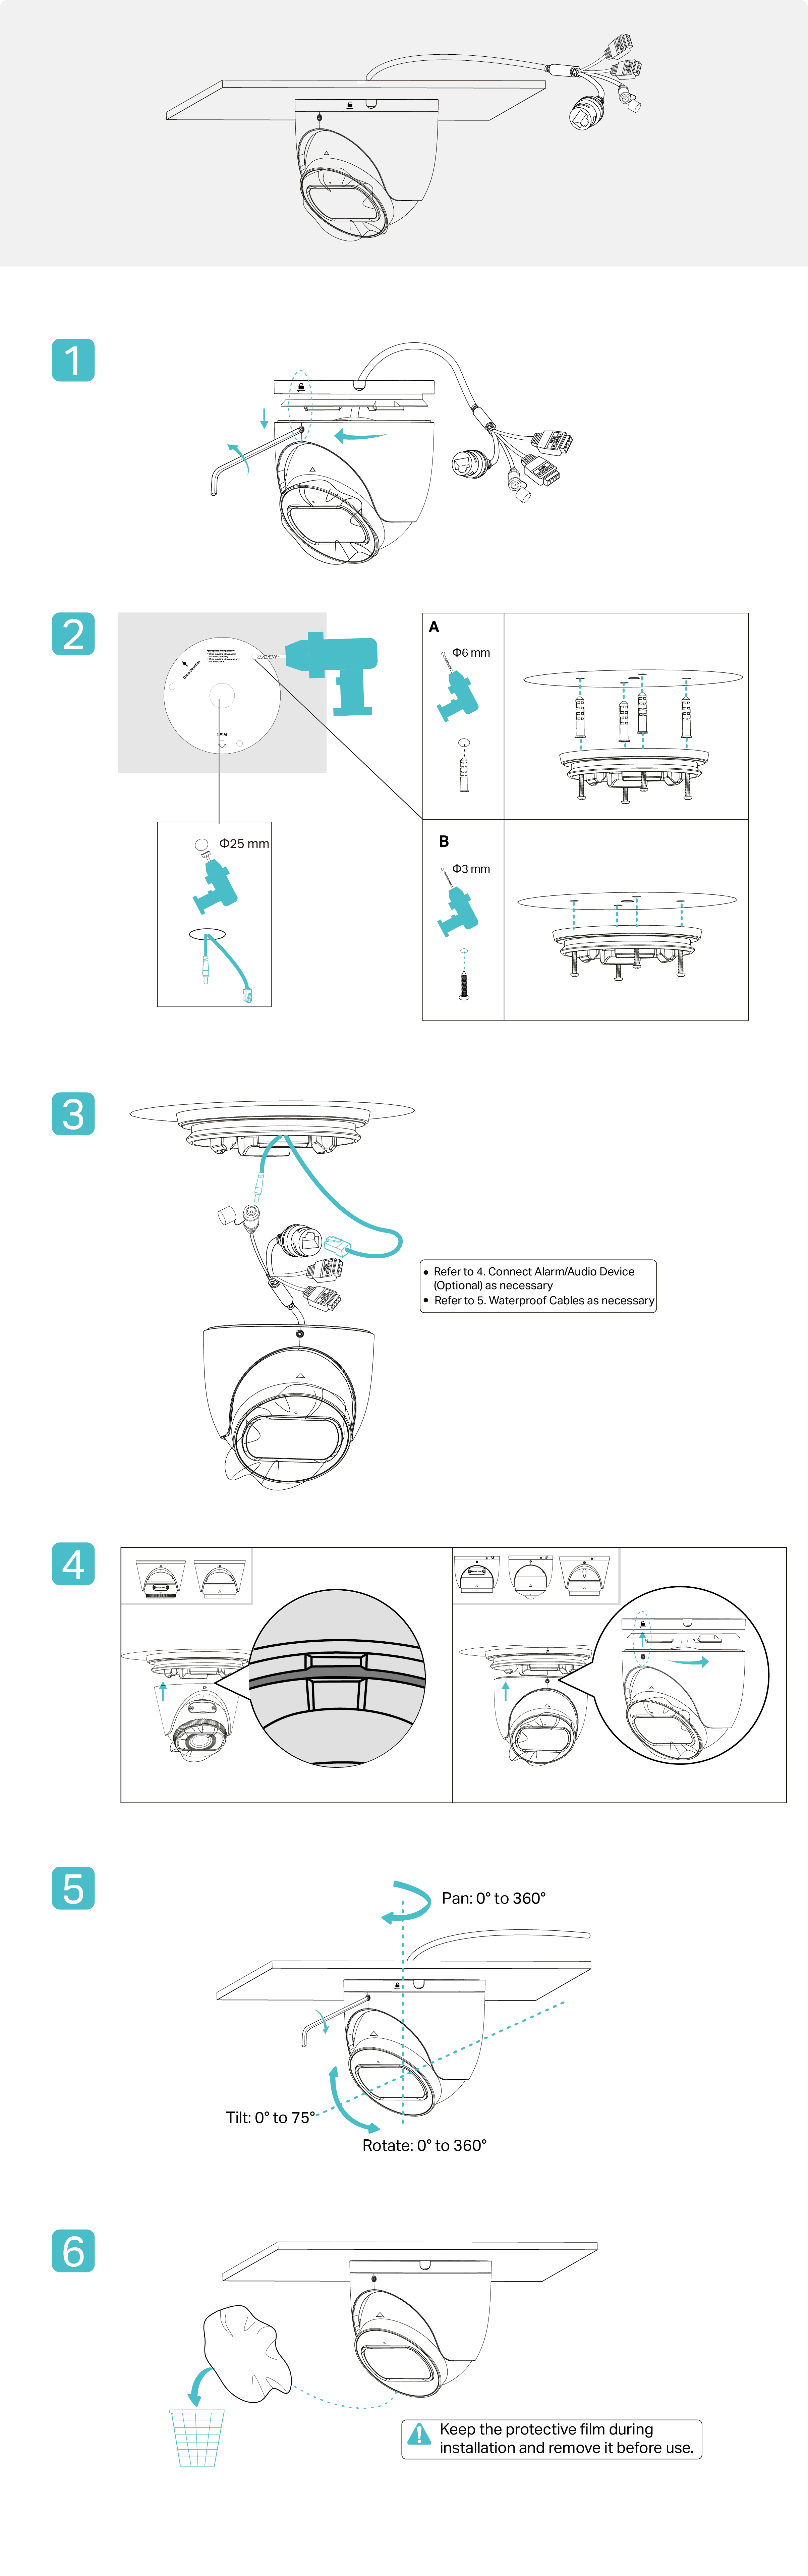
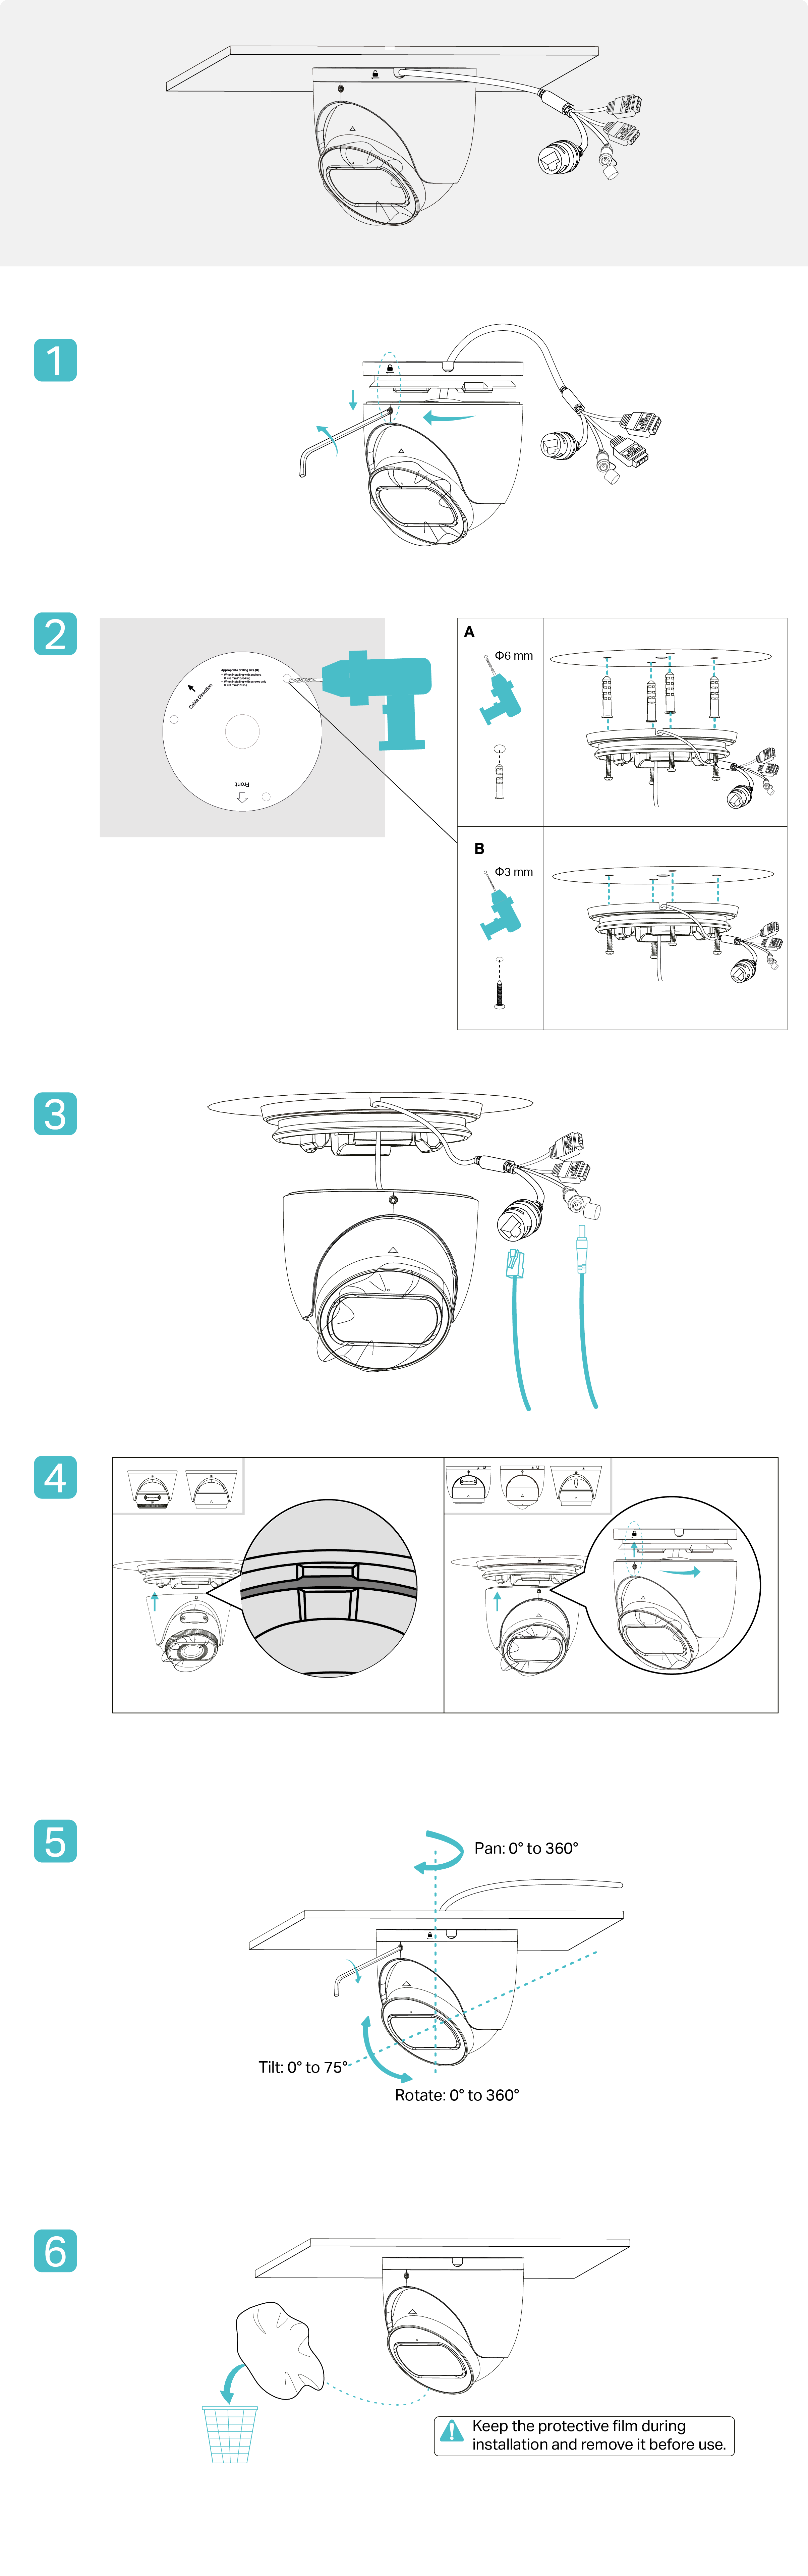
Installation
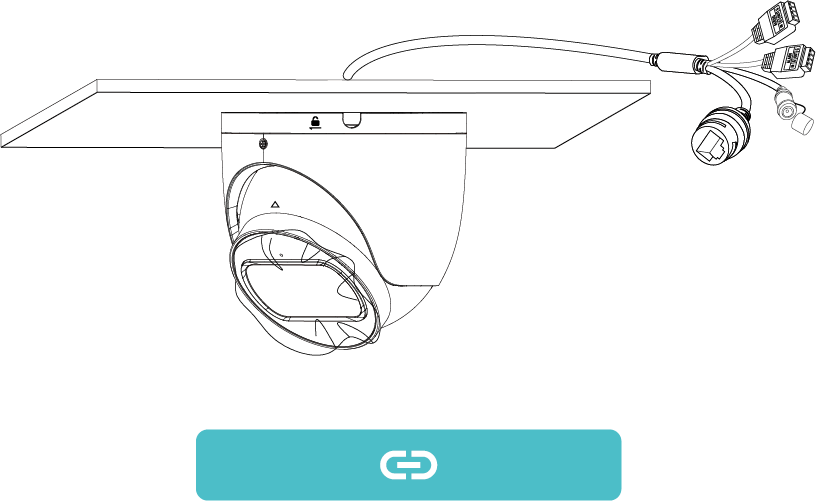
Cable Through the Wall Ceiling
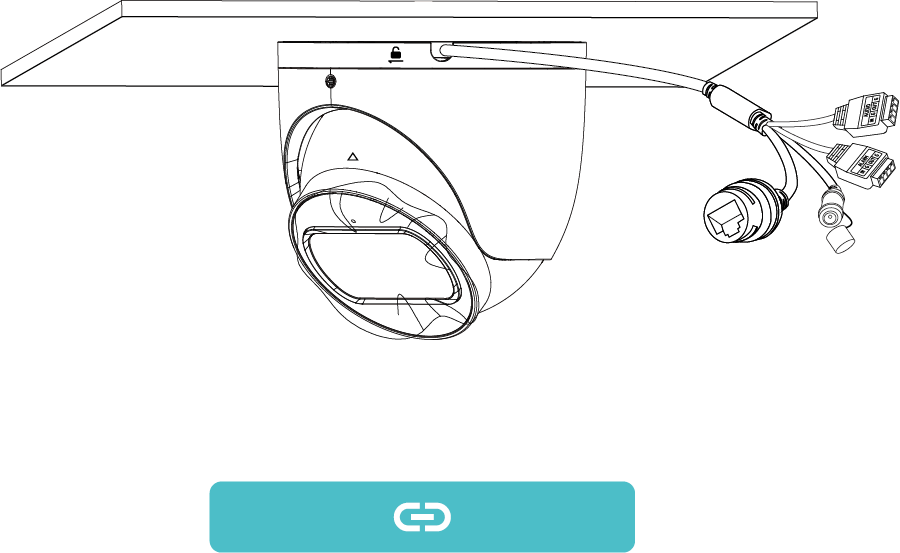
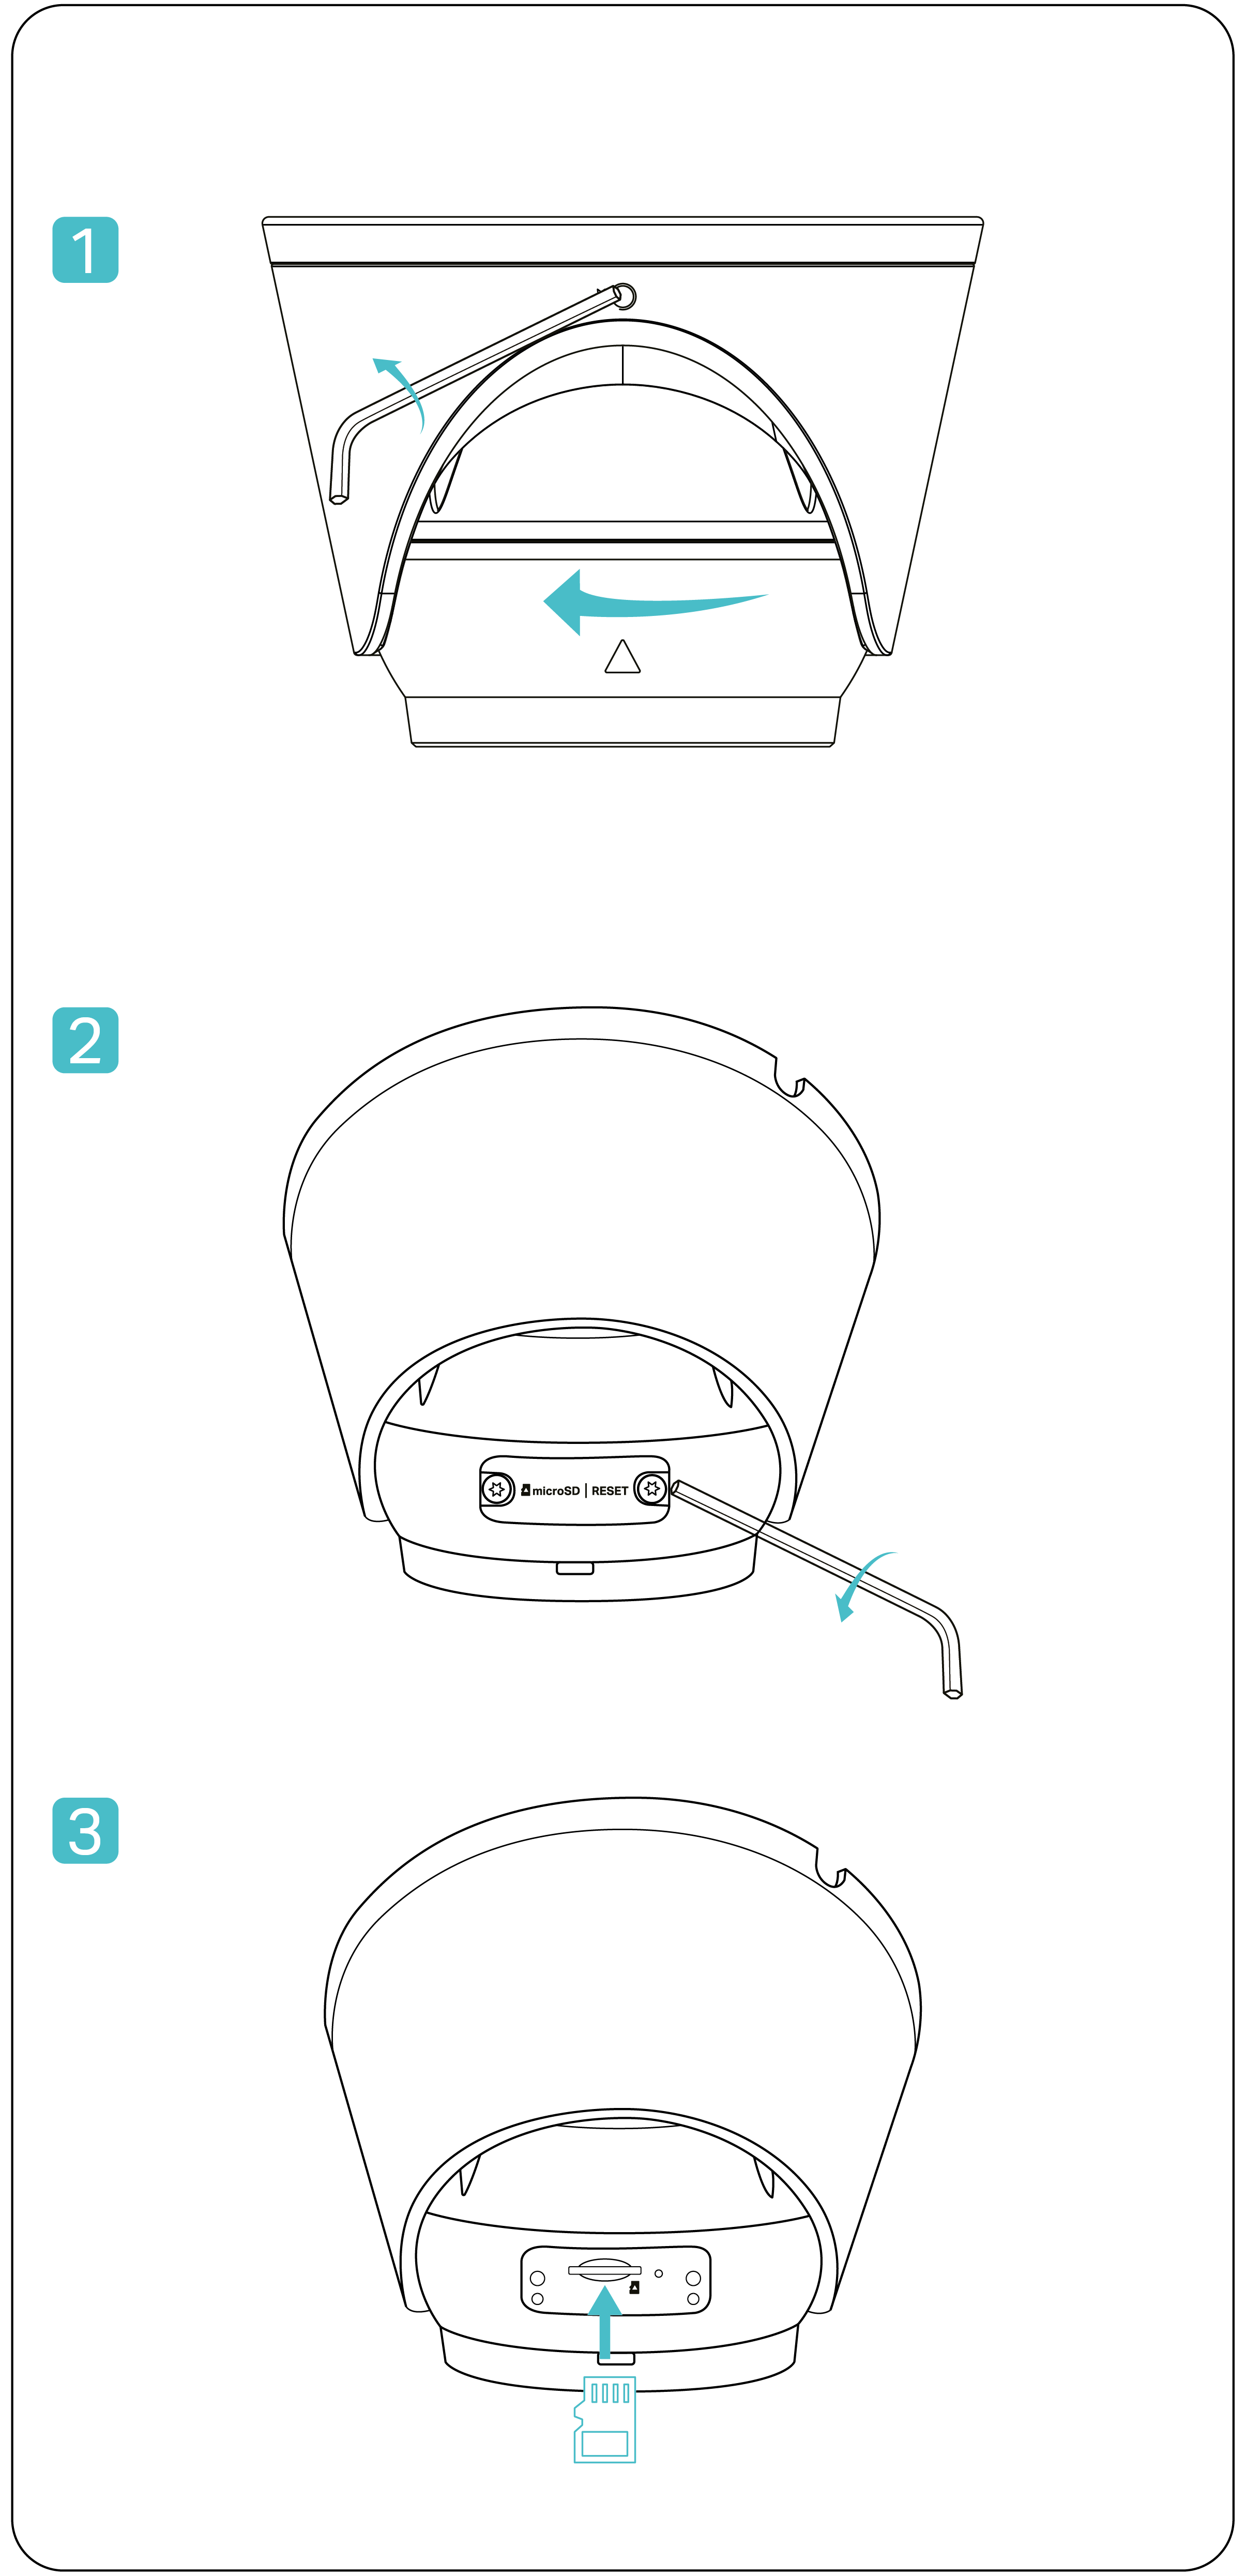
Cable Through the Side Outlet
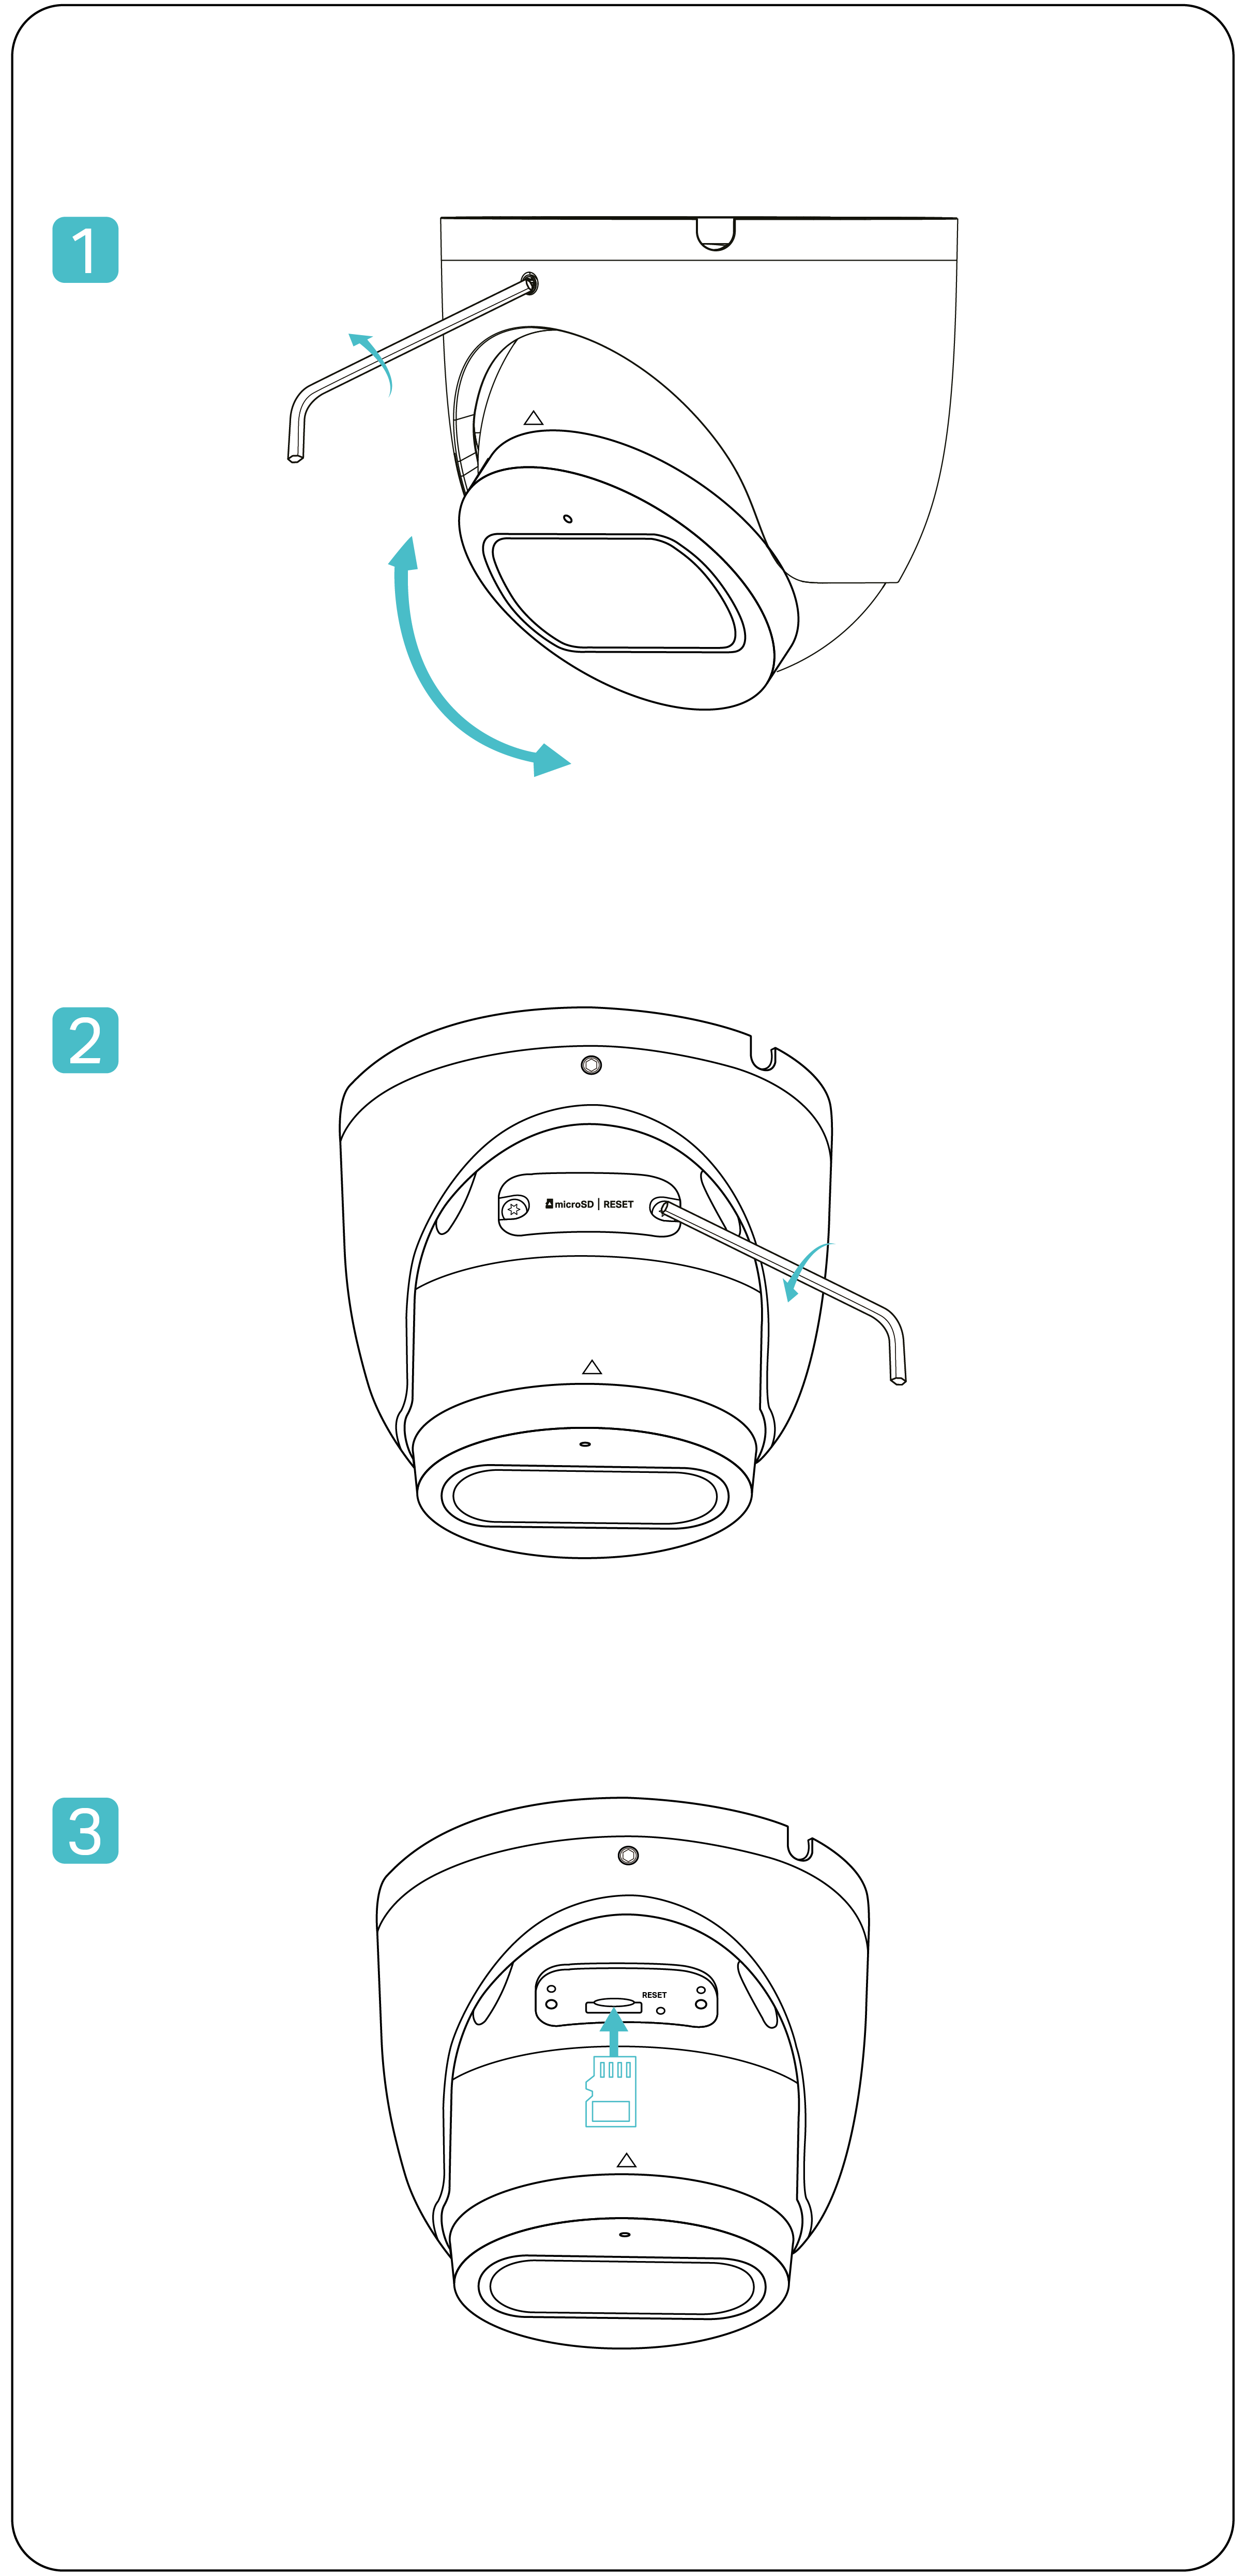
Install micro SD card (Optional)
Connect Alarm/Audio Device (Optional)
Refer to https://www.tp-link.com/support/faq/4041 for more details.
_画板_1_20260119011010p.png)
Waterproof Cables (Optional)
_画板_1_20260119011733u.png)
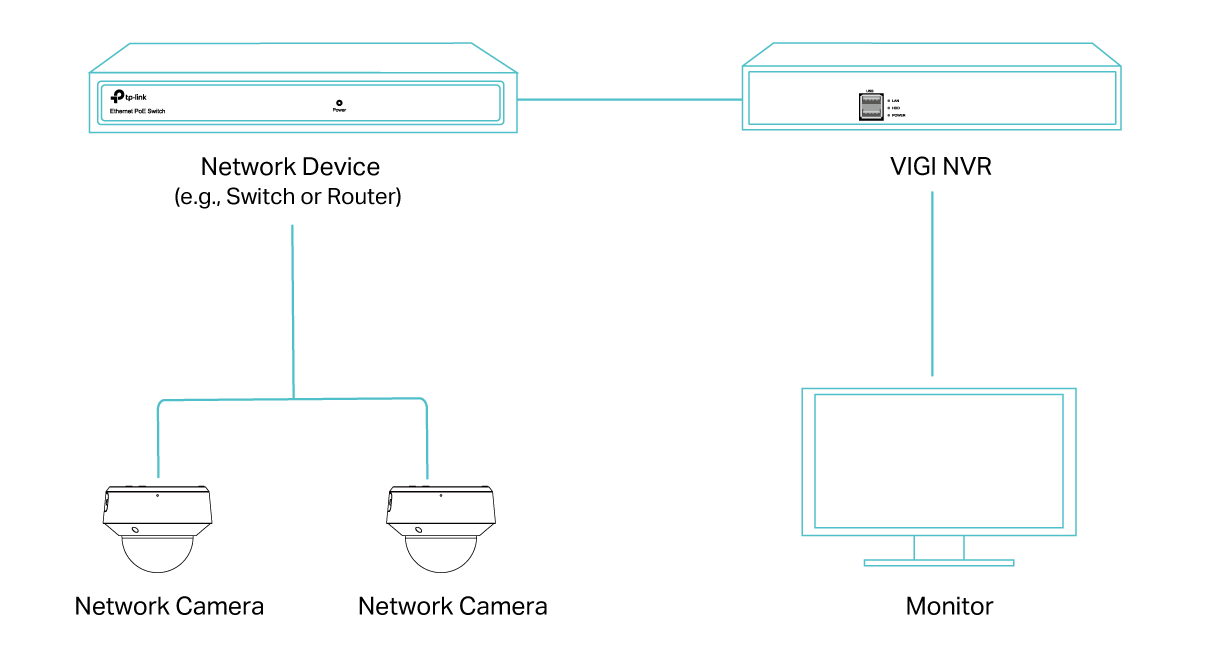
Configuration
Here is a typical network topology. You can add and manage your devices via any of the methods.
■ Via NVR
The camera works with an NVR for easier batch access and management. Here we use a VIGI NVR as an example.
1. Connect your cameras to the same network as your NVR.
2. Power on your cameras with the PoE power supply or an external power supply.
3. Right click on the Live View screen on the monitor, and click Add Camera.
4. Select your camera and click + to add your camera directly. If you have disabled Plug and Play on your NVR, create a password or use a preset password for your camera.
Note:
If you are using your cameras with other NVR brands, follow the steps below.
1. Power on your cameras and connect them to the network.
2. Activate the cameras using the TP-Link VIGI app or web management page.
3. Refer to the NVR's User Manual to add cameras.
■ Via VIGI App
You can remotely view live video, manage device, and get instant alerts via VIGI app.


■ Via Web
You can view live video and modify camera settings via a web browser.
1. Find the camera's IP address on your router’s client page.
2. On your local computer, open a web browser and enter https://camera's IP address (https://192.168.0.60 by default).
3. Select your Country/Region and Time Zone.
4. Set a password to activate the camera.