How to activate active defense in the VIGI APP
Introduction
This article introduces how to use the VIGI APP to quickly configure the Active Defense arming function for VIGI cameras under the VIGI NVR channel.
Requirements
- VIGI NVR and Camera
- Mobile Phone and VIGI APP
Configuration
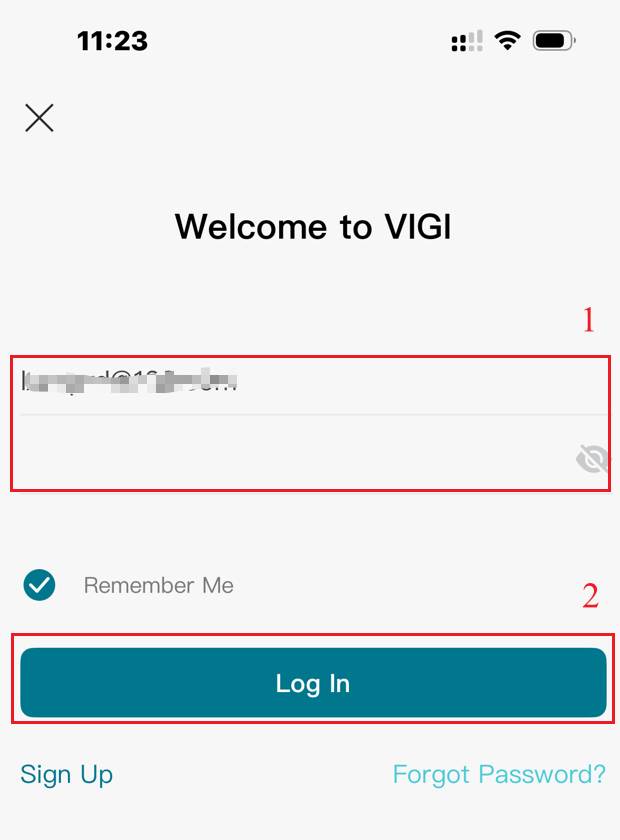
Step 1. Open VIGI APP. Enter the TP-Link ID and Password. Click Log in.
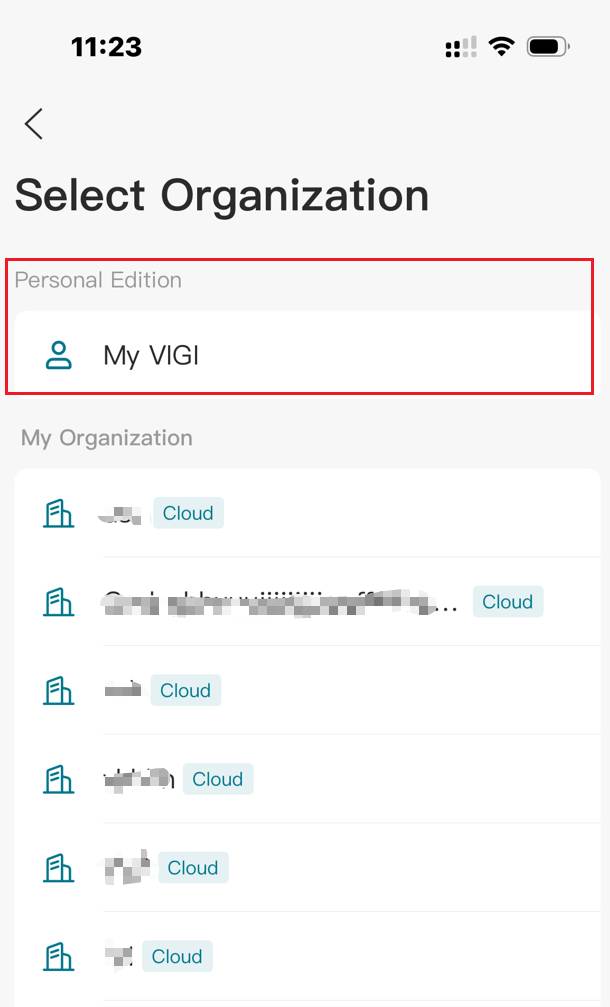
Step 2. Select My VIGI (Personal Edition) as the organization.
Note: This feature is available only when logging in to the VIGI APP (Personal Edition) with an Owner account. It cannot be configured through shared accounts.
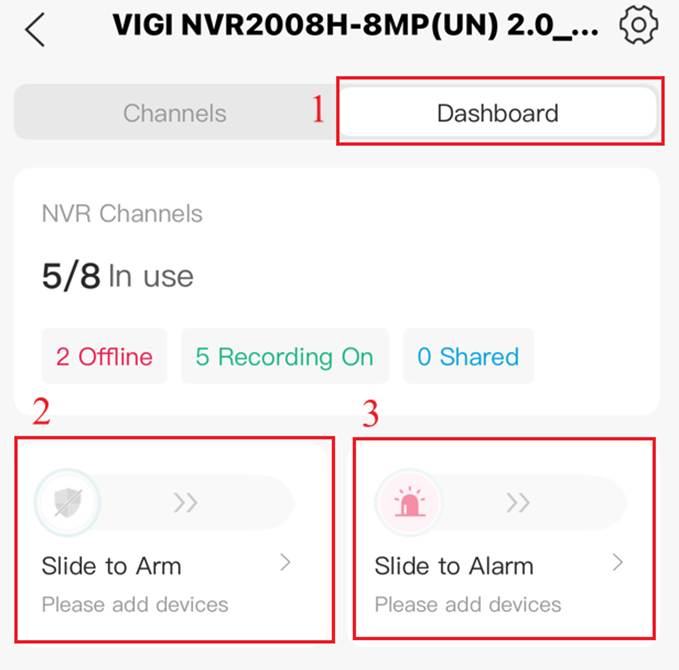
Step 3. On the Device page, select an NVR and click the shaped button on the right.

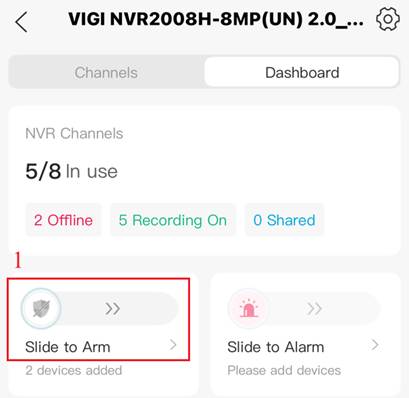
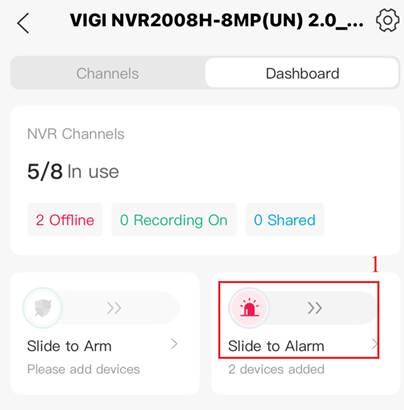
Step 4. Click Dashboard. You will see the two options: Slide to Arm and Slide to Alarm.
Configure Active Defense
Slide to Arm
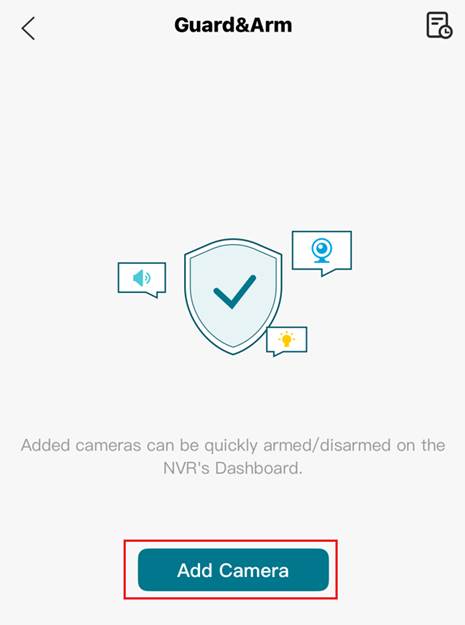
Step 1. Tap the Slide to Arm. Then click the Add Camera in Guard&Arm page.
Step 2. In the pop-up window, select the cameras you want to configure for Active Defense and click Add.
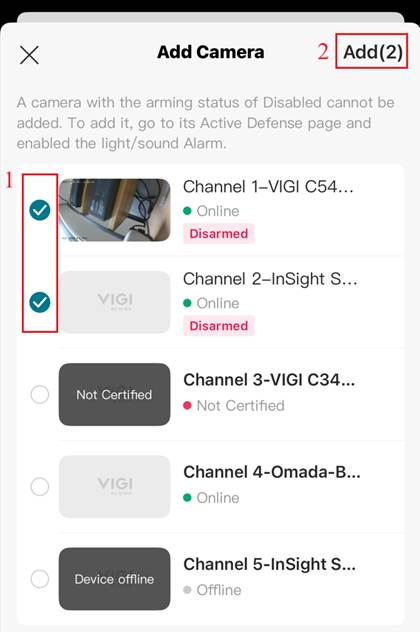
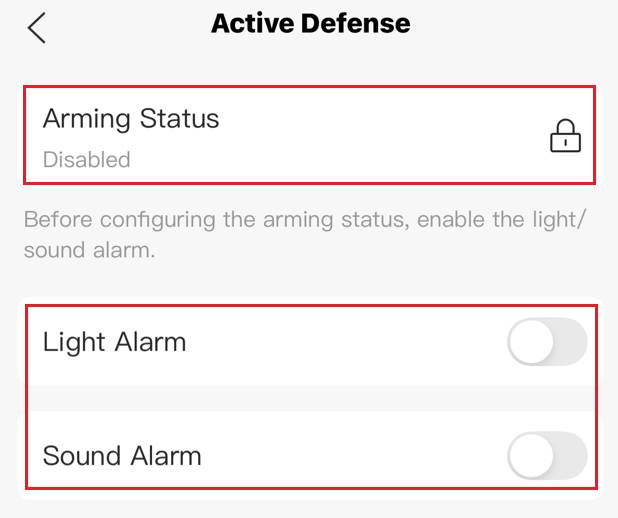
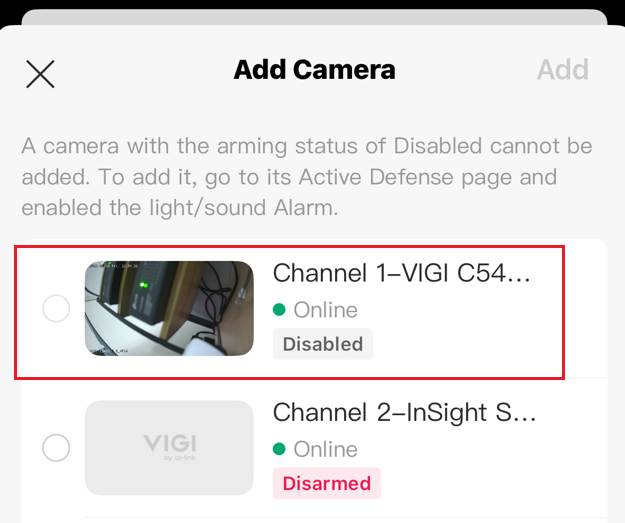
Note: If a camera’s arming status is Disabled, it cannot be added. To add it, please navigate to Settings > Active Defense, enable Light/Sound alarm.
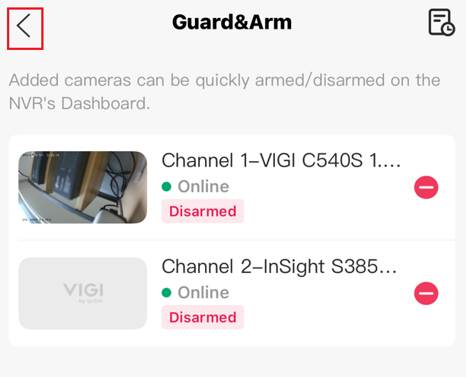
Step 3. In the Guard&Arm Page, tap the icon in the upper left corner. Go back to NVR Dashboard.
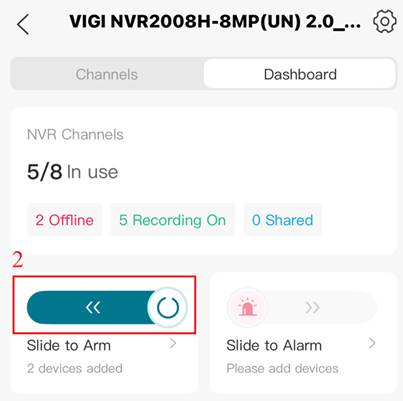
Step 4. Slide the icon to right to Arm. The icon starts spinning, indicating that the APP is sending the Active Defense Arming configuration to the VIGI cameras.
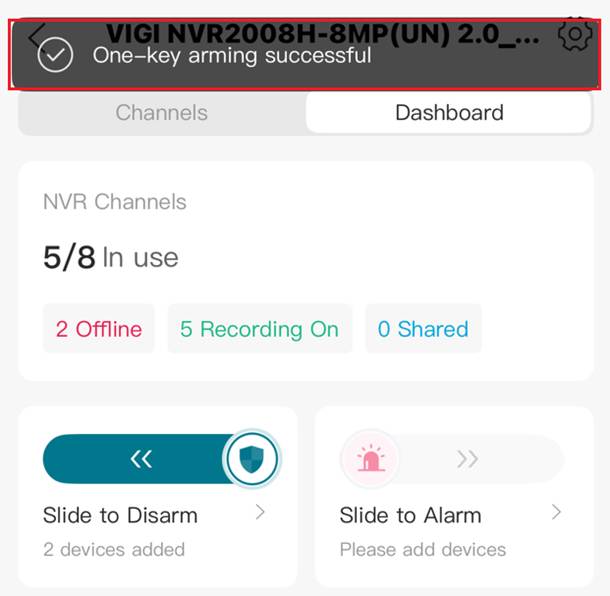
Step 5. A pop-up window indicates that the One-key arming was successful.
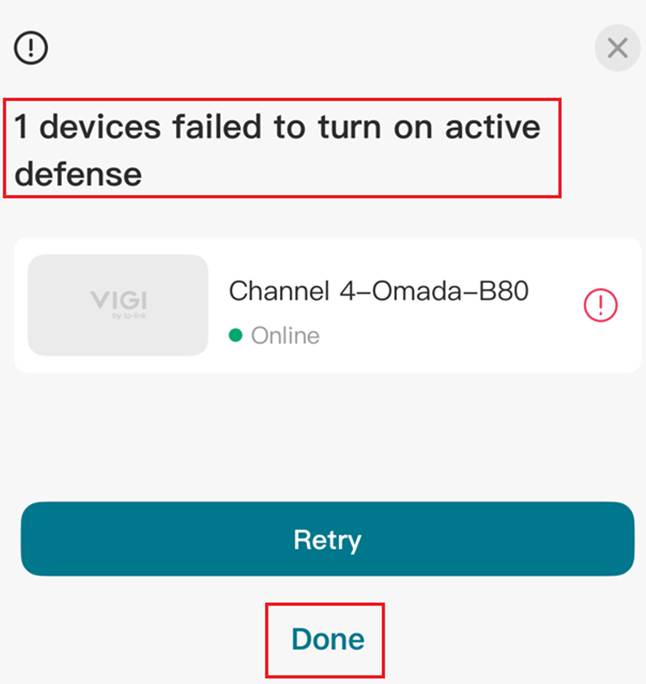
Note: If the selected cameras do not support the Active Defense feature, the configuration will fail. Click Done to dismiss the notification.
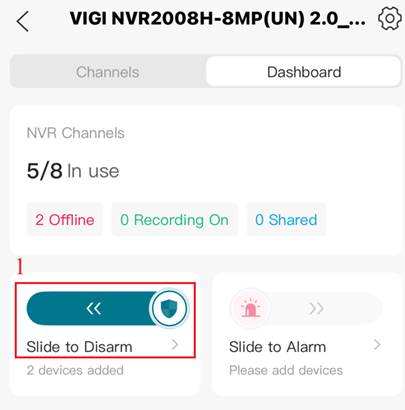
Slide to Disarm
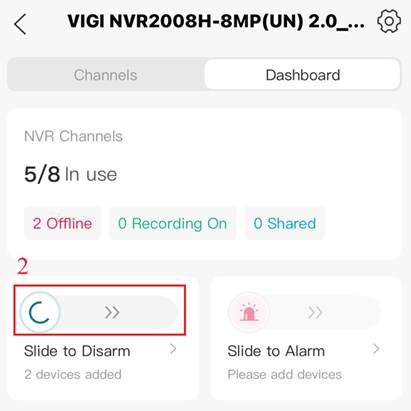
Step 1. Slide the icon to left to Disarm. The icon starts spinning, indicating that the APP is sending the Active Defense Disarming configuration to the VIGI cameras.
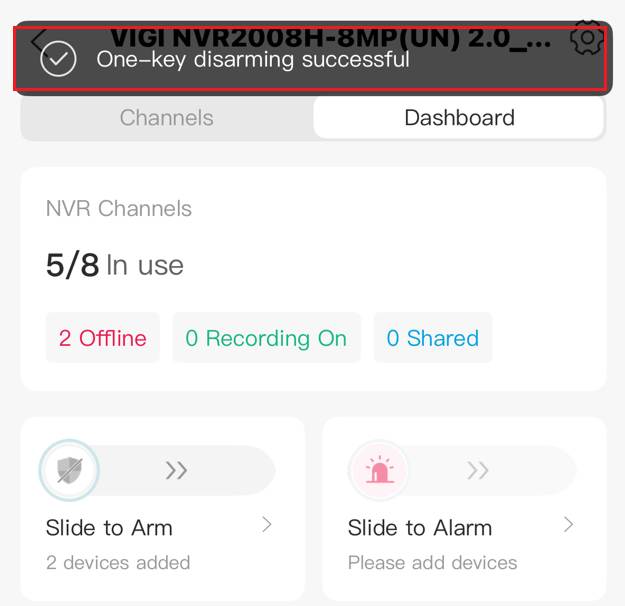
Step 2. A pop-up window indicates that the One-key disarming was successful.
Custom Active Defense Alarm
Regardless of whether the camera is in an Active Defense armed or disarmed state, the NVR Dashboard page currently supports manually triggering the Active Defense Light and Sound Alarm.
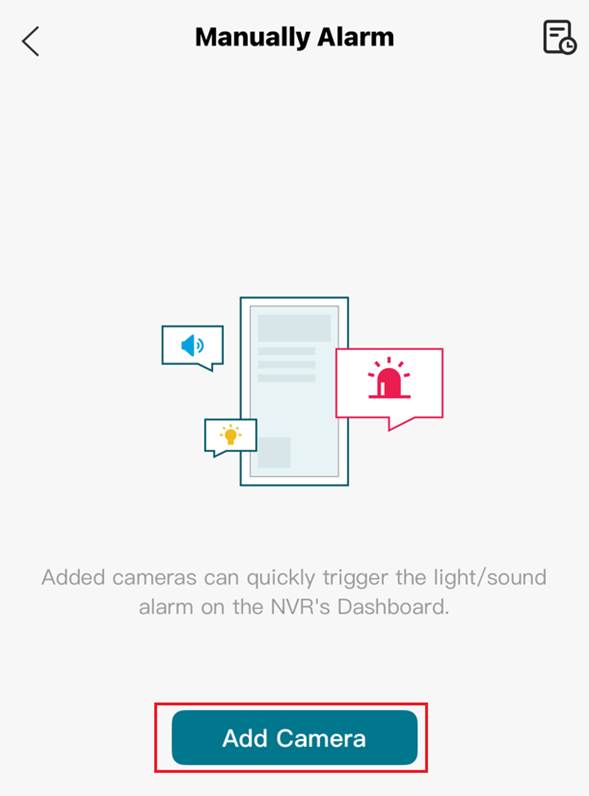
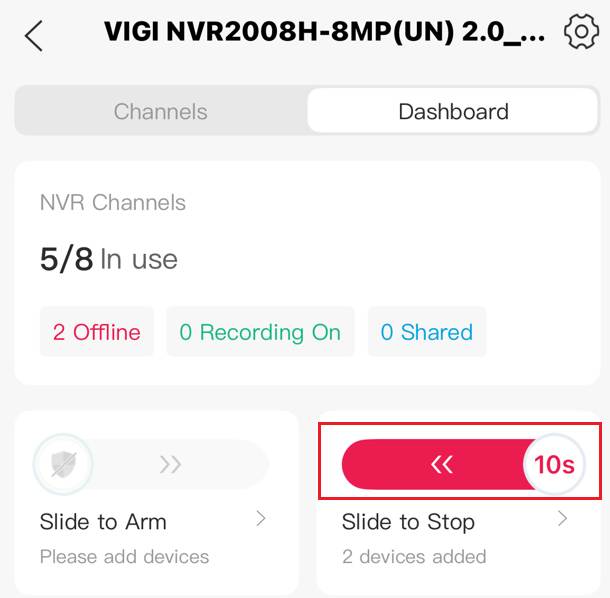
Step 1. Tap the Slide to Alarm. Then click the Add Camera in Manually Alarm page.
Step 2. In the pop-up window, select the cameras you want to configure for custom Active Defense Alarm and click Add.
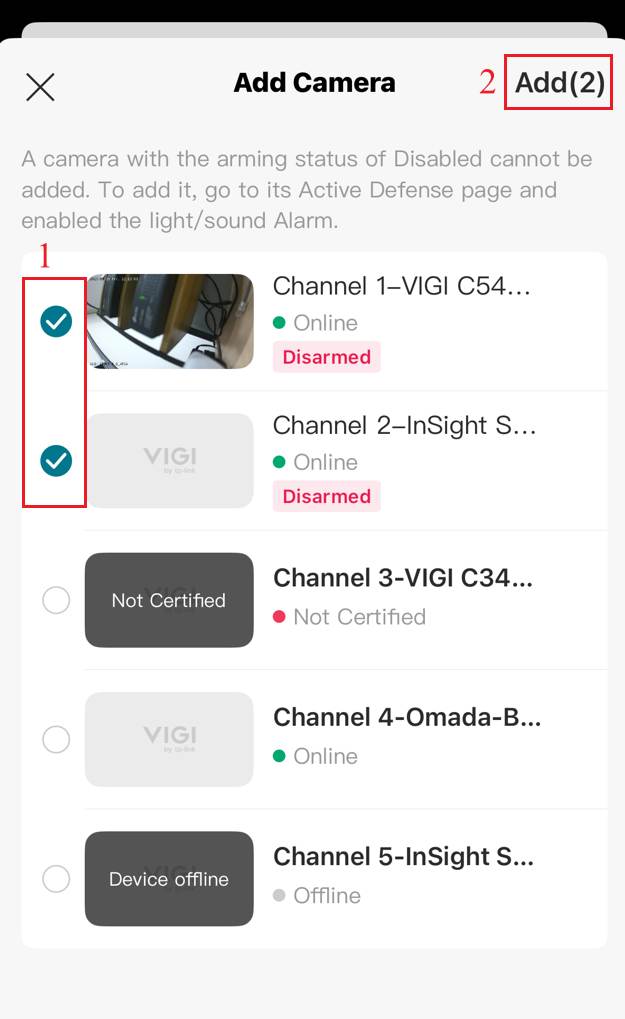
Note: If a camera with the arming status of Disabled cannot be added. To add it, please navigate to Settings > Active Defense, enable Light or Sound alarm.
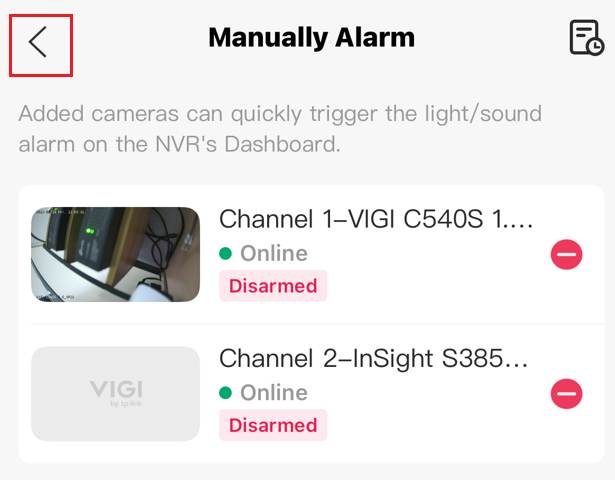
Step 3. In the Manually Alarm Page, tap the icon in the upper left corner. Go back to NVR Dashboard.
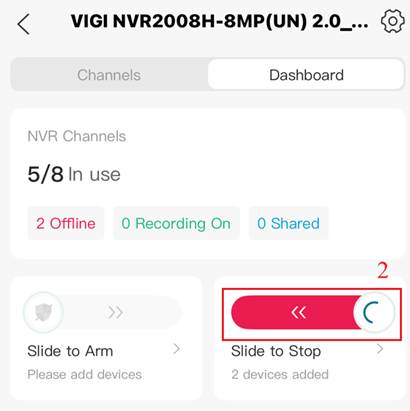
Step 4. Slide the icon to right to Alarm. The icon starts spinning, indicating that the APP is sending the Active Defense Alarm configuration to the VIGI cameras.
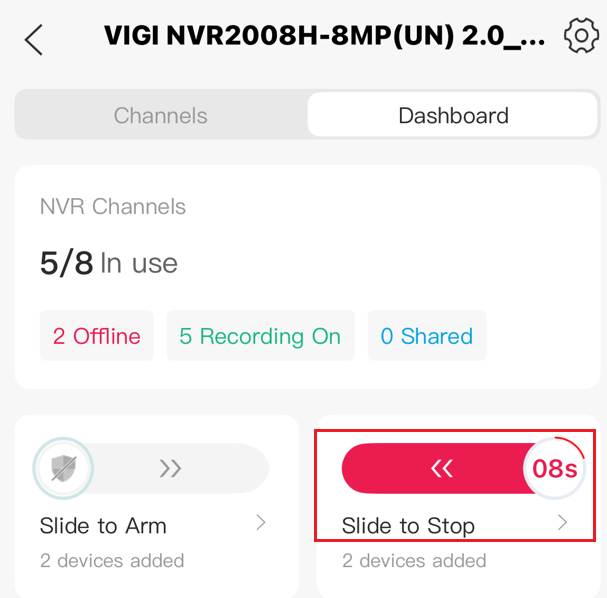
Step 5. A 10-second countdown appears, and the camera begins triggering the Light and Sound Alarm.
Step 5. You can wait for 10 seconds until the custom Active Defense Alarm ends automatically. Or after a few seconds, you can manually slide left to stop.
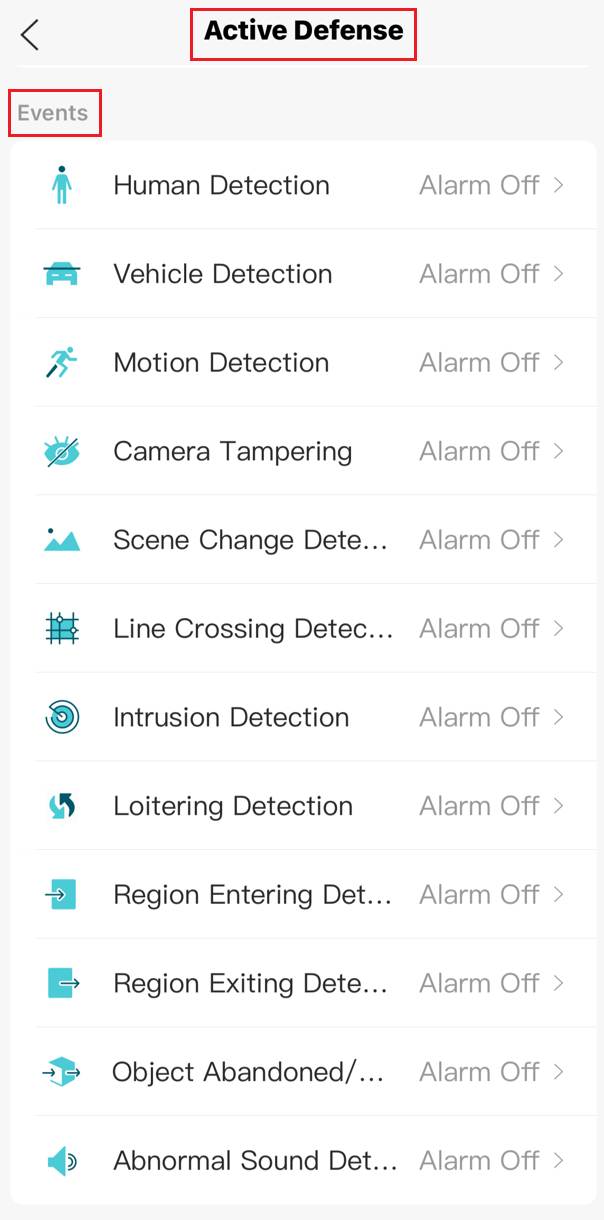
Configure Active Defense for Event Detection
You can configure the camera’s event detection feature to enable the active defense light and sound alarm. When the camera detects the corresponding event, it triggers the active defense light and sound alarm.
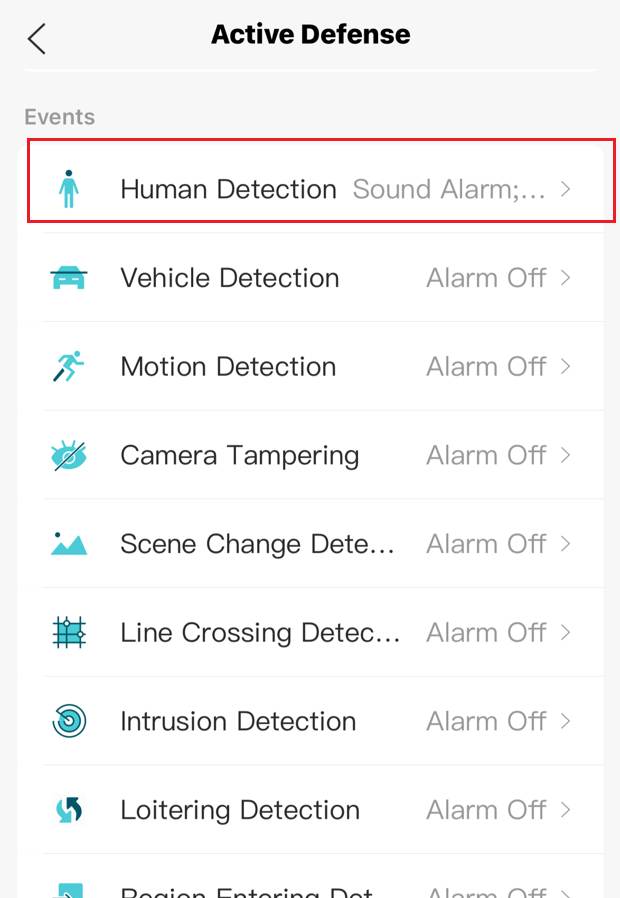
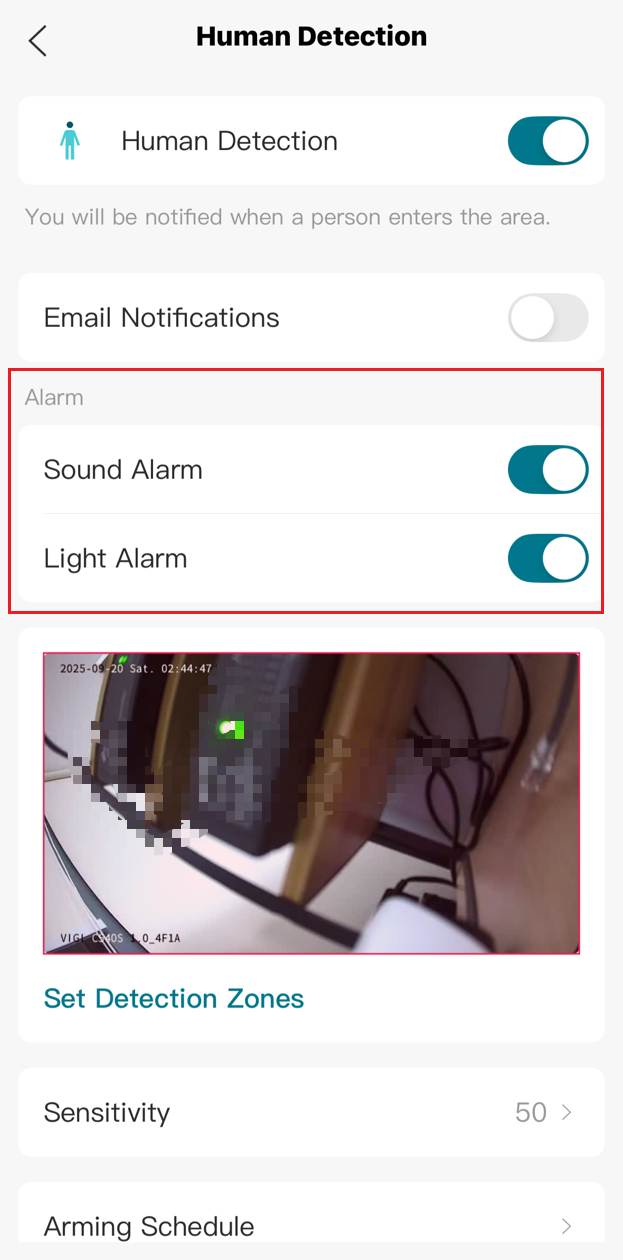
Step 1. Navigate to Camera’s Settings > Active Defense > Events.
Step 2. Taking Human Detection as an example, click the Human Detection and enable the Sound/Light Alarm on the new page. Tap the back button in the upper-left corner.
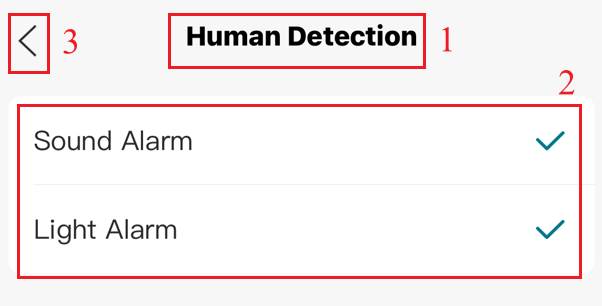
Step 3. Return to the Active Defense’s Events page, where you can see that the Human Detection Sound/Light Alarm linkage has been successfully configured.
Verification
Active Defense Arming
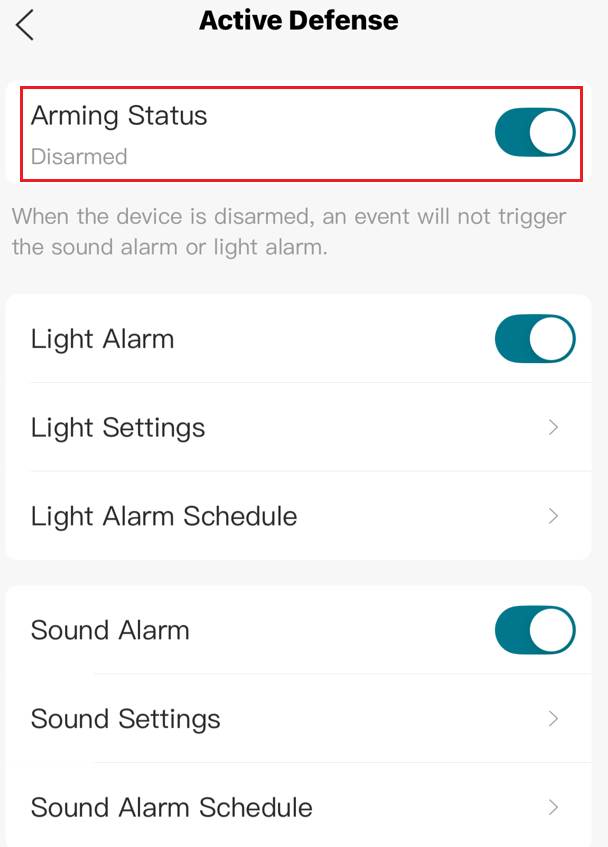
Step 1. Under this NVR, select a camera that has Slide to Arm configured and navigate to Camera’s Settings > Active Defense in settings. Check whether Active Defense is enabled.
Active Defense Disarming
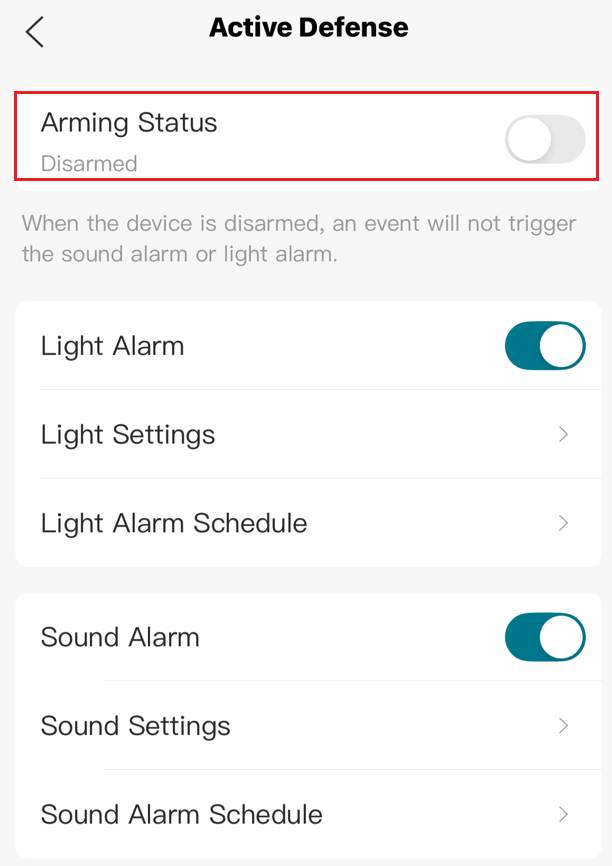
Step 1. Under this NVR, select a camera that has One-tap Disarming configured and click settings icon. Then click Active Defense. Check whether Active Defense is disabled.
Active Defense for Event Detection
Step 1. Navigate to Camera’s Settings > Detection.
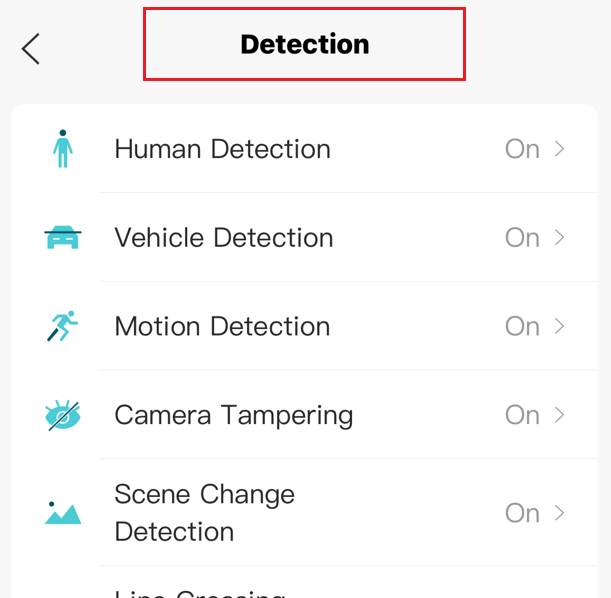
Step 2. The previous configuration was for Human Detection. Here, we also select Human Detection, and you can see that the Sound/Light Alarm is enabled.
Conclusion
You have successfully configured the Active Defense arming, disarming and custom Alarm functions on the NVR Dashboard page of the VIGI APP.
Get to know more details of each function and configuration please go to Download Center to download the manual of your product.
Is this faq useful?
Your feedback helps improve this site.

TP-Link Community
Still need help? Search for answers, ask questions, and get help from TP-Link experts and other users around the world.