How to Factory Reset Your Tapo Camera: Two Methods
Need to reset Tapo camera to its factory default settings? A factory reset can resolve connection failures, fix configuration errors, or prepare the camera for a new account. This guide covers both the physical reset button method and the Tapo app method across multiple Tapo camera types.
Key Takeaways
- To factory reset most Tapo security cameras, press and hold the Reset button for at least five seconds until the LED blinks red. The camera will reset and reboot automatically.
- For Pan and Tilt security cameras, tilt the lens up before pressing and holding the Reset button for at least five seconds.
- For outdoor security cameras, loosen the screws on the back panel and remove the cover to access the Reset button, then press and hold for at least five seconds until the LED blinks red.
- Battery-powered cameras such as the C420, C400, and C425 require removing the cover to access the Reset button. Hold time varies by model and hardware version: five seconds for some, 10 seconds for others.
- You can also reset the camera through the Tapo app by removing it from your account, but the camera must be online for an app-based reset to work.
- Resetting the camera does not cancel your Tapo Care subscription, which is linked to your TP-Link ID. After reconfiguring, you must re-add the camera to your Tapo Care plan through the Tapo app under Me > Tapo Care.
Method 1: Use the Reset Button
Note: Make sure the camera is powered on before you begin.
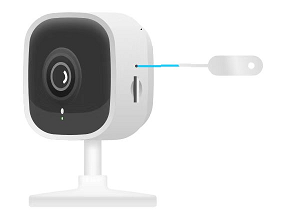
Reset a Security Camera: Hold Five Seconds Until the LED Blinks Red
Use a pin to press and hold the Reset button for at least five seconds until the LED blinks red. Once the LED blinks, the camera will reset and reboot automatically.
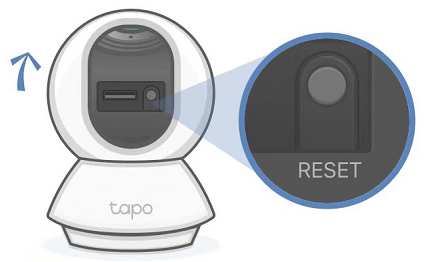
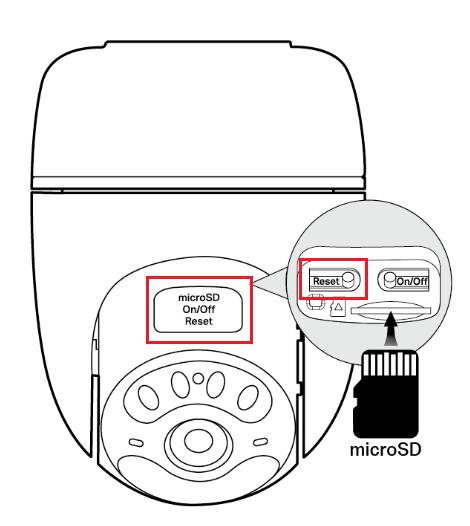
Reset a Pan and Tilt Security Camera: Tilt the Lens Up First
Tilt the camera lens upward, then press and hold the RESET button for at least five seconds until the LED blinks red. The camera will reset and reboot automatically.
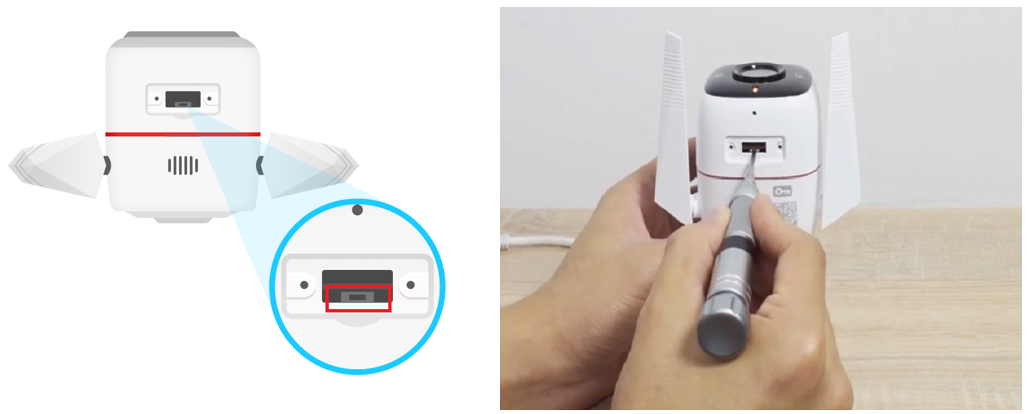
Reset a Tapo Outdoor Camera: Remove the Back Cover to Access the Button
Step 1. Loosen the screws and remove the back panel cover.
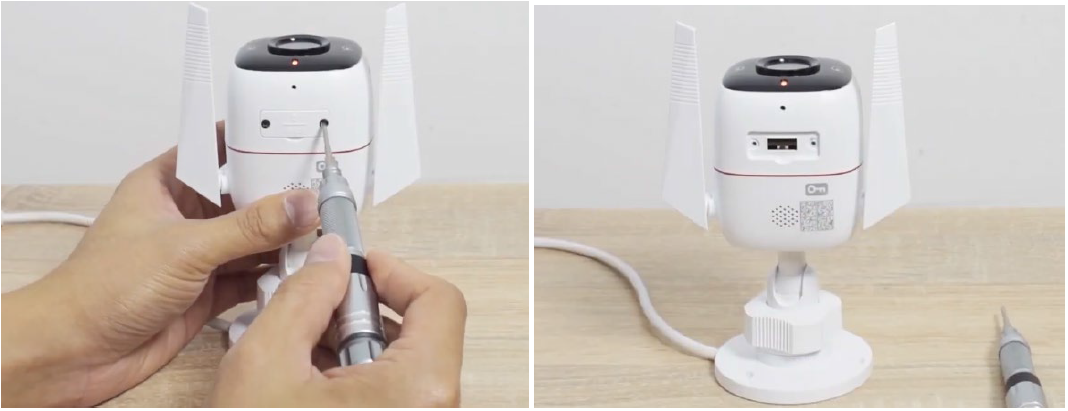
Step 2. Press and hold the Tapo outdoor camera reset button for at least five seconds until the LED blinks red.
Reset a Battery-Powered Camera
Case 1: Reset the Tapo C420 or C400
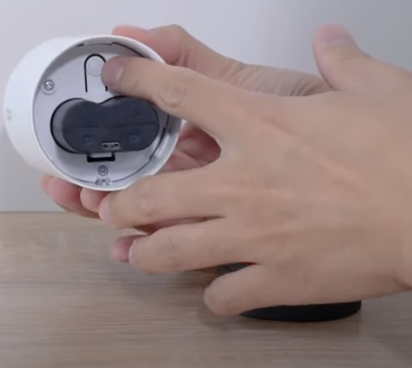
Step 1. Twist the camera cover counterclockwise and pull it off to access the Reset button.
Step 2. Press and hold the SYNC/RESET button for at least five seconds until the camera's status LED blinks red.
Case 2: Reset the Tapo C425
- V1: Use a pin to press and hold the Reset Button for at least 5 seconds to factory reset.
- V2: Use a pin to press and hold the Reset Buttonfor 10 seconds to factory reset.
Case 3: Reset the Tapo C660
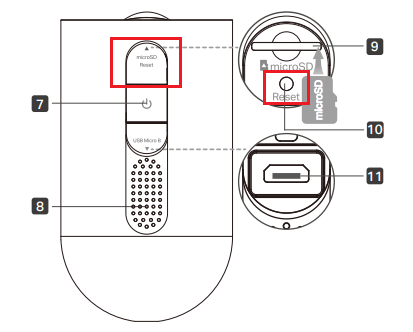
Open the cover and press the Reset button for 10 seconds.
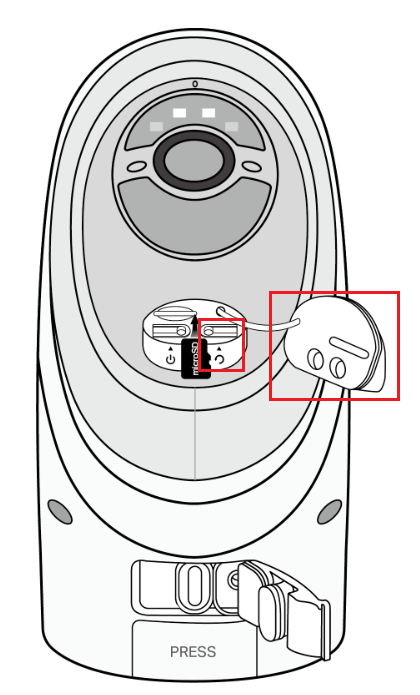
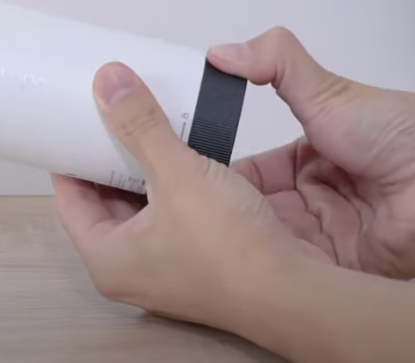
Tilt the camera lens down to find the silicone cover. Open the cover to reveal a circular, raised Reset button on the left. While the camera is powered on, press and hold the RESET button for 10 seconds to restore the camera to factory settings.
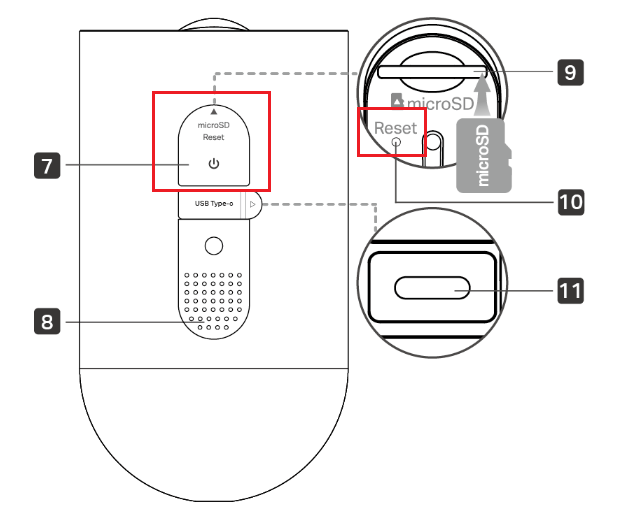
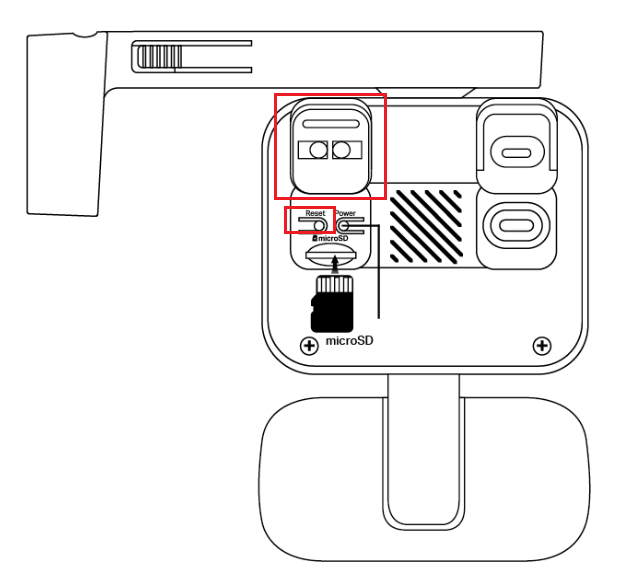
Case 5: Reset the Tapo C645D
Turn the camera to the back of the larger block to locate the silicone cover. Open the cover to find a circular, raised Reset button on the left. While the camera is powered on, press and hold the RESET button for 10 seconds to restore factory settings.
Method 2: Remove the Tapo Camera via the Tapo App
Note: The camera must be online to perform an app-based reset.
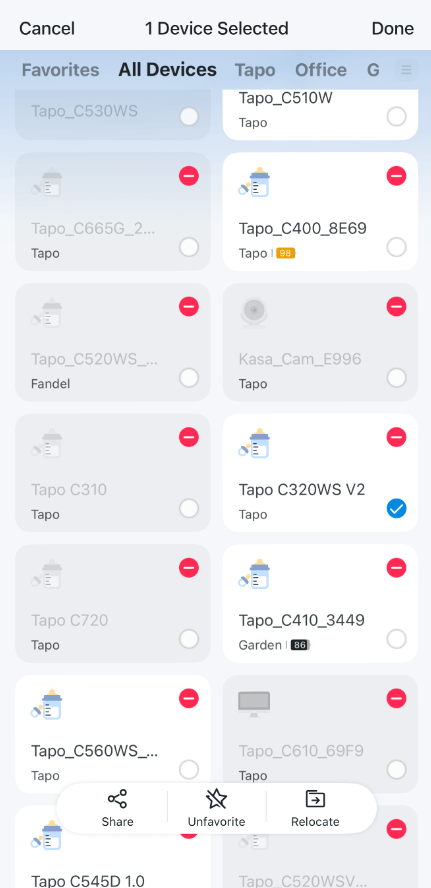
Case 1: Remove the Camera from the Home Page
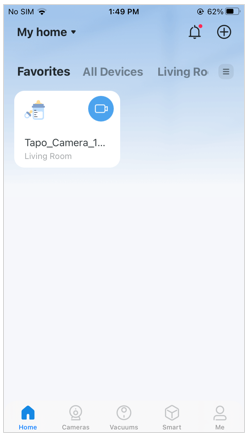
On the home page, long-press your camera model card, then tap the minus icon on the card. The camera will be removed from your TP-Link account and reset to default settings. Note that this action also disconnects the camera from any linked third-party services, such as Alexa and Google Assistant.
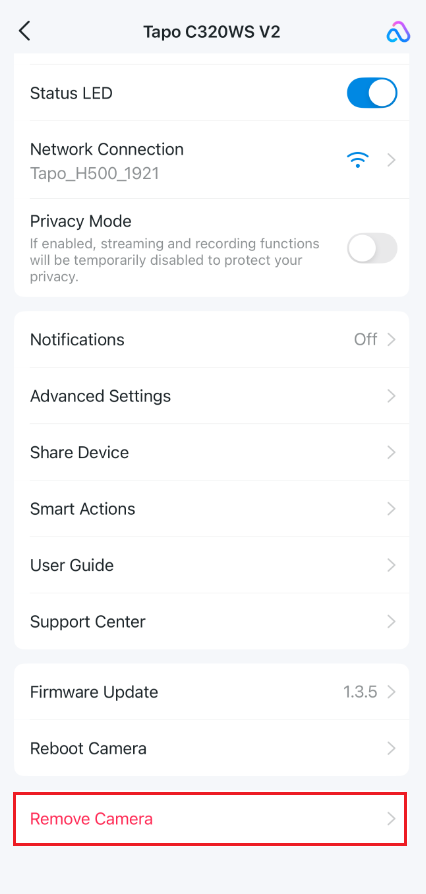
Case 2: Remove Tapo Camera via the Camera Settings Page
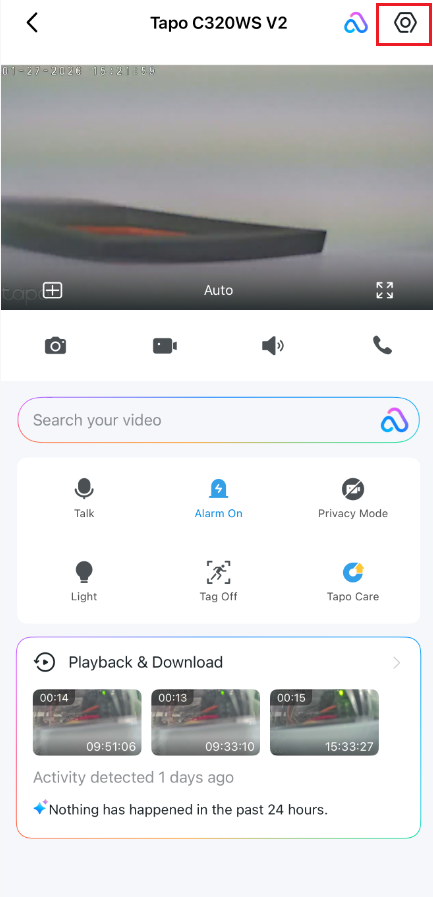
Step 1. Open your camera from the home page.
Step 2. Tap the gear icon to open Camera Settings.
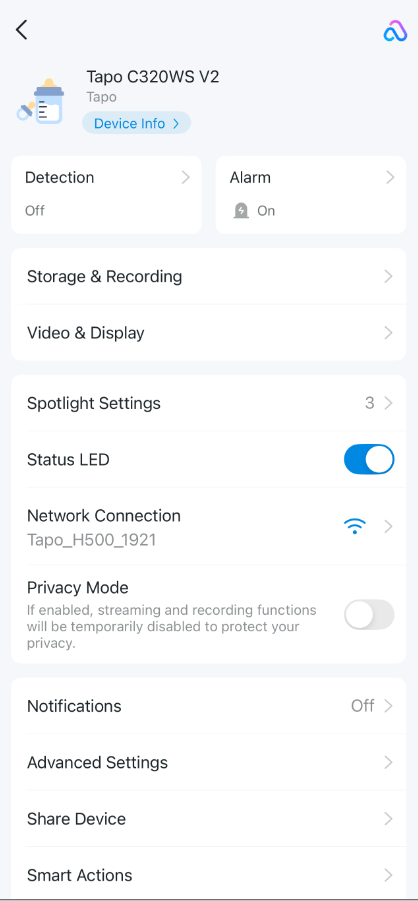
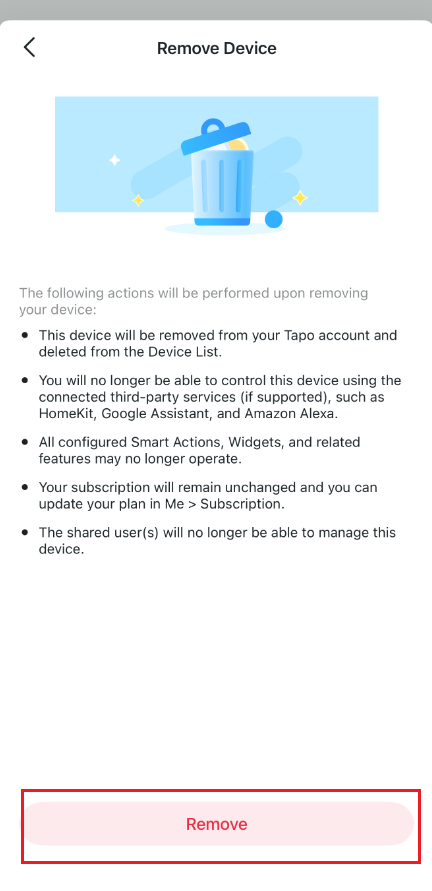
Step 3. Tap Remove Camera to remove the Tapo camera from your TP-Link account.
Frequently Asked Questions
What Should I Do If the Reset Fails?
First, confirm that the camera can be powered on. If it can, do not attempt another reset immediately. Wait 10 minutes after powering on, then try the reset process again.
Does a Camera Reset Affect My Tapo Care Subscription?
Your Tapo Care subscription is tied to your TP-Link ID, not the camera itself, so a factory reset will not cancel or affect your plan as long as it has not expired.
After resetting and reconfiguring the camera, you will need to re-add it to your Tapo Care plan. In the Tapo app, go to Me > Tapo Care, tap Select Camera on the plan, choose the camera you want to apply, and confirm your selection.
If your Tapo Care plan does not appear on the Tapo Care page, verify that you are signed in to the Tapo app with the TP-Link account that purchased the subscription.
Is this faq useful?
Your feedback helps improve this site.


